

Beacon hills are networks of bonfires, optical telegraphs, often used to signal the next village that invaders were coming and to man the defenses. They were placed on high points (hills) in the landscape so they could be seen as far away as possible. In England, the Michael leyline, an earth energy line, runs from Norfolk on the east coast, southwest across the country to Land’s End. Along this line are beacon hills and stories are told of how, on Beltane morning, as the very first glimpse of the sun was seen coming over the watery horizon, the beacon hill in Norfolk was lit to greet the bringer of light and life and to celebrate what was considered the first day of summer. As the sun rose over the Earth it was met with a series of answering fires while passing over England.
Fire is an important part of the turning of the wheel. Beyond its symbology of transformation, on a very real level, there would be no agrarian cycle, no life on the planet, without it. It is understandable that fire is found in the making of candles at Imbolc, the crackling cauldrons of Samhain, Yule logs and community bonfires as behind the traditions of a specific time of year is Gaia’s foundational relationship with the light and heat of the Sun’s fire.
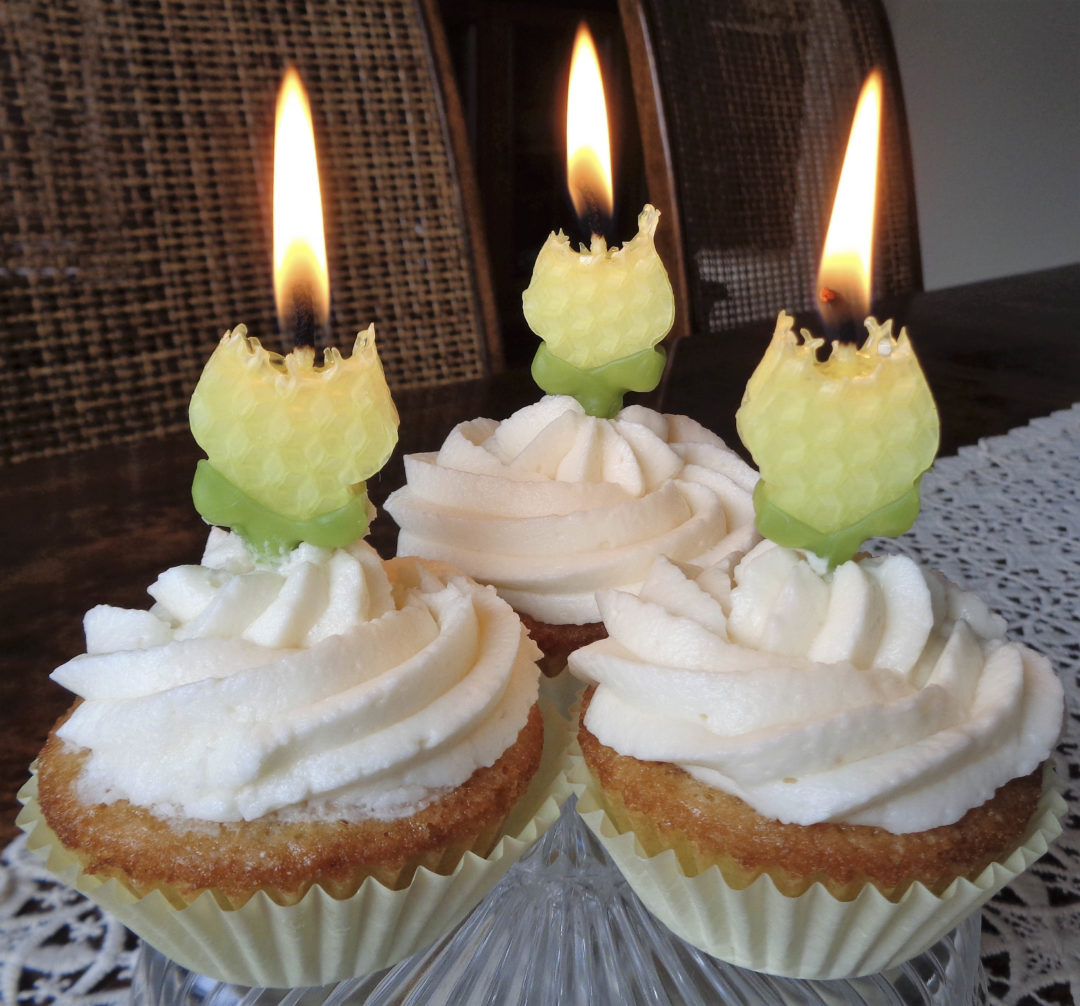
This quick craft combines that connection to fire with the added theme of Beltane flowers for a sweet mini candle that everyone can enjoy in a table center piece or topping the May Day Cake.
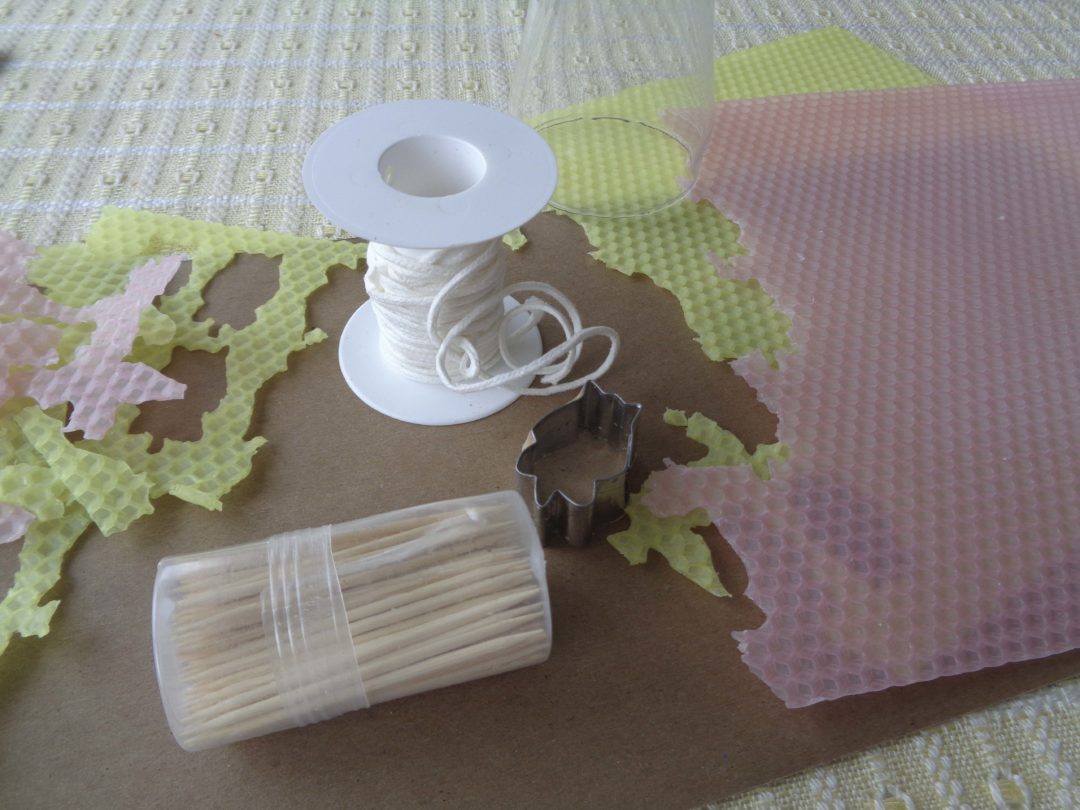
You will need:
Beeswax sheet(s) in a floral colour of your choice
1/0 wick
1/2 toothpick per candle
Mini tulip cookie cutter
green wax melted ( more on that later)
A couple of things before we get started.
Keep the bits and pieces of beeswax that are left over. The bees worked hard to make the wax. It can be used in salves, furniture polishes and t-lites later.
We are making Beltane tulip candles here but this technique can be used with any shape. So if you want to make a choo choo train for a birthday cake or a field of butterfly topped cupcakes just change out the cookie cutter shape. The technique is still the same.

Using the cookie cutter, cut 6 tulip shapes out of the wax for each candle. ( Make sure you have the cutting edge down. It makes life easier. If it hurts to push directly on the cutter try using a can on glass on top and then pushing. ) Cutthe pieces as close together as possible to get the larger number of cut outs and a minimum amount of leftover beeswax.
Stack three tulip cutouts together, one on top of the other. Break a toothpick in half and place it with the pointy side down, ( as shown in the picture above ) on top of the stack. Press into the wax. The broken end should come to just below the middle of the flower.
Cut a 3/4 inch of wick and place it on the stack as well. Centered the wick at the top and leaving about 1/4 inch above the top of the tulip. Press the wick into the wax in a stright line down the middle of the flower.
Stack the other three tulip cutouts and place on top of the toothpick and wick. Gently press around the edges to keep everything together. Beeswax is sticky and it will stay together when compressed. The additional dip to create the leaves will add an extra layer of “glue”.
Now the green wax. I used paraffin as it was handy. It is possible to use beeswax. Soy tends not to hold colour this dark well but if lighter coloured leaves are okay then that is also an option.

If you are really lucky and happen to have an end of a green candle sitting around, lucky you! Just melt that and you will be good to go. If you are starting from scratch, melt the paraffin wax in a small container over warm water add a few grains of polybar or stearic acid and colour with a very small amount of green dye.
Let the wax begin to cool. If the wax is too hot it will not leave a thick layer of wax when the tulip is dipped and several dips will be needed to build up the leaves, warming and possibly melting the beeswax. When the wax is cooler, the pickup of wax will be better and it will tend to pull away from the beeswax helping the leaves with a more natural look.
I had all five tulips put together and ready to go. When the wax in the can looked like the edges were just starting to thicken and lighten in colour, the candles were quickly dipped before the wax for too cold and thick.
Dip at an angle. You can see the two dips on the yellow tulip above, from the last curve of the tulip across and down at a 45 degree angle. The toothpick will get covered and the wax can be twisted off while it is still warm and pliable. Dip from both sides and return the wax taken off to the pot of green wax. Allow to cool. Clip wicks if longer than 1/4 inch.

The candles themselves will last a reasonable amount of time, in comparison to a regular birthday candle, so if there are speeches or short games to be added there is some flexibility.
Bring the bonfire in this May Day and celebrate Beltane with a bouquet of mini tulip candles.
Mini Beeswax Tulip Candles from My Kitchen Wand
