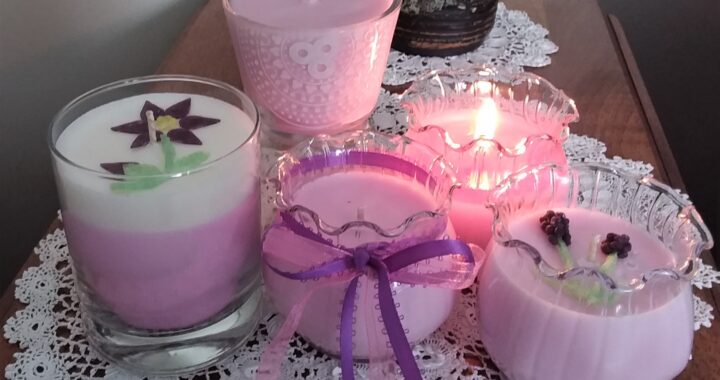
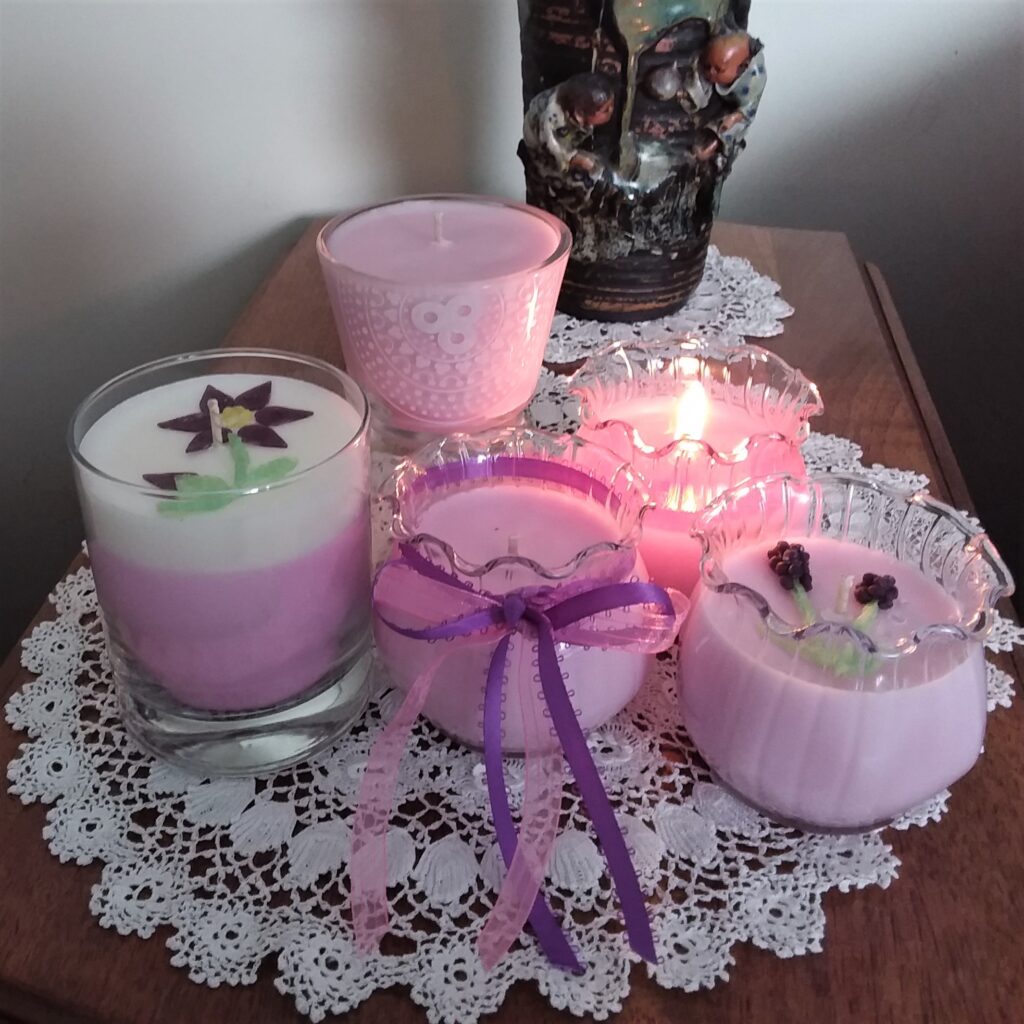
A simple craft for spring, both Mother’s Day and Beltane. Your candles can be smartly modern or cozily old fashioned by your choice of container. Check out the local dollar stores and see what is easily available. Be sure to also look at containers that have tops and can be reused to hold spices, buttons or something else, once the candle is finished.
These candles were made with pink lilac scent but lavender, rose, hyacinth or any other spring floral scent is a possibility. Just change up the dye colour choice to match the scent. Soy wax does not take colour as well as paraffin so expect the candle to be a lighter colour if you have previous experience.
If this is your first time candle making, congrats! Start with this simple option and explore from there. If you need a source for supplies, try your local craft store, being sure to talk to someone there familiar with candle making as the supplies may be from a different manufacturer. You are looking for soy container wax and the appropriate wick size for the container of your choice. It is also possible to order directly from my supplier, which is Wicks and Wax and to get exactly what I used.
Wick size is based on the width of the container being used so knowing the width will help you get the right wick size for your project. The width of the containers I used for class was 2.75 inches. When working with glasses that have straight sides, there will be no issues but when using rounded containers, it is a good idea to find a middle ground between the narrowest diameter and the widest to get the best burn.
Ensure that the containers are at least, at room temperature. Most glasses are not tempered and can break if the wax is too hot in comparison to the container. In colder months, if using this technique, try soaking the containers in warm water, pulling them from a completed cycle in the dishwasher or popping them in a slightly warm oven for a few minutes.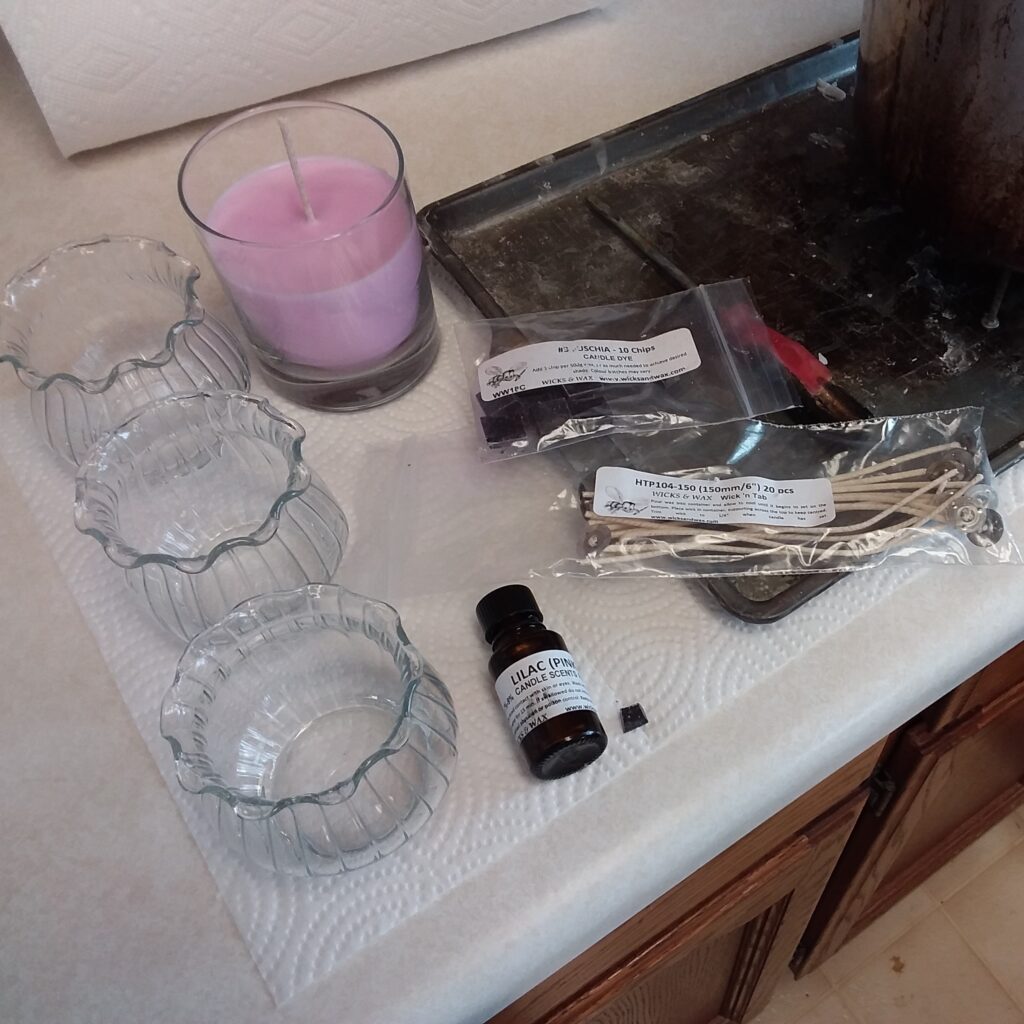 You will need:
containers to pour the wax into
GW 464 container wax
HTP 104 wick, tall enough to come to the top of your candle
fuschia dye chip
Pink lilac candle scent
beeswax sheets in colours you like for decorating
Tacky wax
Begin by melting your wax. I have an electric pressure cooker that works well for small amounts of wax but a pot will also do the job. In your container add an inch or two of water and begin heating.
Now you will need a container for the wax. Any empty tin can works well while you decide if candle making is for you. There are all sorts of other options but to keep your startup costs to a minimum, keep it simple.
An important thing to know is that wax weighs less than water and that means that too much water in the pot will make the tin, even full of wax to be melted, float and probably tip. Test the fill container before you let it go to make sure it is steady and securely sitting on the bottom. As the wax melts, the shavings of wax will collapse down the tin and more can be added, bringing additional weight to the contents. Remember though that when pouring the wax into containers and then returning the now mostly empty tin to the water, it will again be light enough to float. One way to resolve this issue is to add weight inside the tin, a hinge or rock can do the job but be sure it doesn’t fall out and break your container as you are pouring.
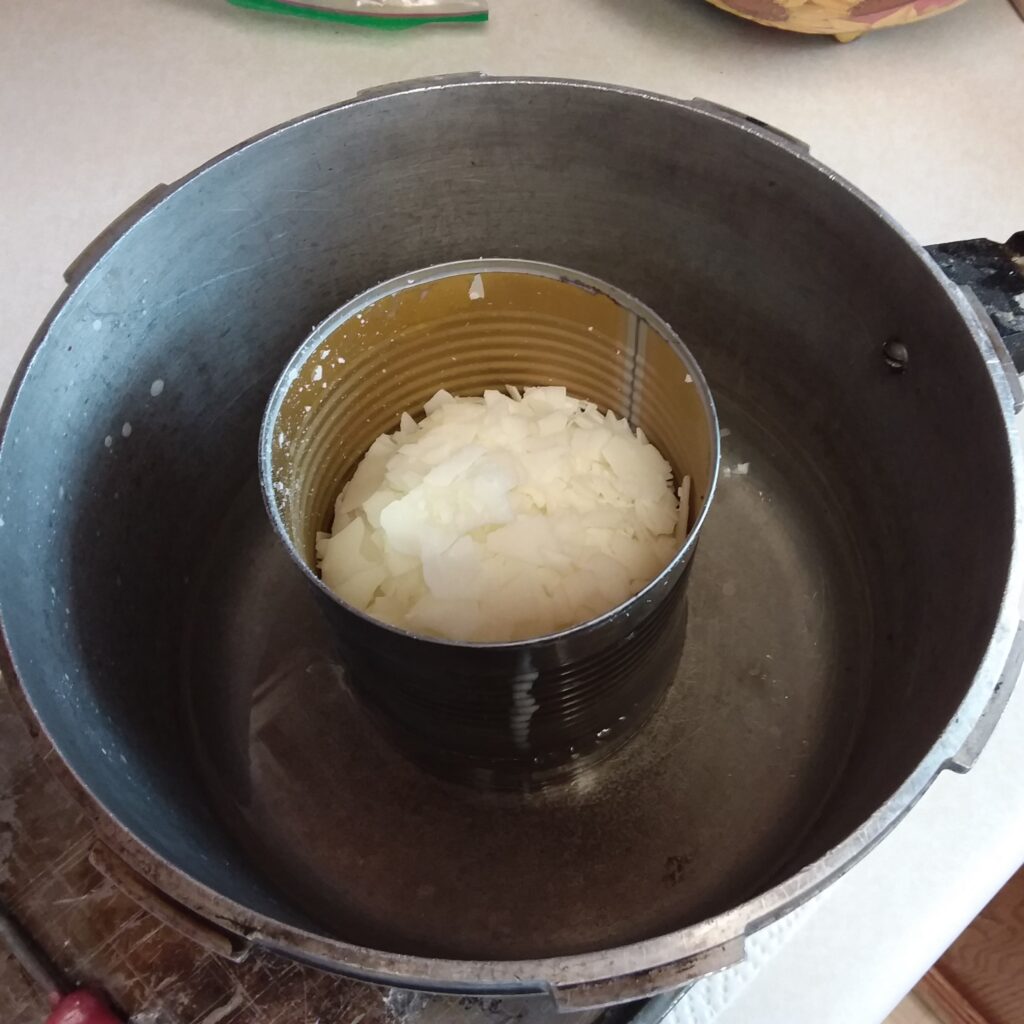 A small round cake rack that can fit the inside of your melter is helpful but not a must have. The cake rack allows the heated water to come up around the sides of the tin and not get trapped underneath the tin which will then make noises and move the tin around as the bubbles look for a way out.
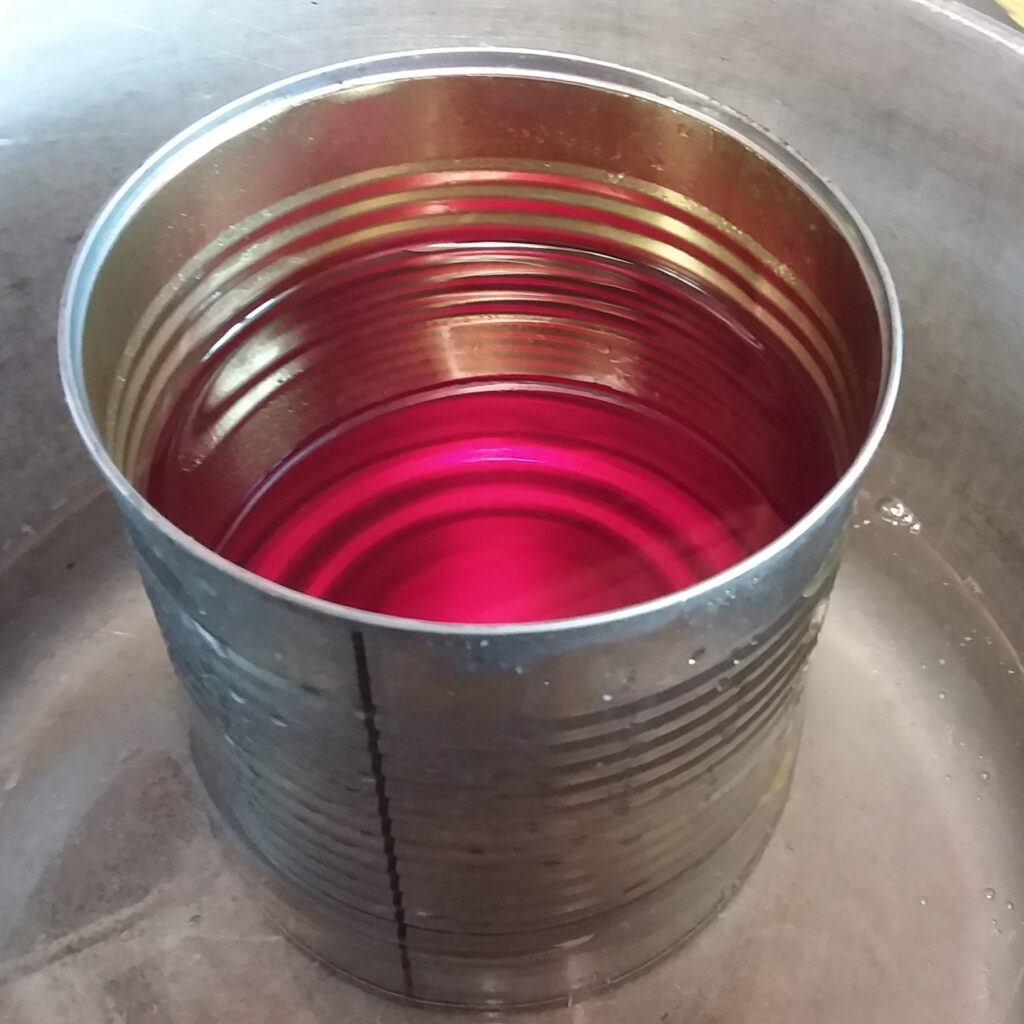 Heat to 160 degree F. Once the wax is melted add your dye chip, if using. This batch of melted wax has 1/4 of a fuschia dye chip for an almost full tin of melted wax. You can see, when compared to the solid wax in the picture below that it lightens up considerably as it dries.
Stir well to make sure the chip is full melted and then allow the wax to cool to between 125 and 145 degrees F. Add in your candle scent. 7-9% is suggested for soy wax. Again stir well. Each candle scent has a different viscosity and heavier scents will fall to the bottom of the wax so stirring well becomes doubly important. Once combined, pour immediately into your chosen containers.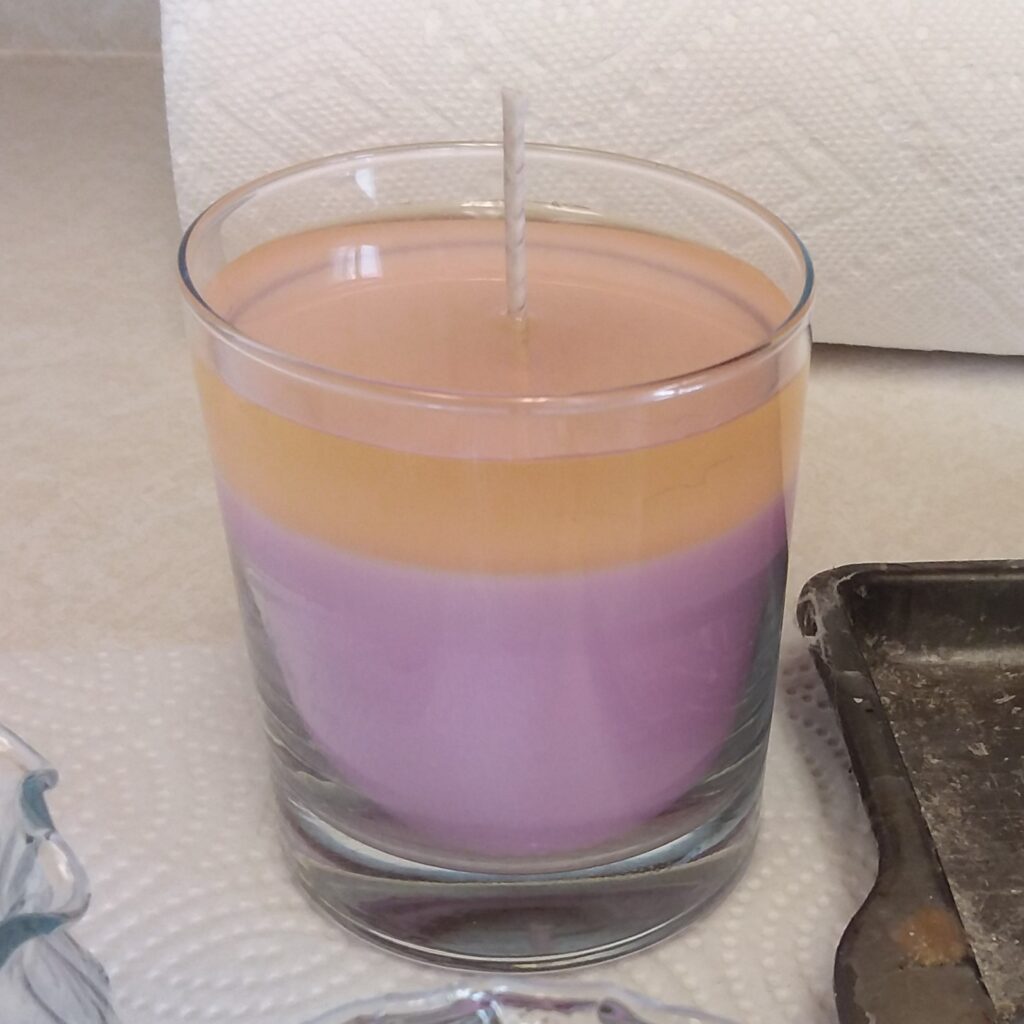 This container was left over from a candle class, earlier this week. I left room in the glass so that it could be topped with white before adding the decorations. Soy wax allows for the layering of colours, which is another way to express some personal creativity.
 Soy wax is considered a “melt and pour” wax because once the wax is in the container, there is nothing left to do but wait for it to harden, no filling holes or leveling the wax.
While waiting on the soy wax, it is time to change and work with the beeswax. These designs were created with micro cutters but can also be cut freehand. The stems of the flowers are pieces of rolled honeycomb beeswax sheets and the center of the flower and blossoms of the lavender/hyacinth are simple balls, made by rolling a very small amount of wax around with a fingertip on a solid surface.
Tacky wax is a type of wax that will help attach your decoration to the candle itself. Push a small amount of tacky wax on to the back of the beeswax and then press firmly onto the soy wax without denting the top of the candle.
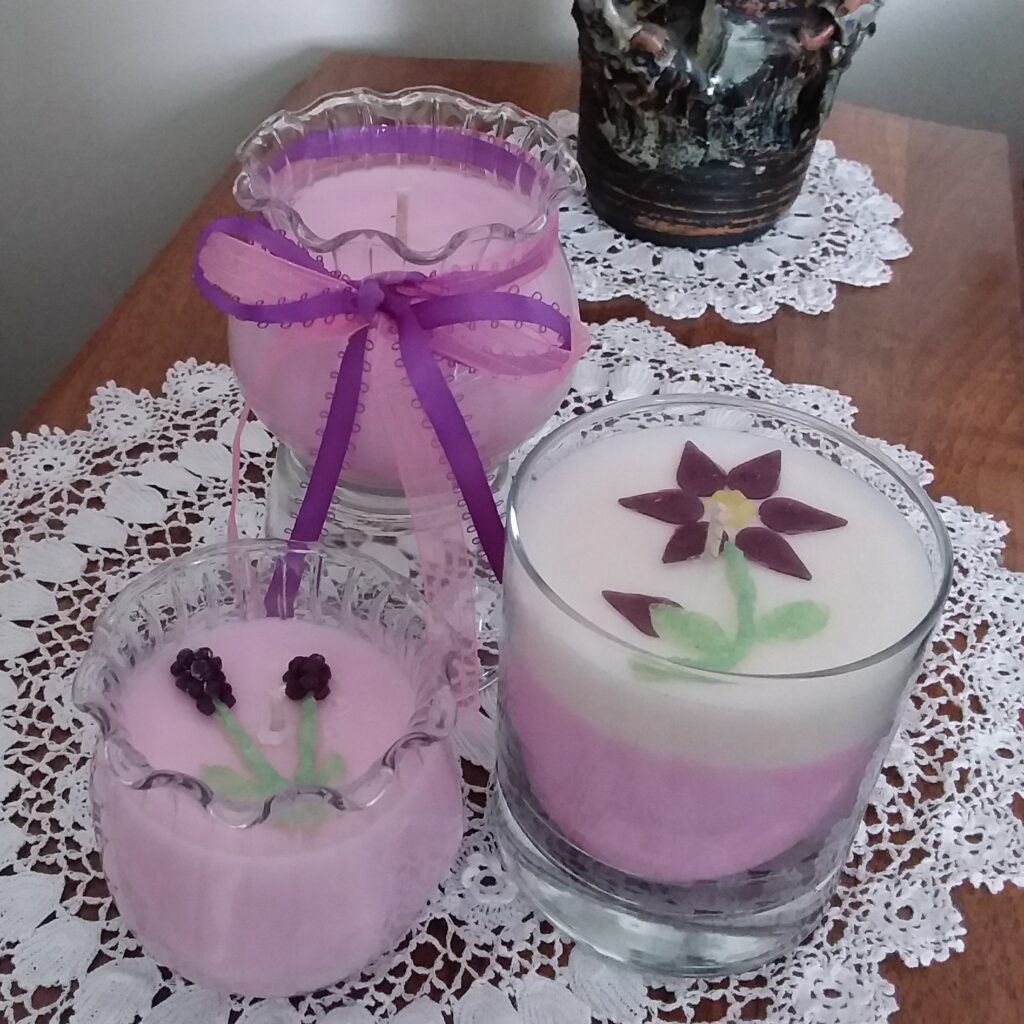
Your finished look will depend on the style of glass and the design, if any, added. You can see in the photo below that one candle just has a simple bow wrapped around the jar.
I also wanted to add that the candle at the back is something I often do to keep life simple. It is not always possible to melt the exact amount of wax needed and having an extra candle container to handle any small amounts of leftover wax is helpful. These have all been gifted but the plain one in the back means I don’t have small tins of leftover wax all over the place and can enjoy a candle as well. It is something for me to enjoy and can be half, 2/3’s or completely full. It can even have layers of different coloured soy wax, the container stored until full. It is on beside me as I type this.
Clip the wicks down to 1/4 inch once cool and before lighting.
Soy wax container candles are an uncomplicated way to begin a new hobby. They can be as simple as melting wax and filling a container to create a white unscented candle for the middle of the dinner table. Add interest by including, colour and/or scent for a relaxing bath, to enjoy while cuddled up with a book or to keep the bugs away outside. Decorations can add a special touch and are a way to personalize any special occasion.

