
The flavour combination of chocolate and hazelnuts was popular centuries before Nutella. In the 1800’s, in Turin, Italy, there were many hazelnut orchards and cocoa was expensive and difficult to get. Combining hazelnut paste and cocoa produced a product known as gianduja (pronounced “john-doo-yah”). This soft smooth chocolatey confection was a hit and has stayed popular since its creation.
You will need:
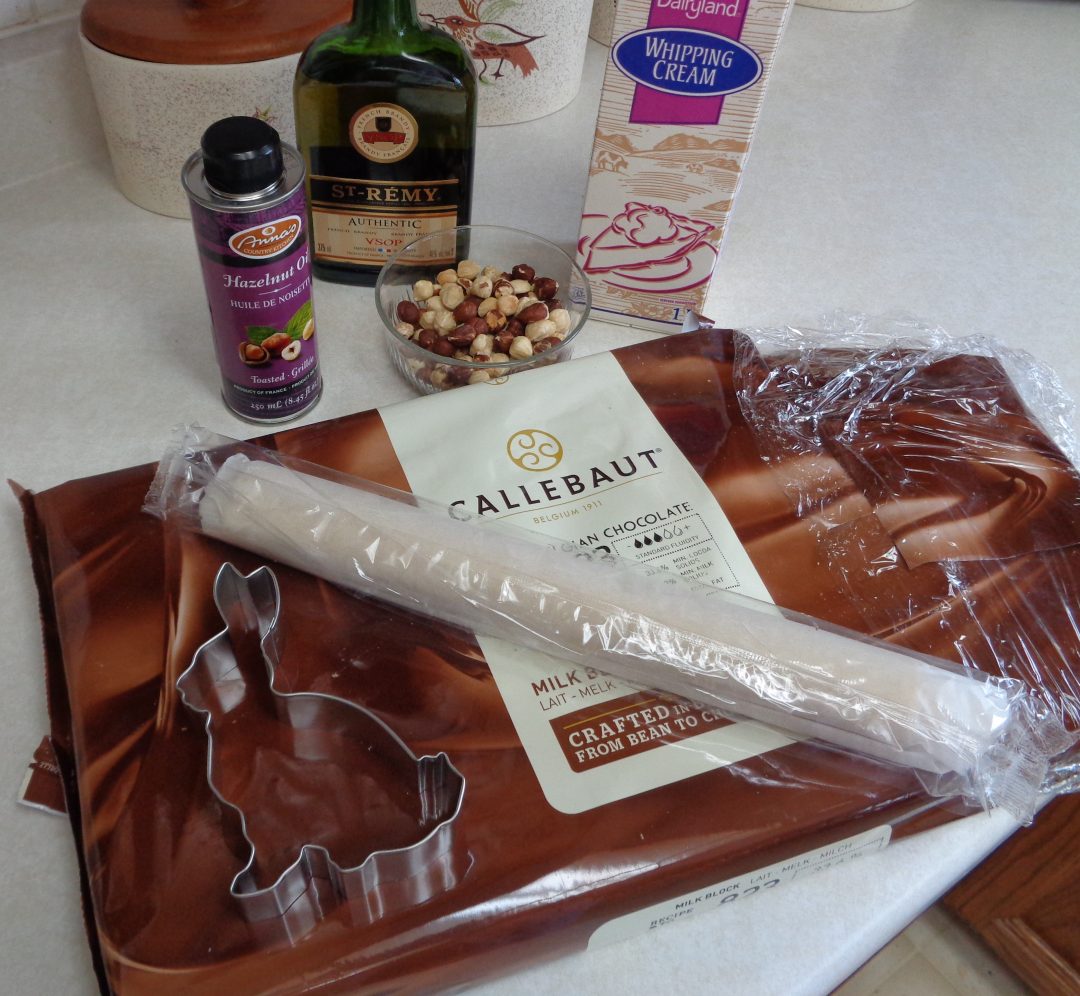
1/2 cup melted milk chocolate
1 Tbsp. Hazelnut oil
1 Tbsp. brandy
1 Tbsp. whipping cream
3 Tbsp. roasted ground hazelnuts
1 roll of store bought puff pastry
Optional:
cinnamon sugar
ground nuts
white icing
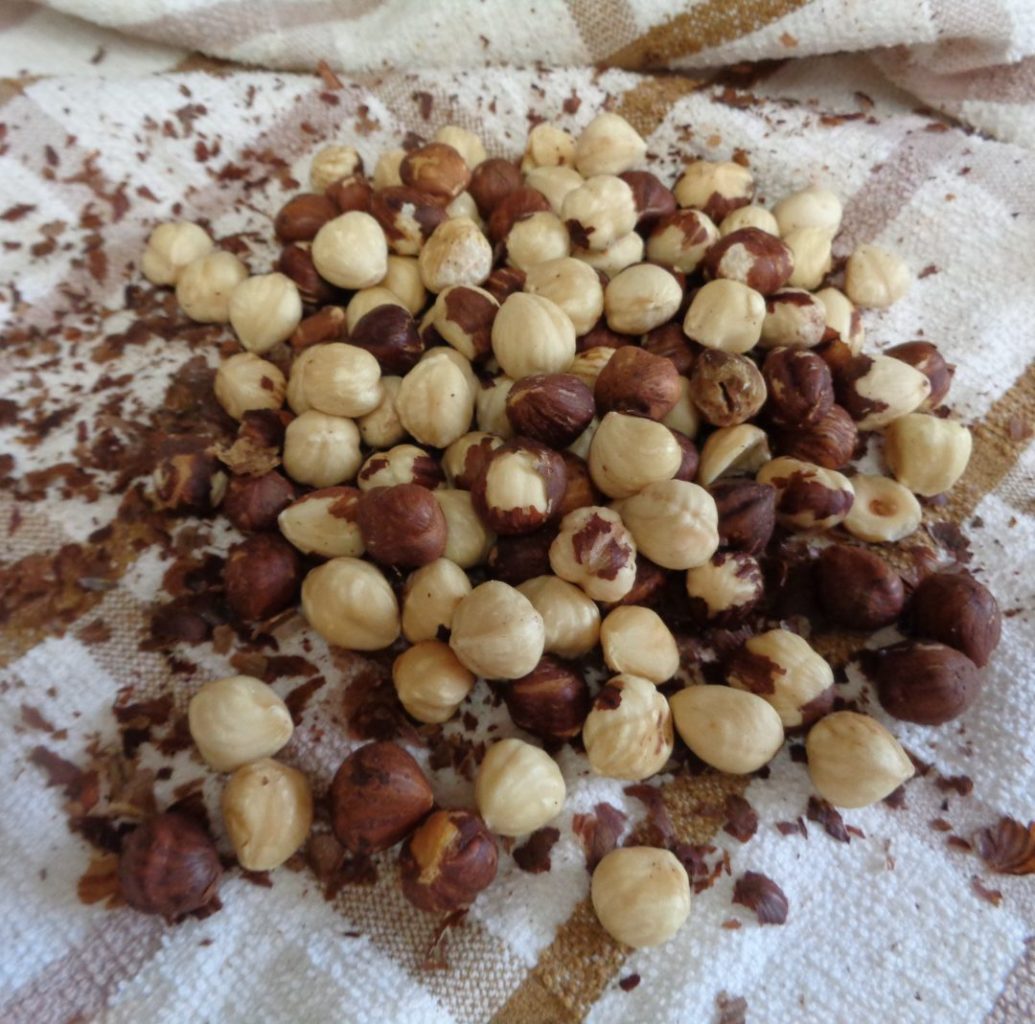 To roast hazelnuts, place the nuts on a small cookie tray and place tray in a toaster oven at 375 degrees F for about 10 minutes or until you hear them crackling. The nuts roast best one deep, so avoid piling them up. Turn the hot nuts out onto a clean tea towel and rub until the majority of the skins have loosened and broken off.
There will probably be some nuts that still have their skins and they can be removed or included, as you choose.
Transfer nuts to a grinder and process until finely chopped.
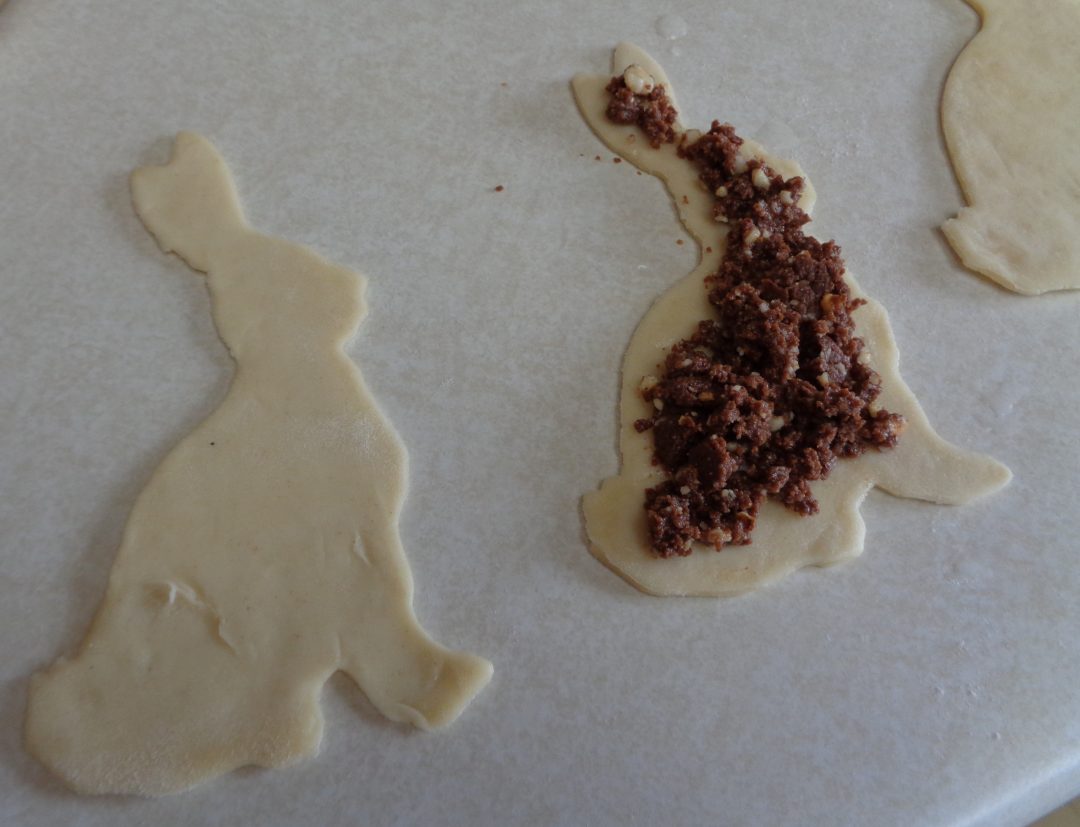
Into the melted milk chocolate, add the oil, brandy, whipping cream and nuts, stir well as the mixture thickens and then put aside. If Frangelico is available, substituting it for the hazelnut oil and brandy will work also.
The store bought puff pastry that I used came in two individual rolls in one package and and one roll was enough for 16 cut outs. How many you get will depend on the size and shape of your cookie cutter. I chose one that looked a little more like a hare. One right way up and one upside down fit well together.
 As the pastry warmed the dough will stretch. Putting the dough back in the fridge will help.Pulling the excess dough away from the cookie cutter before lifting the cutter also helps keep the edges clean and facilitates less strectching of the dough.
Once the shapes are cut, place them on a cookie tray and return to the fridge until needed. Take them out two or four at a time and match the shapes. It sometimes happens that if the dough is warm and soft that shapes get a little pulled away from their original form, so keep the longer ears together and the wider bodies.
I will just quickly say here that doing egg shapes is much less complicated.
Dip a finger in water and run it around the outside edge of the bunny. Fill the middle with the chocolate mixture. Place the second cut out on top and press the edges together.
This is a little more complicated than it sounds. I tried with a fork, pressing around the outside while on the counter and also pinching with my fingers while holding the pastry in my hand off the counter. ( Another reason to keep the ones not being worked on in the fridge. Option two worked better for me.
Turn the rabbits over and place on a cookie sheet. Bake at 375 degrees for 10 to 15 minutes depending on your oven.
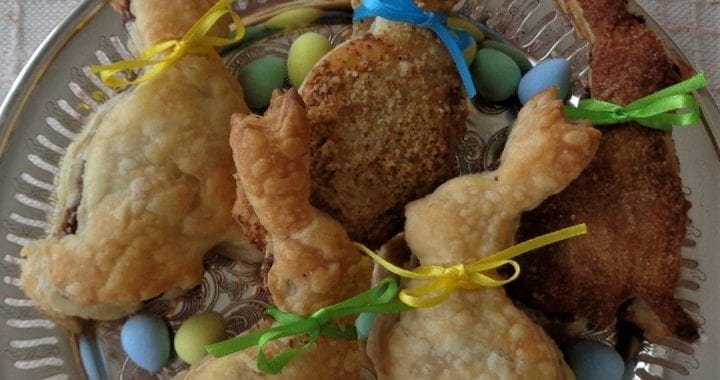
Wild rabbits tend to be a mottled brown where I live so on some pastries I added a milk wash and sprinkled more ground nuts. On others a sprinkle of cinnamon sugar gave a nice finished top. A third option was to bake the pastry plain and then use white icing to create a cottontail effect once baked. Any combination will work.
Instead of trying to seal in the filling, next time I might just bake the puff pastry first, split it in half once cool and then pipe on a chocolate ganache. Something to think about.
For now, here is a variation on chocolate filled Easter rabbits/hares that should make some “hunters” happy.
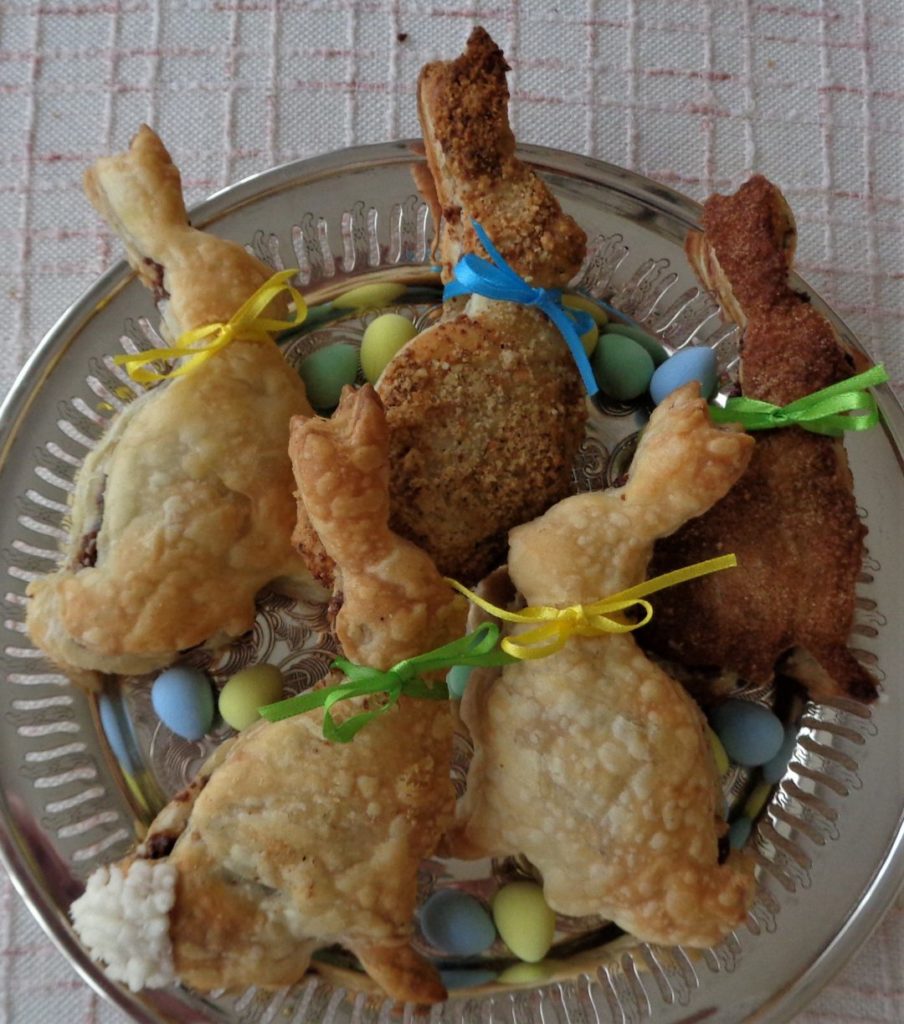
Chocolate Hazelnut Puff Pastry Bunnies from My Kitchen Wand
