
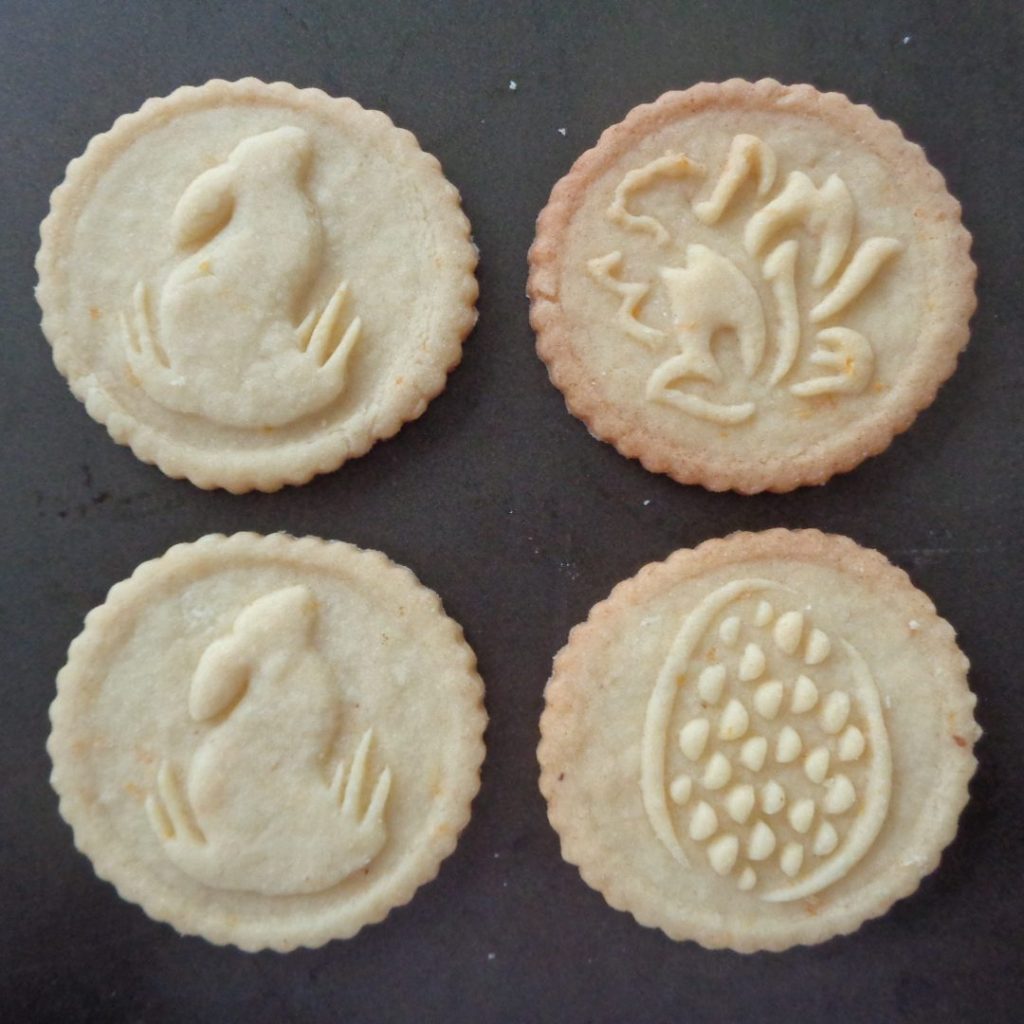
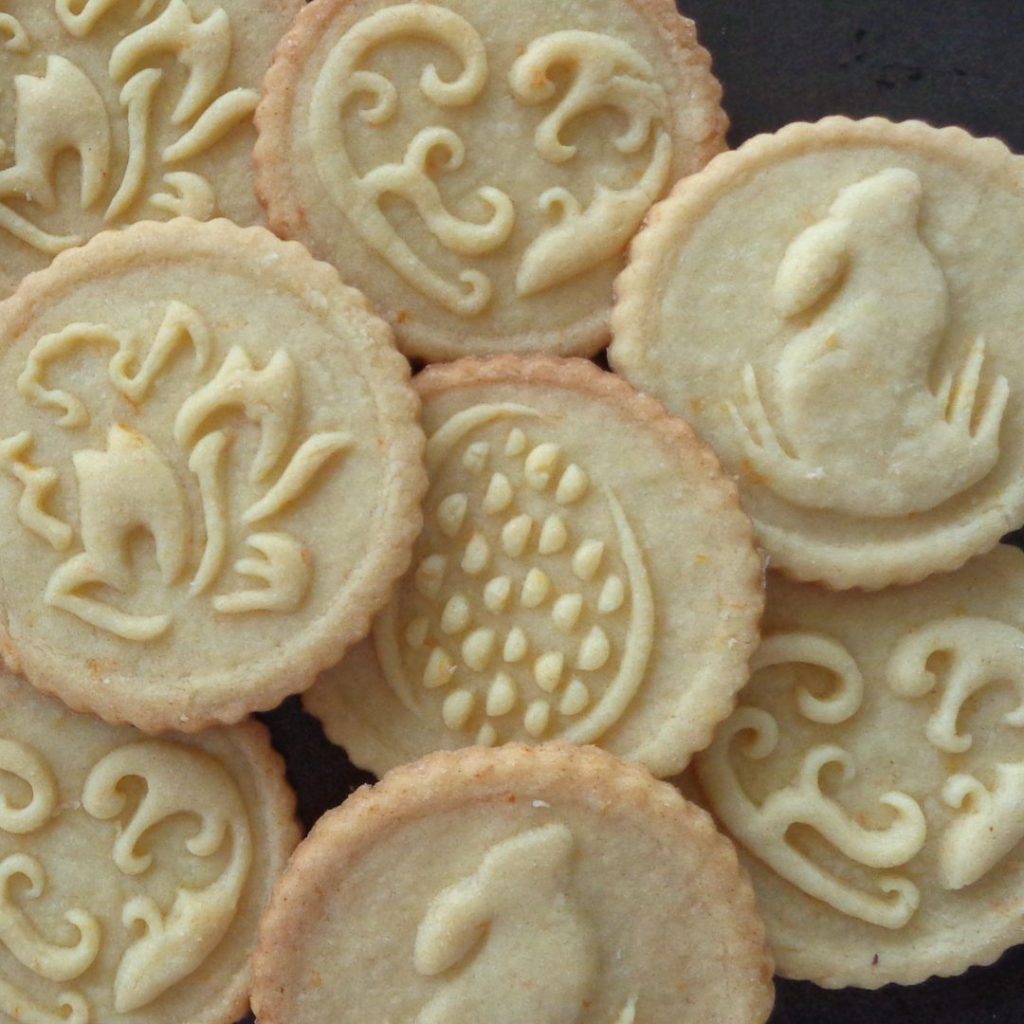
The feedback about the frustrations of embossed rolling pins is exactly my experience as well. Having the images stick, ripping the dough, having no impression once baked are common problems and that is why I am showing the cookies baked in the picture below. Don’t give up hope, “THIS IS POSSIBLE!”
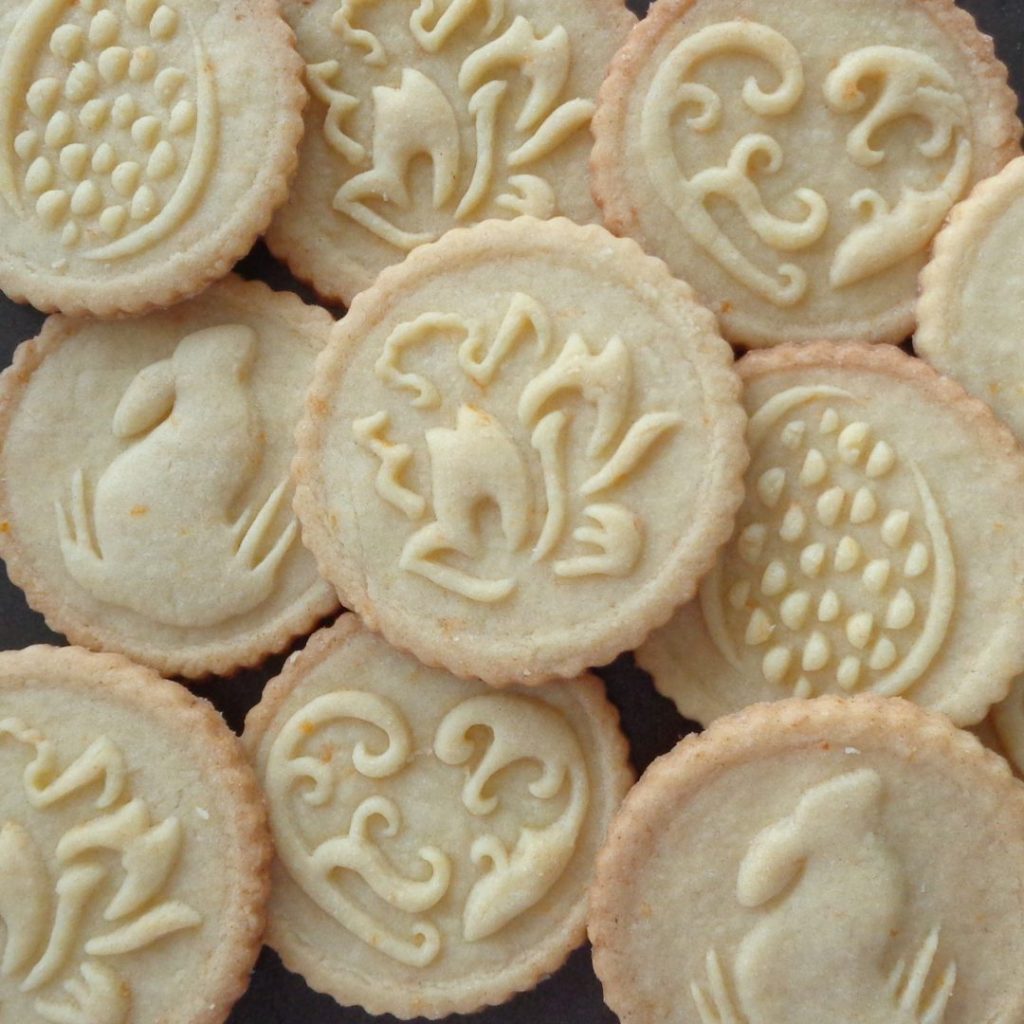
Let’s go through some pointers on how to get the best baked imprinted cookies using My Kitchen Wand cookie stamps.
 First off the stamps are open. That means the depth of the impression is controlled by you not the depth of the engraving on a rolling pin. On the good side this helps create lovely detail that stays put when baked. The harder you press the deeper the impression. That said there comes a point when it is too much and things will start to happen. The cookies will have trouble separating from the stamps because they are “locked” in. The center section will brown too quickly because it is so much thinner than the rest of the cookie.
When you use the stamps for the first time, expect a less than 100% success rate. The good news is that any dough that isn’t quite right can go back into the mix and be re-rolled.
Drop your stamps in flour before using. Not just top and bottom. You 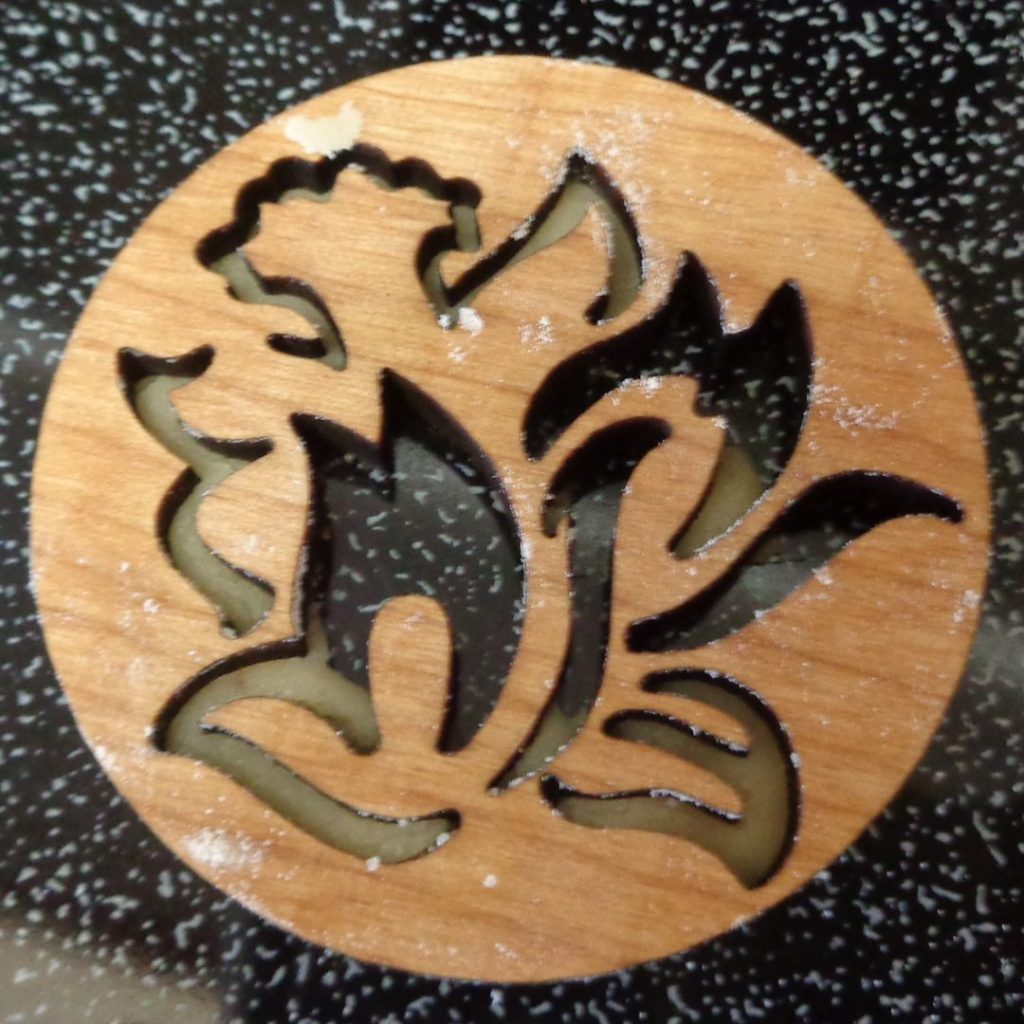 want to get flour into everything that has been cut out. This will create an easier disconnect when the stamps are lifted up. I can generally get two compressions before the stamp needs more flour.
You can see in the picture on the right what happens when the dough sticks to the stamp. This can happen for two reasons, one is that the dough is too warm and the other is that the flour barrier is not there to help release the dough.
Clean the dough out with a toothpick , dust with flour and carry on. My experience is that washing and drying the stamp does not work as well as just pushing out the dough and dusting again with flour.
This is more likely to happen once or twice with new stamps but will disappear with use.
 Sprinkling sugar lightly over the top of the unbaked cookie before adding the stamp is another way to create a separation between the dough and a stamp.
This is also the easiest way to also add sugar to the top of the cookie. Sugar underneath the stamp will be pushed into the dough and what comes up through the opening, will remain visible once baked. Sprinkling afterwards tends to cover up the design.
When choosing a cookie recipe, I have oft heard it said to start with one that has a minimum amount of eggs and leavening.
 Shortbread has had varying success. While lovely and flaky once baked, that only helped the images disappear as the butter melted and the layers expanded.
In the end I have found the most success with recipes like Speculaas and sugar cookies. Since not all recipes are the same, this specifically was the ingredient list. It makes just over 50 cookies.
Adding herbs, spices, extract, zest or cocoa are absolutely okay but I would stay away from extras like chopped nuts or dried fruit as that can become a challenge. Switching out the white sugar for golden or brown is also doable. It simply depends on what kind of finished product you have in mind.
Another nice thing about this combination is that you do not need to cool this dough once made. You can move right on to rolling if the butter was cold to begin with.
You will need:
1 cup butter, cold, 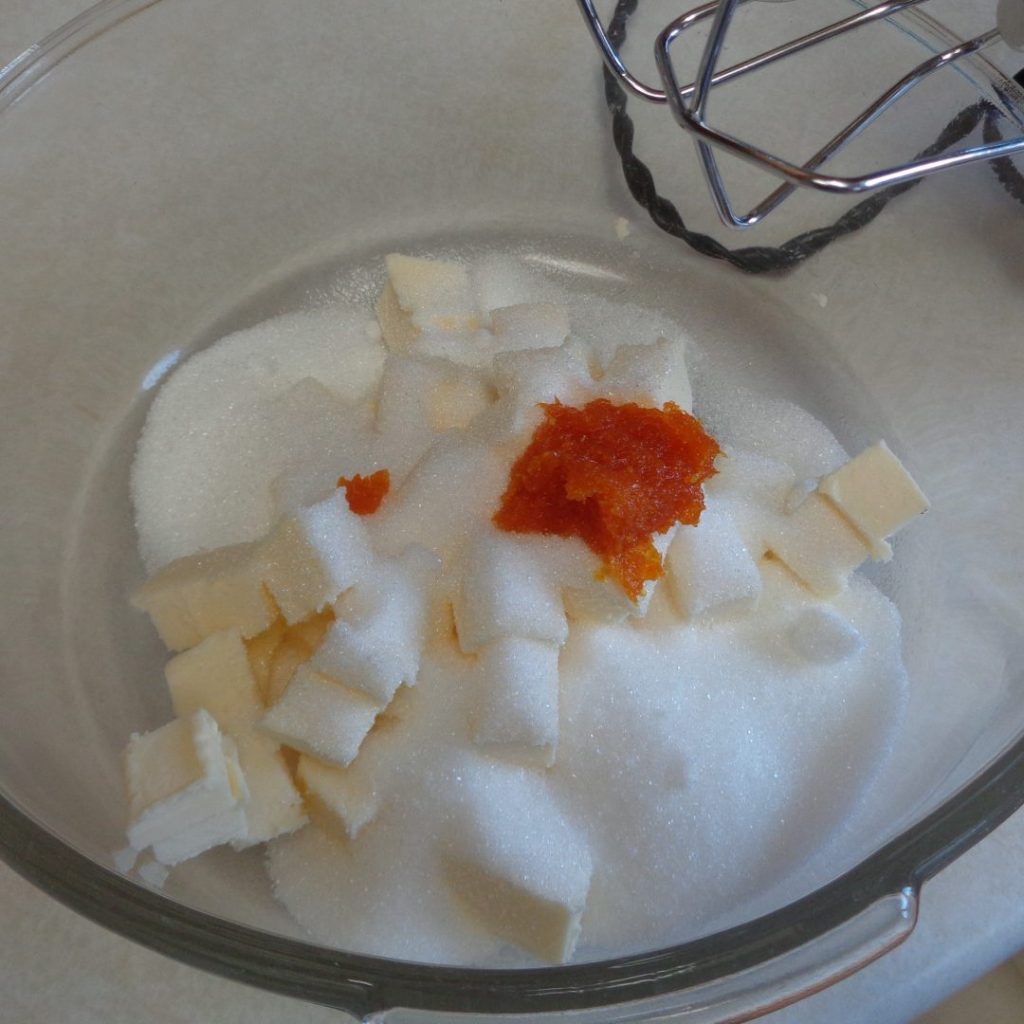 quartered three times, height, length and width
1 cup sugar
2 tsp. lemon zest
1 tsp. rum extract
1 egg
2 tsp. baking powder
3 cups flour
The best tip I can give you about this recipe is that I take the butter out of the fridge, cut it down, wait 15 – 20 minutes and carry on. You might need a little less time when the weather is warm and more when its a cold day but the butter should still feel cold as you begin to mix and be malleable enough to be mixed.
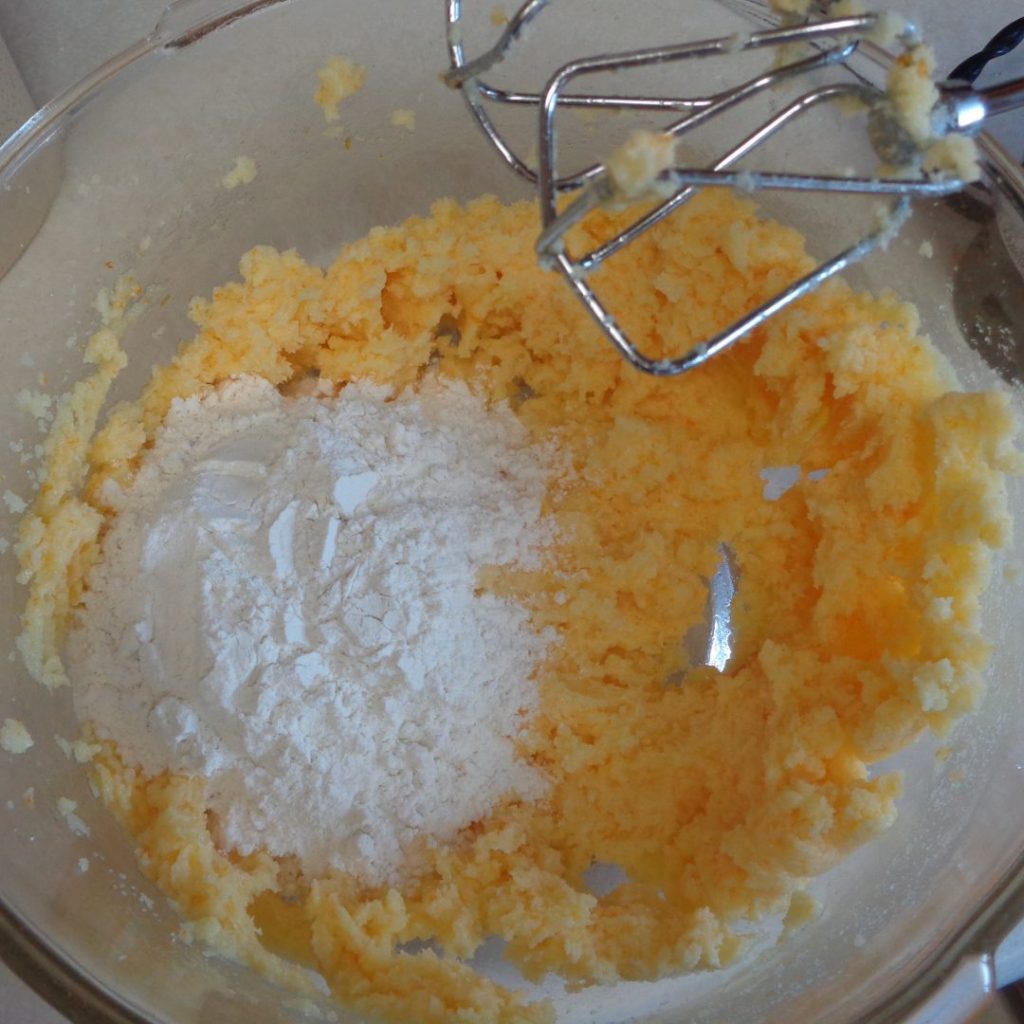 Once the sugar and butter are mixed together well, add and egg and mix again.
Add the dry ingredients, a cup at a time, popping in the baking powder with the last cup.
Once the dough is mixed it may well be in crumbly bits around the bowl.
No problem! Simply squish it all together and get to rolling.
More tips!
Do not try to roll the entire dough at the same time. Take it about a quarter at a time.
 Flour your rolling pin to avoid sticking.
The dough will be rerolled and rerolled gaining more flour along the way. You may find that as the dough gets stiffer it also becomes easier to imprint. Too stiff and the edges will crack when the stamps are applied.
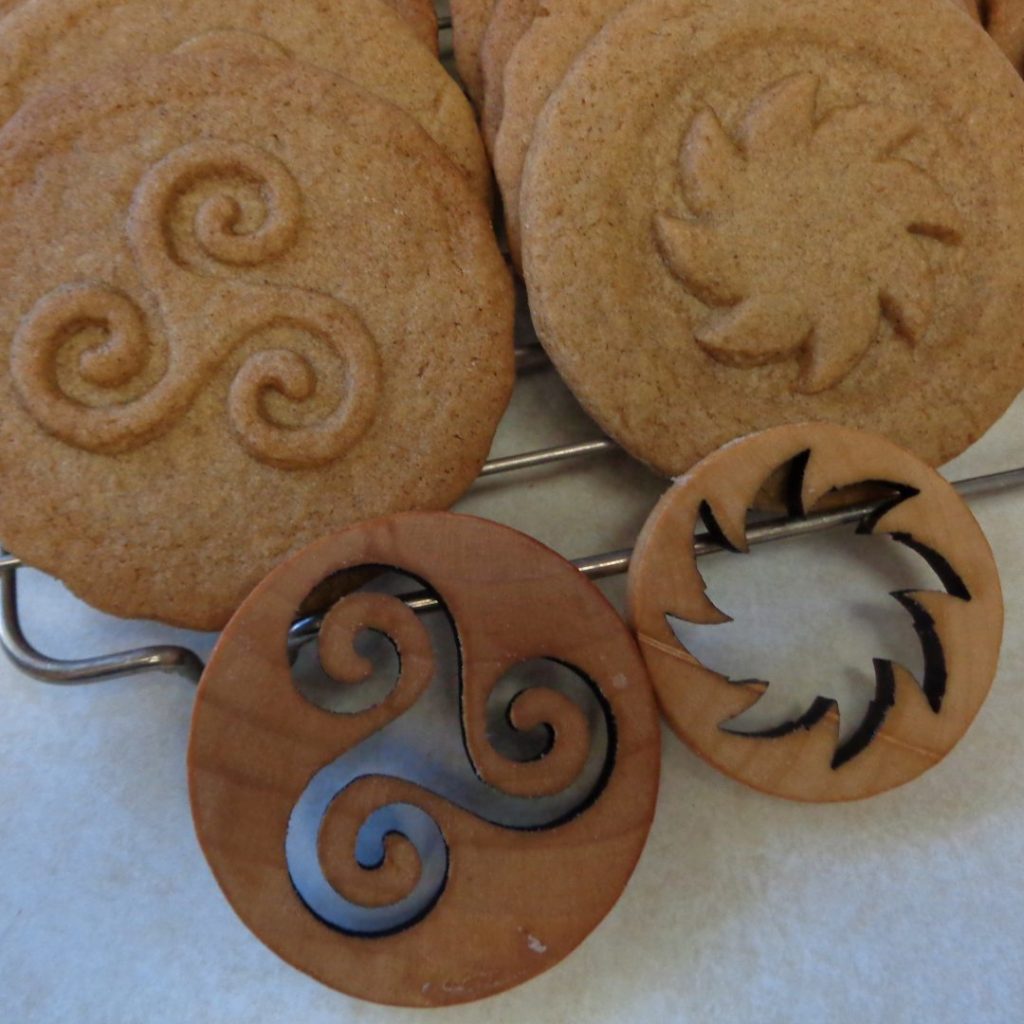
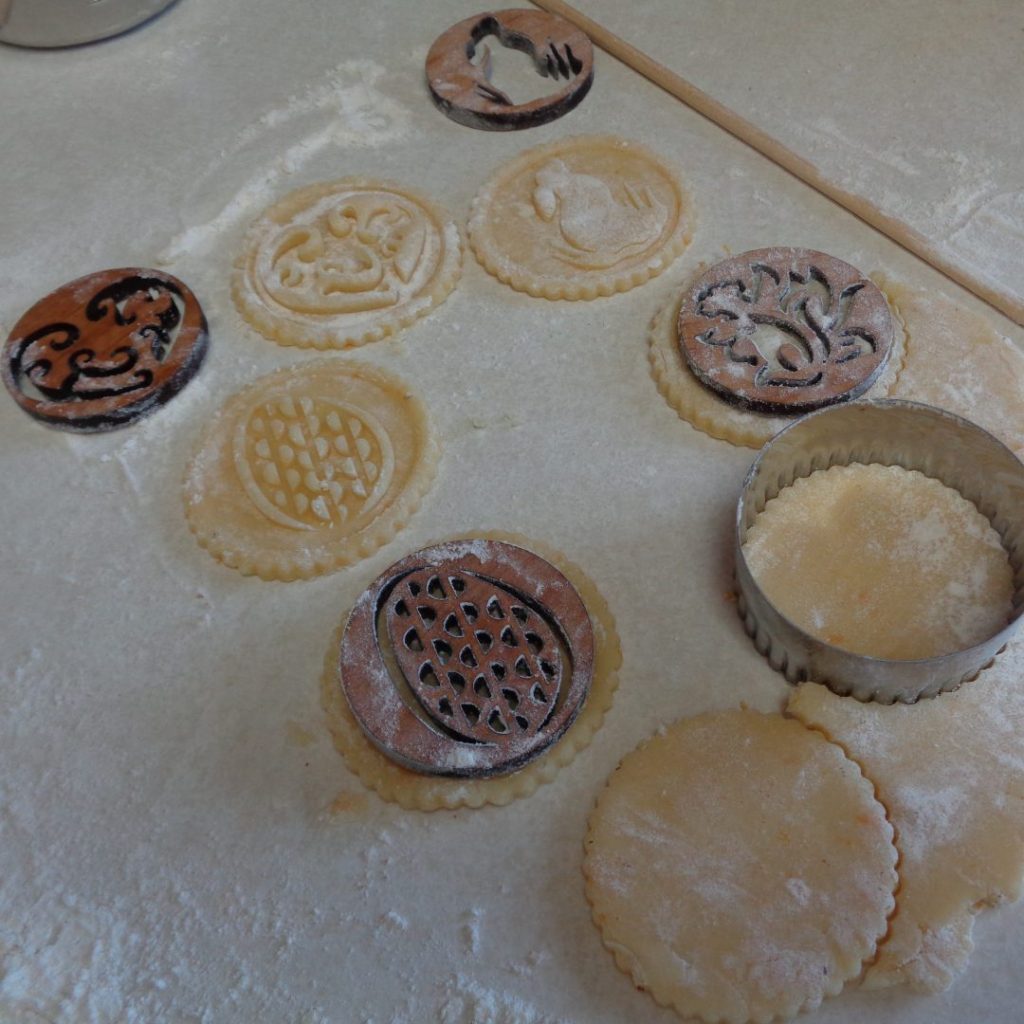
Use edgers when rolling the dough. Mine are made from balsam wood bought at the hardware store, 3/8 inch. You can see one in the top right of the picture.
With one on either side of the dough, roll the rolling pin along the edgers not on top of the dough itself. This will ensure equal depth of cookie making the baking times more effective.
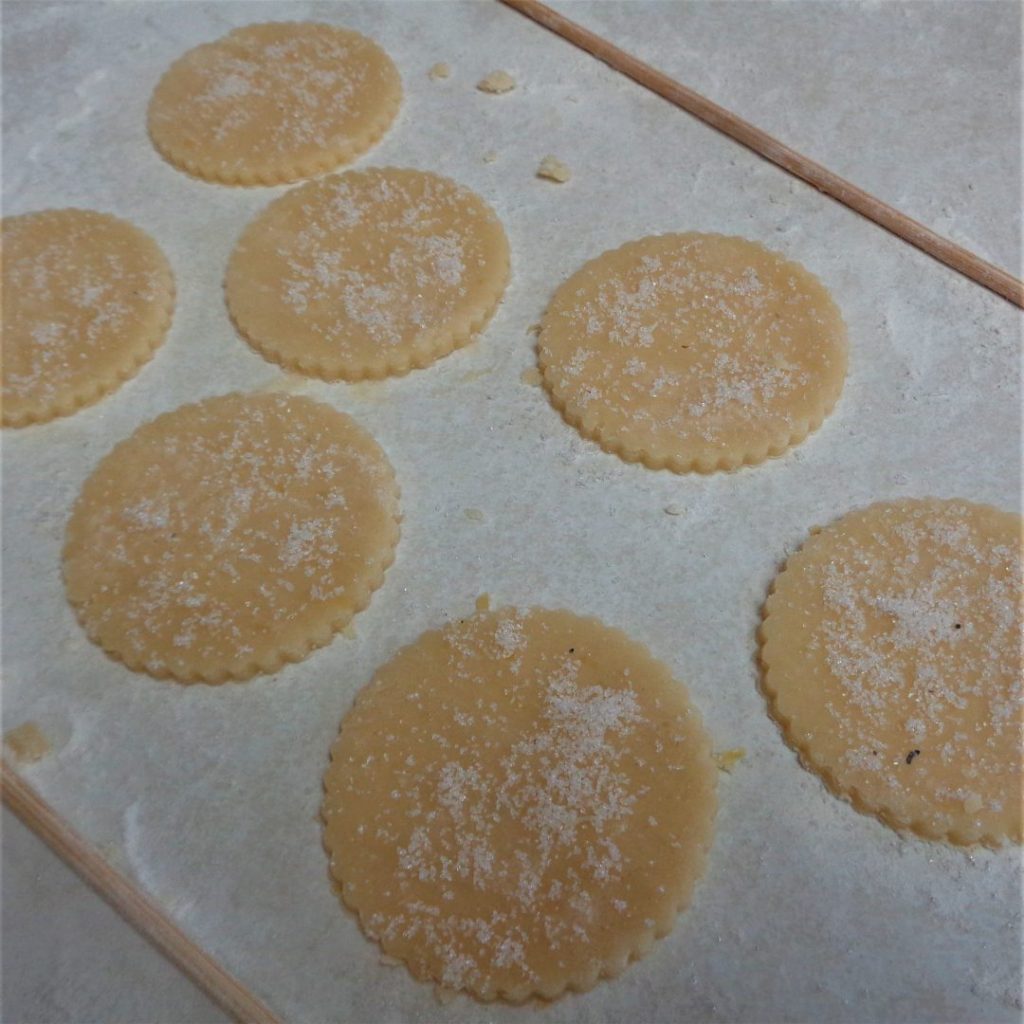
Leave room between the cookies as they will spread out when the cookie stamp is applied.
Once the cookies have been cut, remove the excess dough so the cookies have room to expand when pressed upon.
 Flour the stamp, center it on the dough and push down with the most pressure on the more solid parts of the stamp. The stamps are made of alder wood and have a grain. Too much pressure can split the grain. If you use the two finger/each hand method ensure that you have even pressure at equal distance for the best results.
Here are a few examples of what can happen when one side gets more pressure than the other. I often run my finger around the outside of the stamp just to get the dough even.
Use a light coloured cookie sheet. The darker ones will brown the bottoms of the cookies more quickly.
When transferring the cookies to the tray, move the spatula back and forth as it slides under the unbaked dough. Pushing directly in can also push the cookies out of shape.
If a batch comes out of the oven and the impressions seem to not be as sharp. Pop the dough or the prepared cookies into the fridge for about 5 minutes, it may be getting too warm from the rolling and rerolling.
While baking, keep an eye on the progress. You may decide to take off the cookies on the outside edge of the cookie tray first as they will brown before the ones in the middle of the cookie tray do.
It is not difficult and before long you will not even be thinking about the process and everything I have written here.
My intention is not to make this sound complicated, rather to let you know that I have probably dealt with all the things that are going to happen, including overbaking and I am so happy to be able to tell you that beautiful imprinted cookies that taste good and keep their shape are possible.
If you would like a set for yourself the spring selection is here and the originals are here.
