
The general rule of thumb for makers of cold process soap is done by Remembrance/Veterans Day to be ready for Christmas/Yule. If you didn’t make the deadline there is an option, hot process soap! In hot process soap making the oils and lye are heated once combined, pushing the mixture through the curing process so there is no need for your lovelies to sit for four to six weeks.
The texture of the soap will be a little different but all those additives that turn brown in cold process will stay their pretty colours in hot process, so adding tea leaves and flowers petals is possible.

Let me start by saying, this post is about the process, not so much the recipe. I have shared the recipe I used but if you have a combination that you prefer then by all means, use that instead.
Soap making is done by weight and a scale is important. I live in Canada and grams and milliliters is what we use here. I have converted my recipe to ounces and as you can see there are fractions of ounces in the measurements. Scales that go to .01 oz. are recommended.
You will need:
500 grams (17.6 oz.) coconut oil
247 grams (8.7oz.) vegetable oil
48.5 grams (1.7 oz.) avocado oil
25 grams (.9 oz) beeswax
307 ml (10.4 oz.) distilled water
125 grams. (4.4 oz) lye
Phenolphthalein, available at most soap supply stores.
 Begin by measuring and placing the coconut, vegetable and avocado oils in a slow cooker turned on low.
Finely chop and add the beeswax. The ingredient list is by weight to ensure that the amounts are correct as there is considerable chemistry involved in soap making. The beeswax can be raw and in need of shaving or cutting or it can be pastilles or sheets that have been torn into pieces. With whatever type of beeswax you choose, the point here is to make the pieces as thin as possible so that the oils do not need to be at a temperature hot enough to melt beeswax for very long.
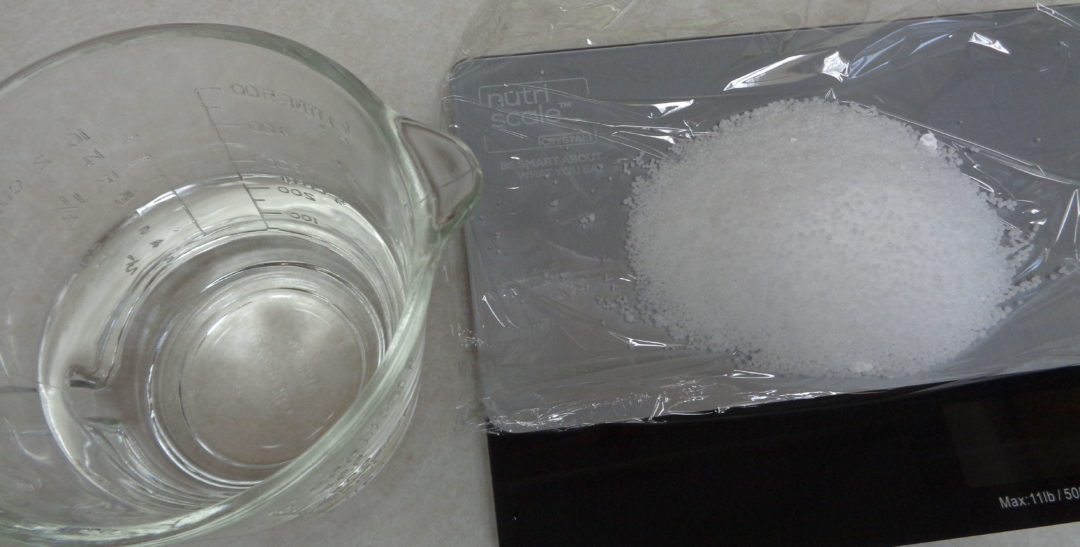 This is a good time for any animal and children to be in another area. Measure the lye. Break up any lumps that are in the mix.
Measure the distilled water and making sure you are not going to be disturbed and that your face and hands are protected, pour the lye into the distilled water which is best in a glass container and stir carefully. NEVER POUR WATER INTO THE LYE.
A chemical reaction will begin and the 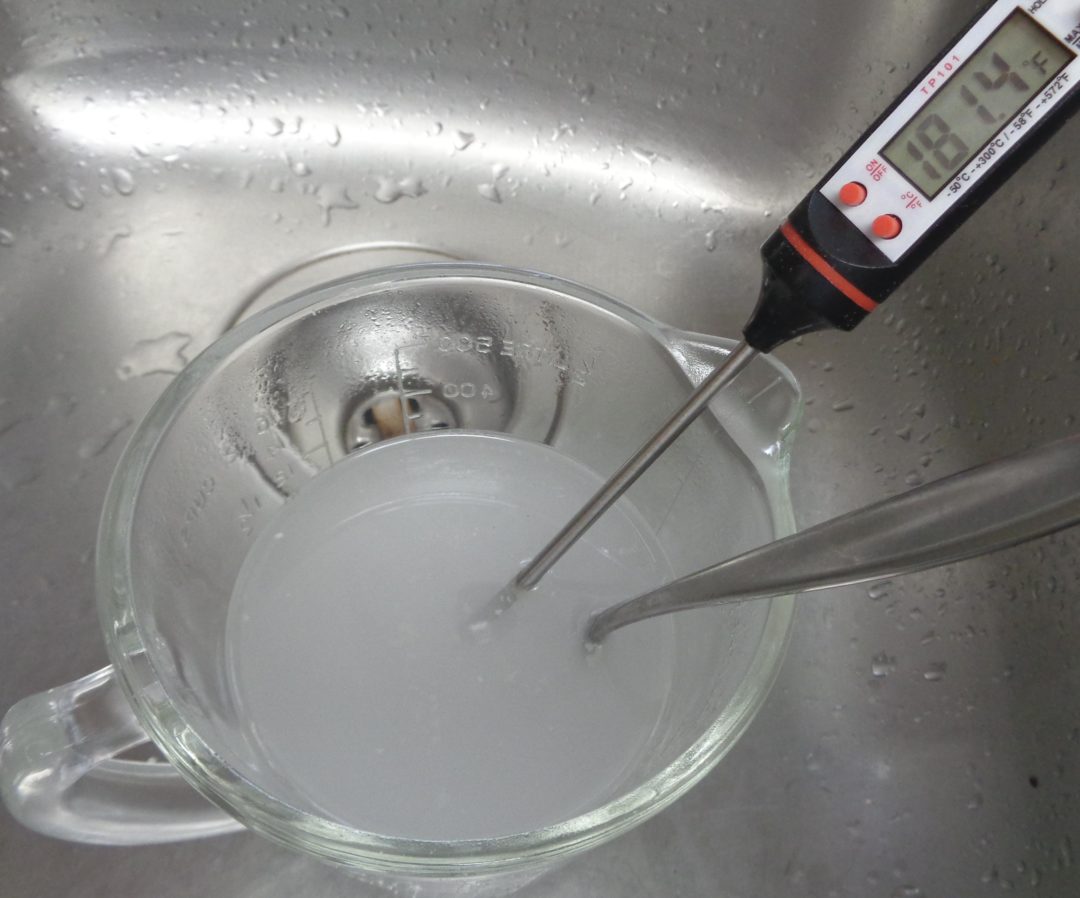 temperature of the liquid will immediately rise. That temperature you can see on the thermometer has nothing to do with any added heat and everything to do with what happens to lye when water is added.
LYE WILL BURN YOUR SKIN. Not from the heat of the liquid but from the chemical reactions taking place. Keep anything away from the action that will take your concentration off the job at hand.
The task now is to get the lye mixture and the oils reduced to the same temperature. In your kitchen you will find a system that works for you.
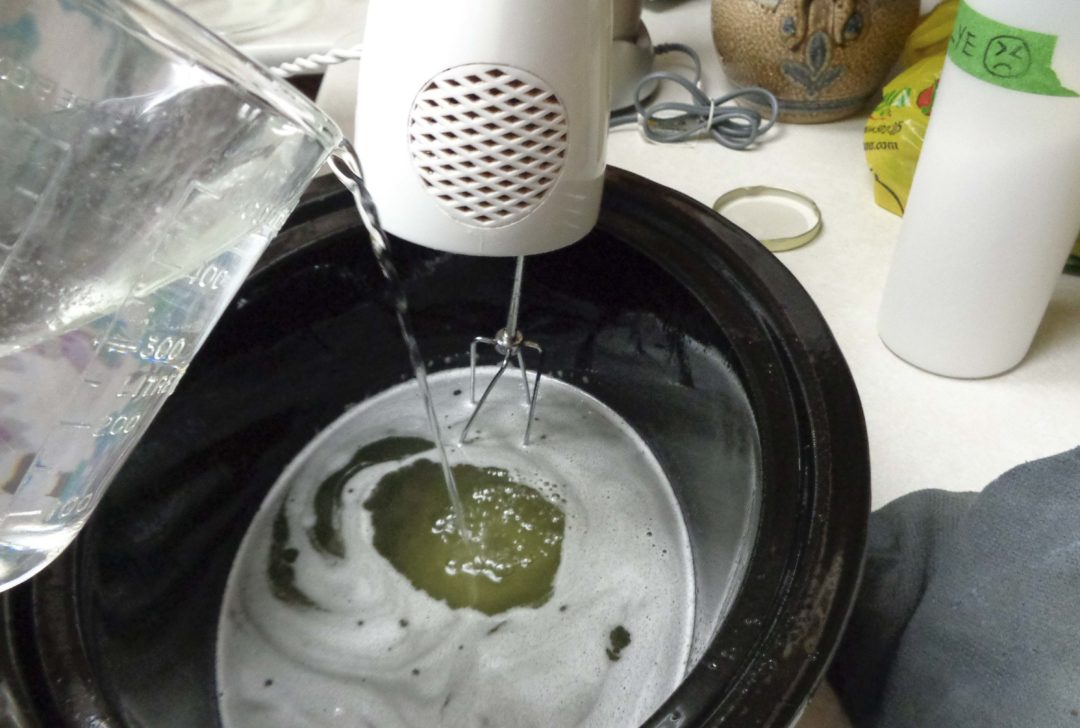 Some people add the lye to the water first and then let it sit while the oils heat. I get my oils going and then put the activated lye into the freezer to bring the temperature down.
The thing to understand here is that the oils can be heated and cooled by changing the position of the lid, taking the container out of the slow cooker and away from the heat or whipping with a hand mixer.
The lye, not so much. The heat comes from a chemical reaction.
 There are things you can do to cool it down like resting time in the freezer but nothing will heat it up again and there is a point of no return when the lye will not longer be able to support the saponification ( soap making ) process.
So pay attention to the temperature of both liquids and adjust your plan of action to suit the situation. The goal is the allow both liquids to get down to around 130 degrees F. at the same time and then to pour the lye mixture into the oils and mix well.
 I used a hand mixer on low with only one beater so that there would be a minimum of soon-to-be soap flying around. A stick mixer will also work.
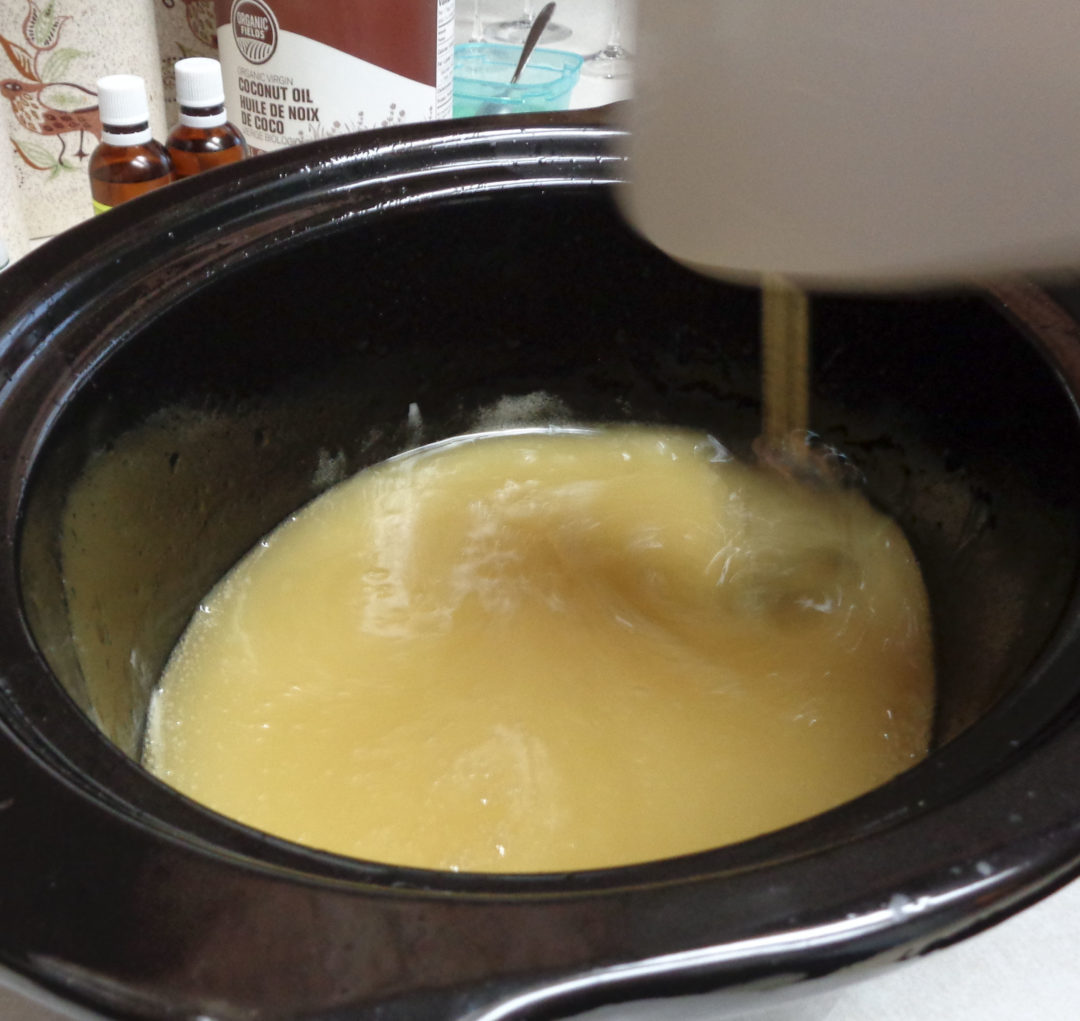
The goal here is to mix to a thin trace. Trace is a technical term in soap making for being thick enough to see any drizzle on top of the soap mixture for a moment before it disappears into the soap again.
Once trace is achieved, the point where hot process begins has arrived.
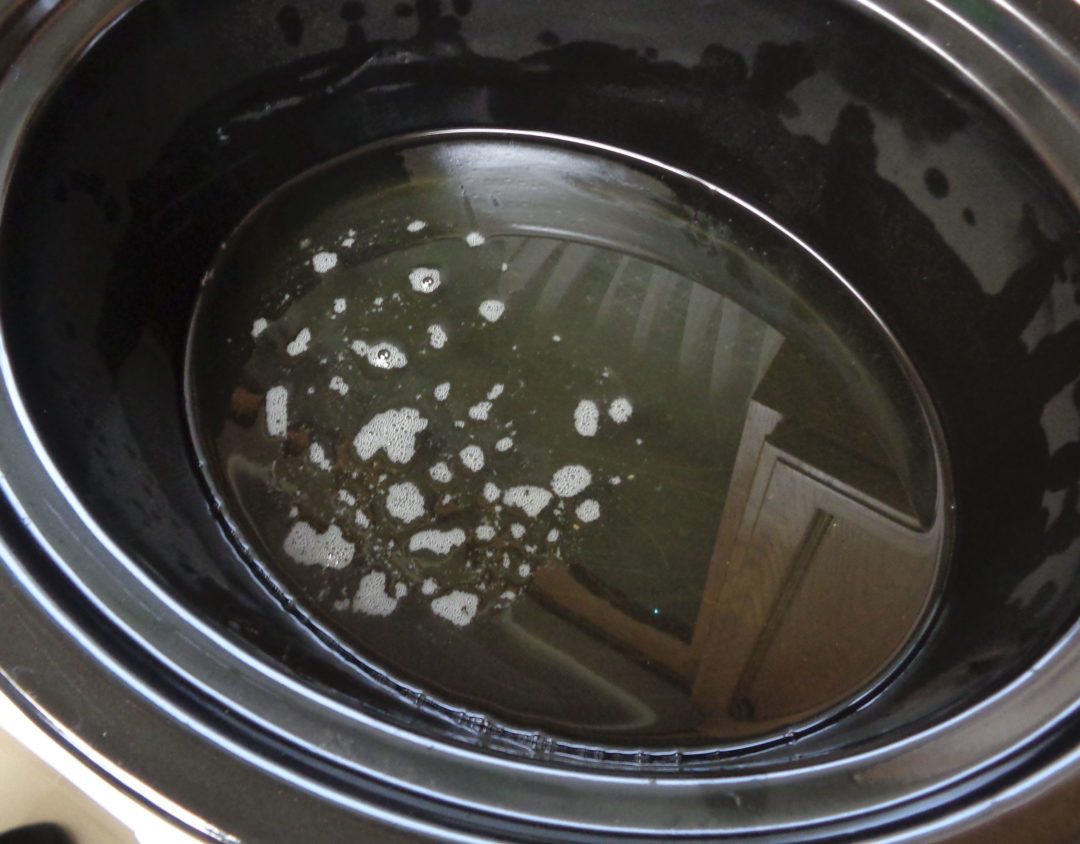
Place the lid on the slow cooker and allow the soap to cook for an hour, on low.
 Things are going to start to bubble and that is okay.
At one hour, take the lid off and scrape down the sides. The soap will have expanded so mix everything again before taking out a small sample. Place it on a piece of paper towel or a saucer and add a drop of Phenolphthalein.
Phenolphthalein is a ph indicator. Bright pink and you have a ways yet to go. Bits of pink and soap is not ready, maybe 15 more minutes of cooking time. Clear and you are good to move onto the next step.
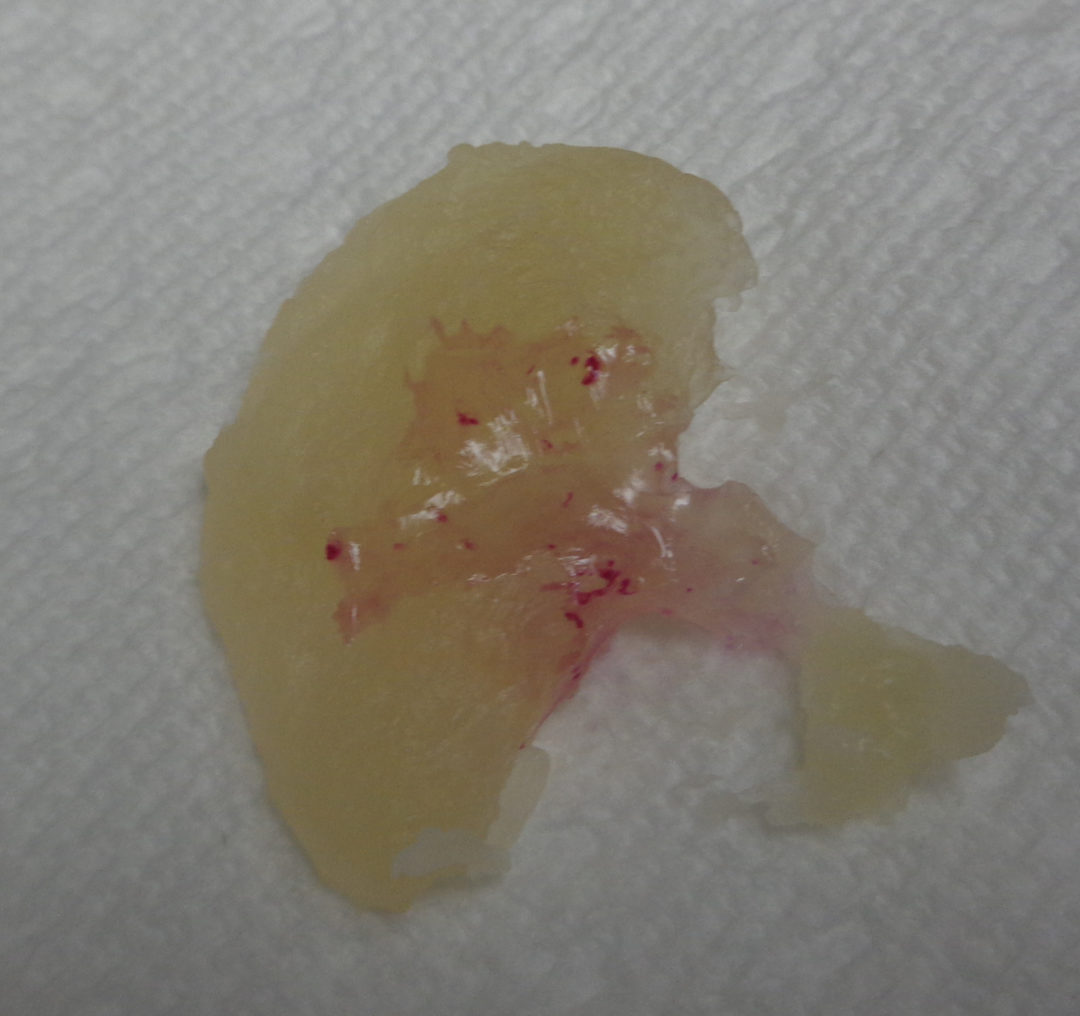 With cold process soap the cooking process is substituted with time. The intention here is that the soap be ready to use when finished so making sure it is safe on the skin is why it is checked until the Phenolphthalein stays clear.
Once clear, it is time to add your additions. I chose 1/2 cup oat flour, 3 Tbsp. honey and 3 Tbsp. Greek yoghurt for this batch. This is also the time to add essential oils and shea or other butters if you are superfatting. ( If that is a new word, ignore it until you have a couple of batches under your belt ). Two tablespoons essential oils total of your choice will be enough for this amount of soap. One teaspoon Orris root powder will act as a fixative and help keep the aroma of the essential oils in the soap for a longer time.
 Turn the soap into a mold. Try a simple loaf tin to begin with, lined with parchment or plastic wrap. Place the soap and tap firmly to get out air bubbles. This mixture will be considerably thicker than a cold process mixture.
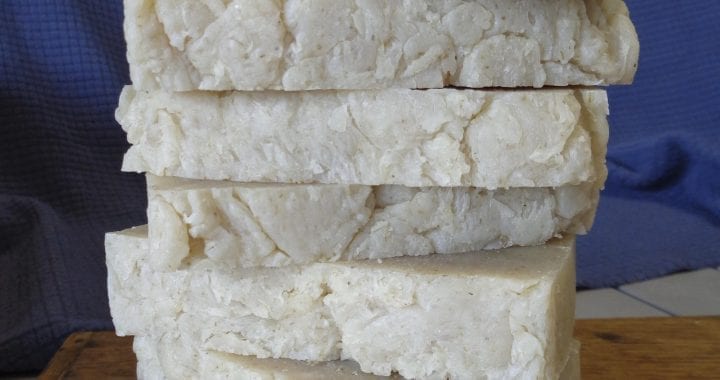
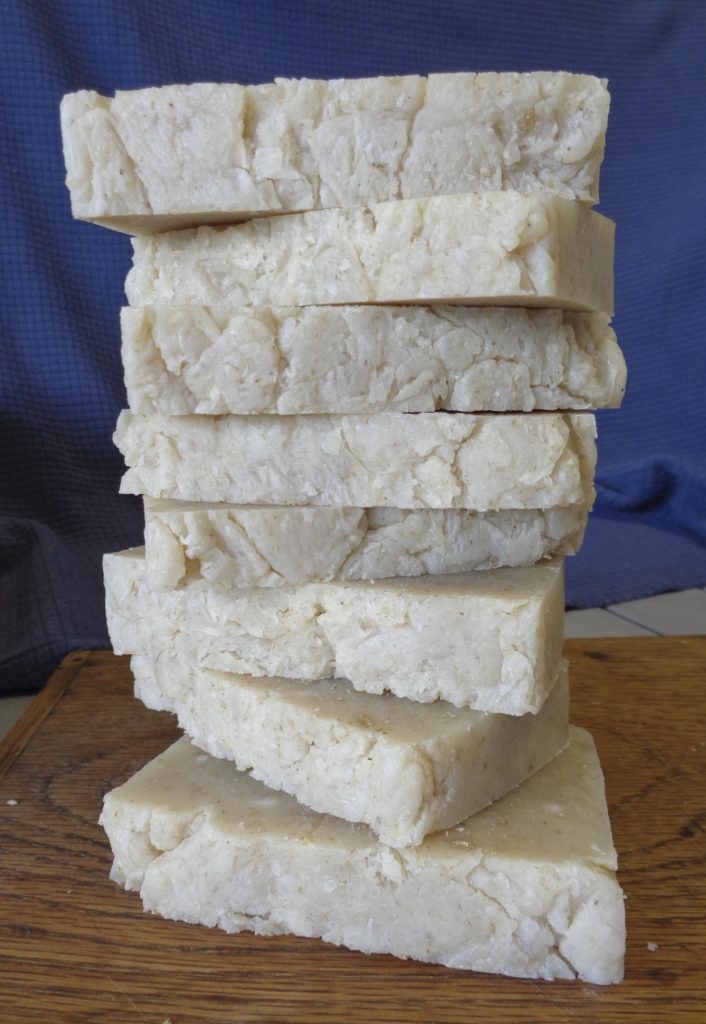
Pat down and smooth ( or not, I left this batch pretty rough because of the association with oatmeal ) then allow to cool until firm enough to cut. There are many devices available for ensuring straight and fancy cuts but when all else fails a sharp knife and a steady hand can do the job.
This batch gave me 9 bars of soap and 3 golf ball size balls made from the leftovers. The soap will be soft enough that rolling the leftovers in your hands will bring the pieces together.
So if you missed the deadline for Christmas or just like the idea that your soap will be ready to use right away, hot process is another option to put in your soap making kit and who doesn’t like something homemade for the holidays.
Oatmeal, Honey & Yoghurt Hot Process Soap from My Kitchen Wand
