
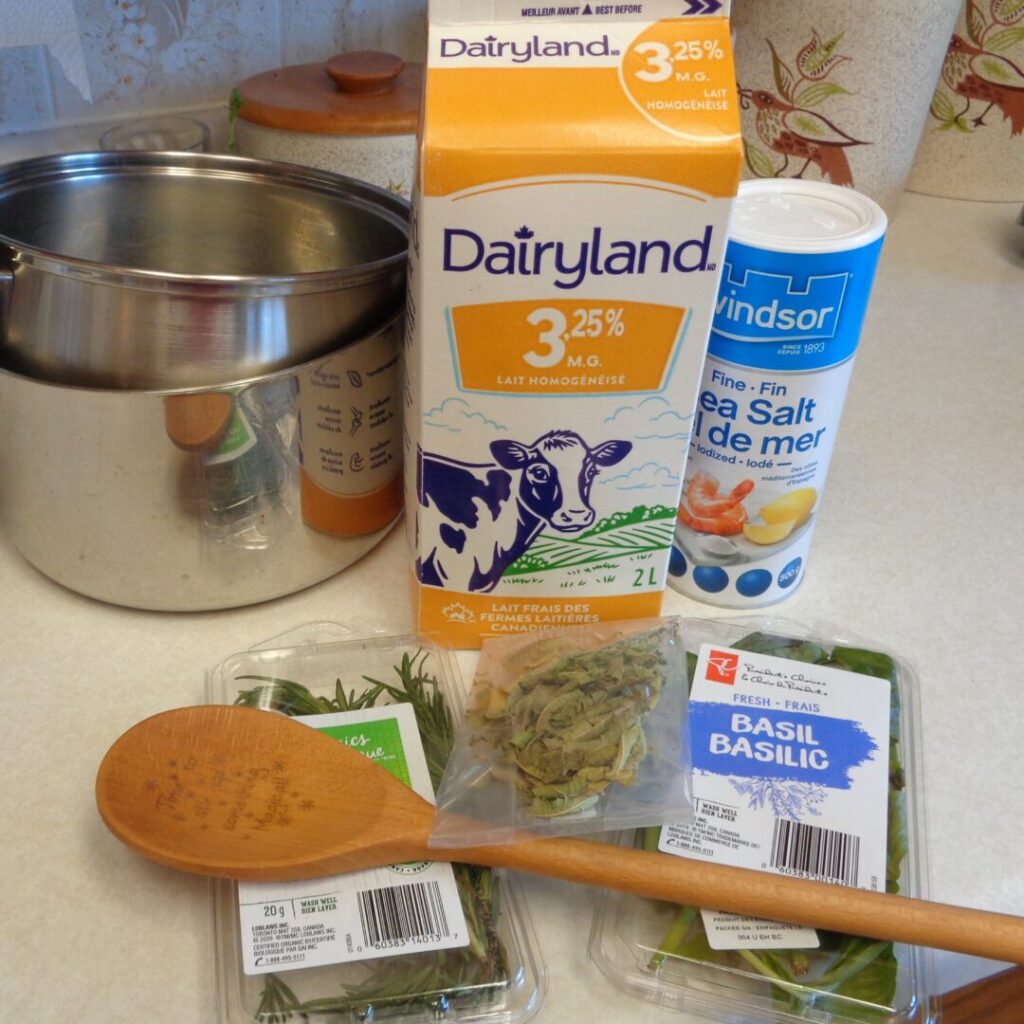
I chose lemon verbena, stinging nettle and rosemary for this Imbolc cheese. If you can’t find all on any one list of Imbolc herbs, it is because I picked and chose, based on what I had readily available and my intentions. The word Imbolc/Imbolg is from the Gaelic for “in the belly” and speaks to the promise of spring. Even when winter seems to linger, know that new life is on its way. Cheese is a sacred food of Imbolc and Brigid, in her maiden form is the goddess of the season.
It has been said that lemon verbena brings out our exuberance, verve, and a lust for life and laughter. The plant is attributed to stepping past forms of being that no longer serve, especially ways that have led to stagnation, resistance and conflict. Imbolc is a time for letting go and clearing out what no longer serves.
Nettles are a tonic in a busy life. They add energy and can act as a protective barrier. There gentle cleansing quality can support the body when it is under stress by strengthening the adrenal glands, something we can all benefit from after this last year.
Rosemary is another tonic and herb of purification. A 1671 cookbook by Robert May says it also “wards off negative emotions” and “is well loved by faeries“. Sir Thomas Moore in The Good Housewife, 1763, wrote that, “rosemary is sacred to remembrance and friendship”. It is used to encourage happiness and good fortune by blocking negativity and might be one of the reasons for the line in Practical Magic about “always keep rosemary by the garden gate“.
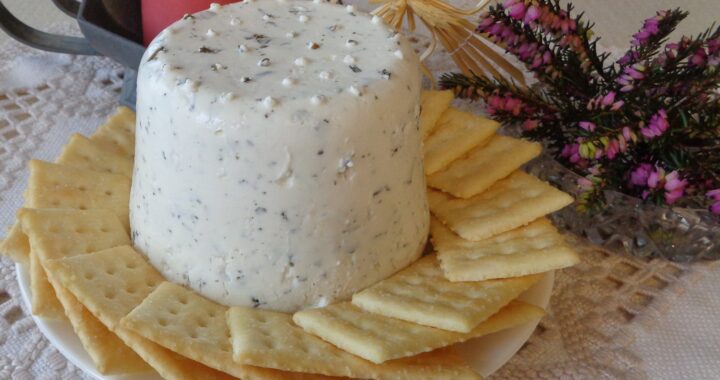
This is a simple buttermilk farmers cheese, perfect for this time of the year. It needs nothing more than heat and time and a few herbs that honour the season.
 You will need:
3.25% cultured buttermilk
rosemary
nettle
lemon verbena
sea salt
A willingness to let go is a good place to start with any Imbolc food preparation. Clearing away what is no longer needed and an openness to new growth are excellent intentions. Enjoy the sensation of warm water dripping off your fingers as you see what is no longer of value circling down the drain. “In my kitchen filled with care, I welcome, Earth, Fire, Water, Air.” Take a deep breath, hold…, hold, and release. Relax. Begin.
You will have noticed I have not included any amounts. That is because this is more about the process. The size of the pot will determine how much buttermilk can go in and how full the pot is filled, will be the other determinate. It does not matter how much goes into the pot. The process will be the same.
Pull out the double boiler or create one by putting a smaller pot inside a large one, as in the picture above. If you create one, make sure it is stable. I use a top pot with a two part edge. Smooth edges can slip and water can get into the buttermilk. Fill with enough water so the bottom pot will not go dry and the top pot is not touching the simmer water.
Add the buttermilk to the pot.
 There are two ways to add the herbs. The first time round I collected them into a small cheese cloth bag and placed the bag in the buttermilk. It is visible in a picture at the bottom of the post.
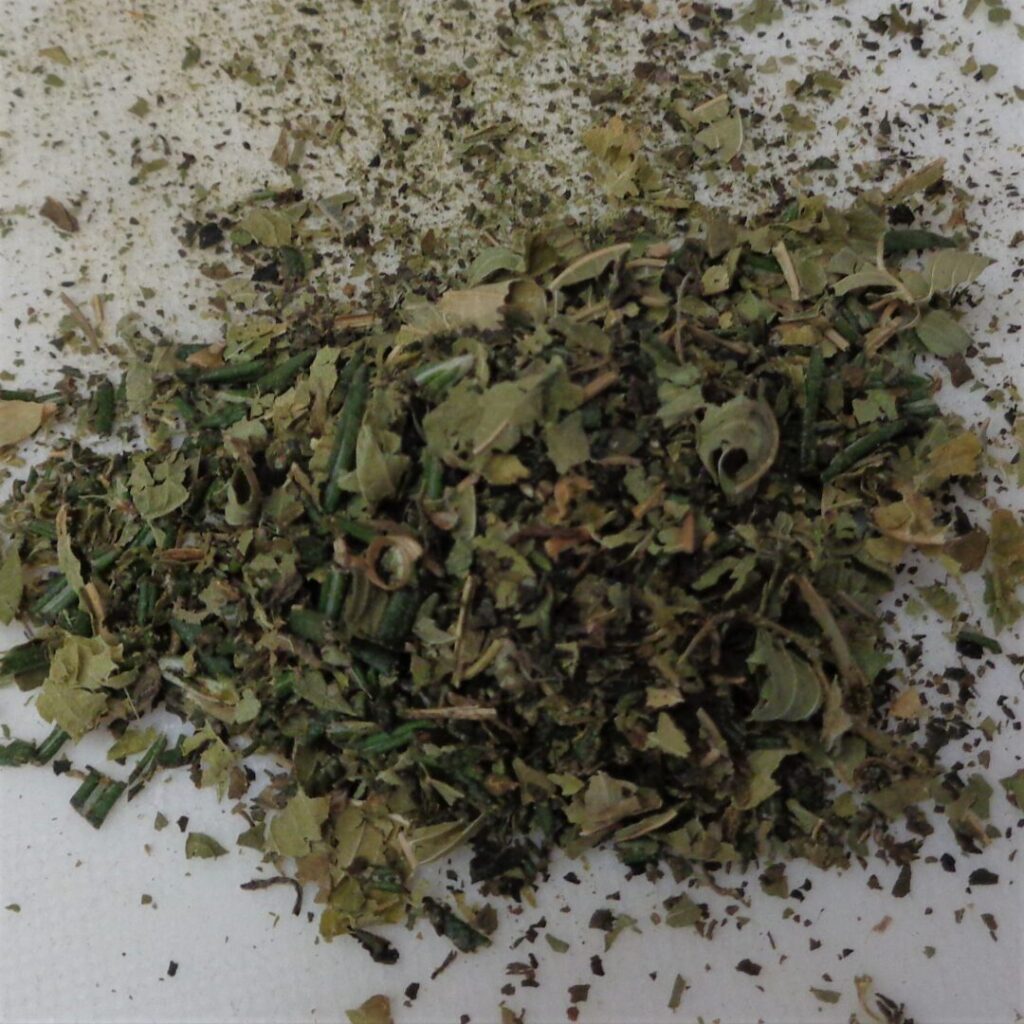
The second time, I chopped the herbs finely and place them directly in the buttermilk. I used about a tablespoon of finely chopped mixed herbs. This important especially for the rosemary.
There is no right and wrong. If you like the pieces of herbs to be in your cheese, drop them directly in. If you prefer the flavours but not the sprinkles, collect them in cheesecloth. If there is no cheese cloth in the house, a clean white cloth hankerchief is an alternate option.
I did not use cheesecloth the second time around for this one reason. I had used up most of the herbs on hand the first time through and had comparatively little lemon verbena left. Having it stay in the cheese would allow the flavours their input for a longer period of time. Why I was making a second batch is explained further down the post.
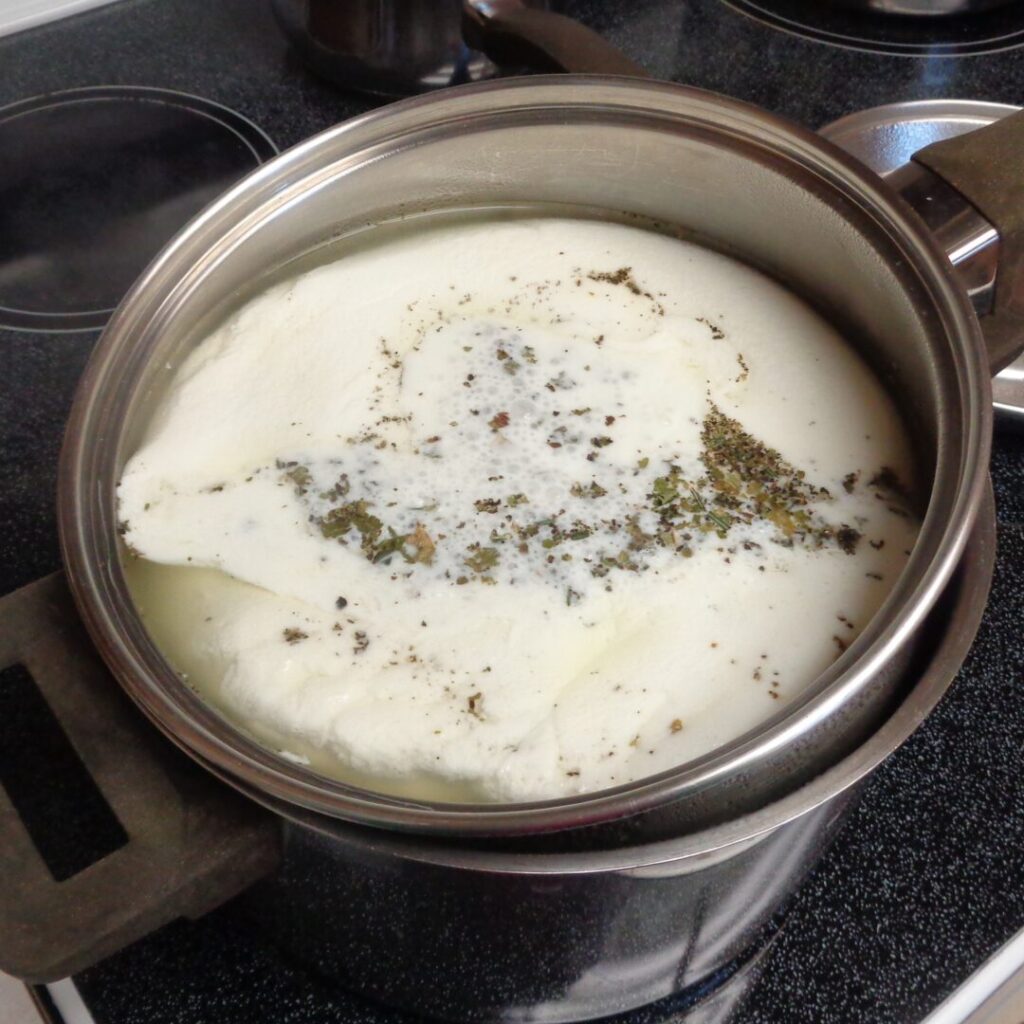 Place the lid on the pot with the herbs and buttermilk and let the water in the bottom pot heat.
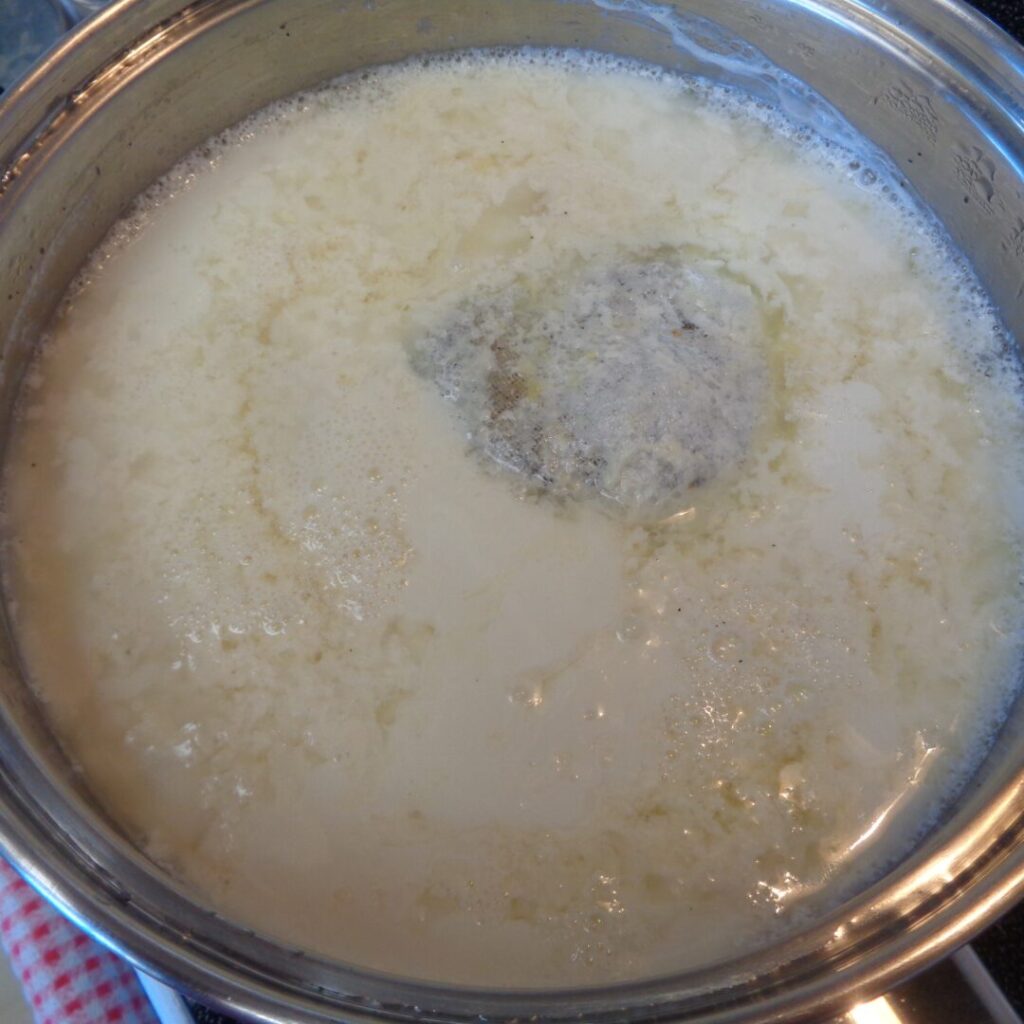
This is what is supposed to happen. Can you see all the clear whey around the edges?
How long this process takes, depend entirely on how much buttermilk is in the pot. I filled the pot with everything in a 2 quart carton, except about 6 ounces that would have been too much for the pot. Once the water underneath was simmering, it took 15 – 20 minutes to get to this stage.
A smaller amount of buttermilk in a smaller pot will take a shorter amount of time. Want to make a smaller amount? Go ahead.
There is nothing you need to do but not take the lid off the pot too often.
 When the buttermilk had separated, the next step is to drain the whey.
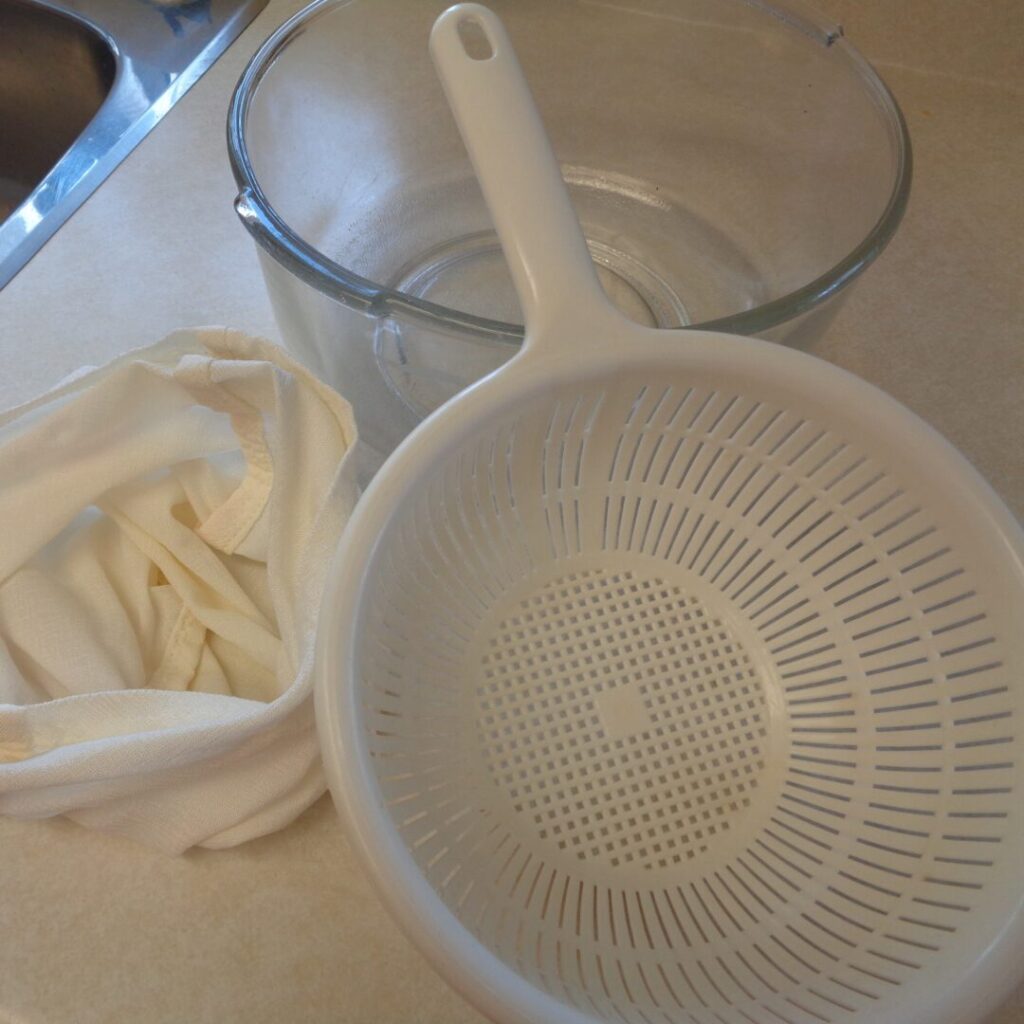
A bowl, sieve or colander and either cheesecloth, untreated muslin, or a cheese bag are needed.
This picture shows the cheese bag, used in the first batch. In the second, you will see the untreated muslin.
All three things will work. The only thing I would say about the cheesecloth option, is it needs to be good quality cloth or be prepared to use multiple layers in order to save as much of the cheese as possible. The whey should be relatively clear in the bottom bowl. If it is cloudy, know you are loosing bits that would otherwise become cheese.
The cloth goes in the sieve and the sieve goes in the bowl that catches the whey. There will be a need to empty the bowl, several times. It is a good idea to make sure the bottom of the sieve is not sitting in the whey or it will take longer for the whey to drain. The whey can be kept and used in bread making and other good tasty options.
 The whey will drip out of the curbs, through the sieve and into the bowl below. The decreasing level can be seen in this picture.
Speaking of pictures, it has been a dark and dreary few weeks here with only a few hours of reasonable for picture taking light. My apologies for some of the shots.
The first 4 cups will drain in the first few hours. Then the process will slow down. The longer the cheese drains, the firmer and less tangy it will become. It can drain in the fridge or a cold garage. Plan to allow several days of draining while the whey continues to drip out.
The volume will continue to get smaller and smaller. Using a spatula to clean the inside of the material once or twice will allow the whey to pass through the material a little more quickly. Sprinkle half a teaspoon of finely ground salt over the top and gently fold into the mixture. This is a good time to try a little bit and adjust the salt as needed. The more the whey has separated from the curds the less tangy the cheese will become. Putting the salt in too early will let it be rinsed out as the whey drips.
I transferred the milk solids into my cheese mold. It has holes that let the whey continue to drip out while letting the cheese settle into the shape of the mold. Cover the sieve to protect the cheese and allow the dripping to continue.
There is no real need for a mold. The cheese can sit in the sieve and continue to release whey. It might even be quicker. As the volume gets smaller and if you have a smaller sieve, transferring the cheese so it takes up less space in the fridge is an option. When the mixture is solid enough, transfer to a container and pack down. Store in the fridge for up to two weeks.
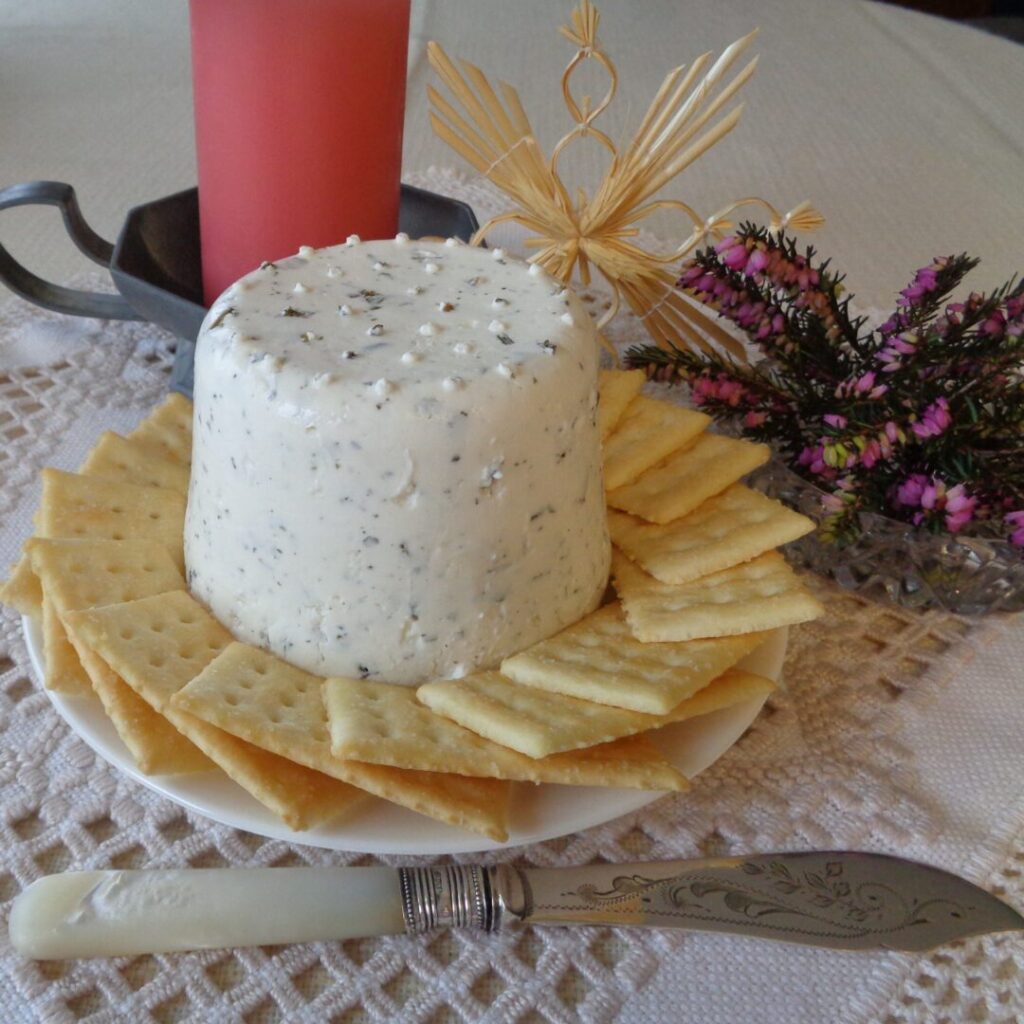 Imbolc Cheese from My Kitchen Wand
I have been on a bit of a tear these last few weeks, work wise. It all came to grinding halt while preparing this post, due to the fact that I was sailing along and didn’t pay attention to the details. This was supposed to be a buttermilk cheese recipes with Imbolc herbs (and by the end it was) but by looking at the first picture above can you tell where it started to go wrong?
If you said that is not buttermilk, you would be absolutely correct. Our grocery store carries two varieties of buttermilk, a one litre 1% butterfat option (which comes in an almost identical yellow coloured carton) and a 2 litre 3.25% option that is in a more brown less yellow carton. I opened the door pulled out the container without checking because the milk is usually three doors down and the adventure began.
 I tied up the herbs and got the pots heating, and heating and heating.
Nothing was happening. I finally decided to add lemon juice as that can help dairy separate milk solids and whey. It worked but when transferring to the cheese bag, it was obvious there were not enough milk solids. There was a little left in the carton so I tasted it and discovered… sweet milk!?
Taking everything back to the store after calling, I chatted with the manager on duty and returned the carton as requested. That is when I finally realized that I didn’t have buttermilk at all. The manager explained they had new staff and he had had several calls about buttermilk having gone “bad” that turned out to be the same issue.
Back home with buttermilk for take two.
 The smaller “blob” in front was from the first batch and was not something worth serving with crackers as it was not in the least spreadable.
The larger shape at the back was smooth and creamy and what I was looking for. It dipped for two days and ultimately shrunk down to compactly fit into my cheese mold. A third day would have made it a little firmer and would have dropped the volume down by maybe 1/4 inch.
These kinds of adventures happen to everyone at one time or another. Roll with it as much as possible and have a good laugh.
Life is too short to do anything else.
