
Seville oranges didn’t actually originate from Seville, Spain. They were brought by the Moors during the 900’s A.D., having spread westward after being introduced to the Roman Empire by India in the first century.
Legends hint that Hercules, stole the first oranges, named Golden Apples, from the Gardens of the Hesperides. It is an interesting connection as he is also considered one of the founders of Seville.
Norange was the original English name for what we today call orange. It came to us via the Spanish word “naranja” which itself is sourced from an Indian word, “naranyan”, which translates as “inner fragrance”.
The city of Seville, today grows over 30,000 orange trees that bring shade and decoration to the city. Because Seville oranges are bitter, people do not pick them and the trees stay looking beautiful until harvested.
Most bitter oranges are shipped to England for jam making, where the Spanish word for jam – “mermelada” was also imported.
Shop around for the best oranges you can find. The better the oranges, the better the marmalade.
 You will need:
3 pounds of Seville oranges
2 lemons (optional)
15 cups water
12 cups sugar
Marmalade takes time so start with an openness for the process. If you are looking for something a little quicker from start to finish try this Meyer Lemon recipe. Sarah Randell, food director at Sainsbury’s Magazine writes,” Always make marmalade when you’re in the mood. Don’t rush the process and enjoy the ritual.” To start the ritual, gather your ingredients and bring your focus into the present moment. Release any nigglies while washing the oranges and invite the compassionate spirits for each step of the way.
 Let’s start by covering rind size suggestions.
Everyone has a favourite. If smaller pieces are the preference wash and grate oranges to your desired size before juicing. If a small dice, as at the bottom of the picture or a slice such as in the middle is the preference then juice first and cut the peel afterwards. The larger the rind pieces, the longer they will need to cook to soften.
Whichever choice gets made ensure a scrub of the oranges and a few rolls back and forth before cutting. With the oranges at room temperature and several rolls, more juice will be released from the sections and getting as much as possible out of the oranges is good.
When grating there is no need to remove any extra pith (the white stuff between the orange skin and the fruit section inside.) If slicing and dicing, it is however an option if there seems to be too much pith for your preference. It is just about what you prefer, nothing else. I went with grating for this batch of marmalade as it is being made for someone who experiences challenges chewing.
That brings me to the underlining in this post. Instructions for making marmalade with large pieces of orange peel are in the underlined sentences and are things that I did not do when actually making this recipe with grated peel. My grandfather would have made the marmalade with larger pieces and used the steps underlined. As I am making this with very fine pieces of grated orange rind and do not need to cook the peel for several hours, the steps are a little shorter. I do still need all the pectin/liquid that comes from cooking the leftover bits. In simple terms read through the entire recipe, skipping the underlined parts if grating and paying attention to the underlined parts if chopping and slicing.
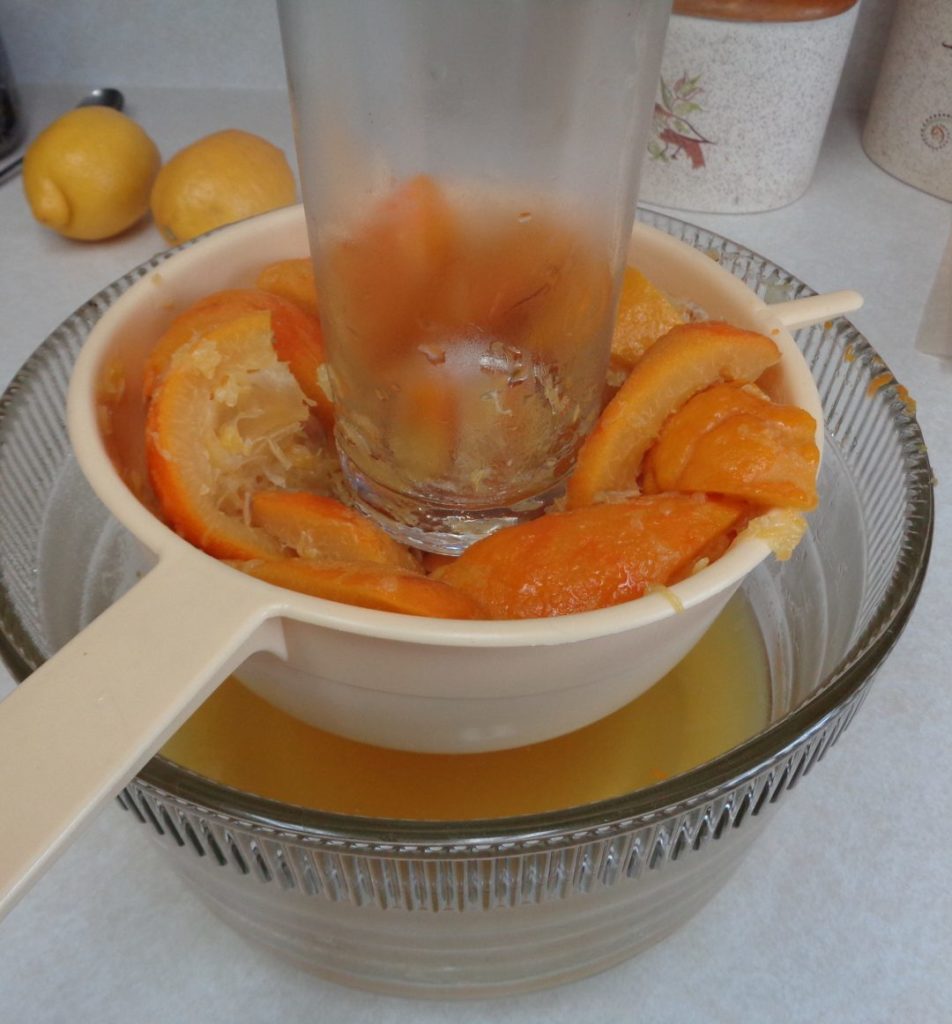
 Juice the oranges and strain into a bowl, then if choosing a larger size of rind, chop or thinly slice the orange skin into your preferred size. Add the grated zest to the bowl with the orange juice.
Lemons are a good idea to add, especially if the oranges have been frozen, as they bring more pectin to the mixture, making a proper set more likely. They will also subtly change the finished flavour. Whether that is good or bad is personal preference but for this batch, oranges unfrozen, I added lemon.
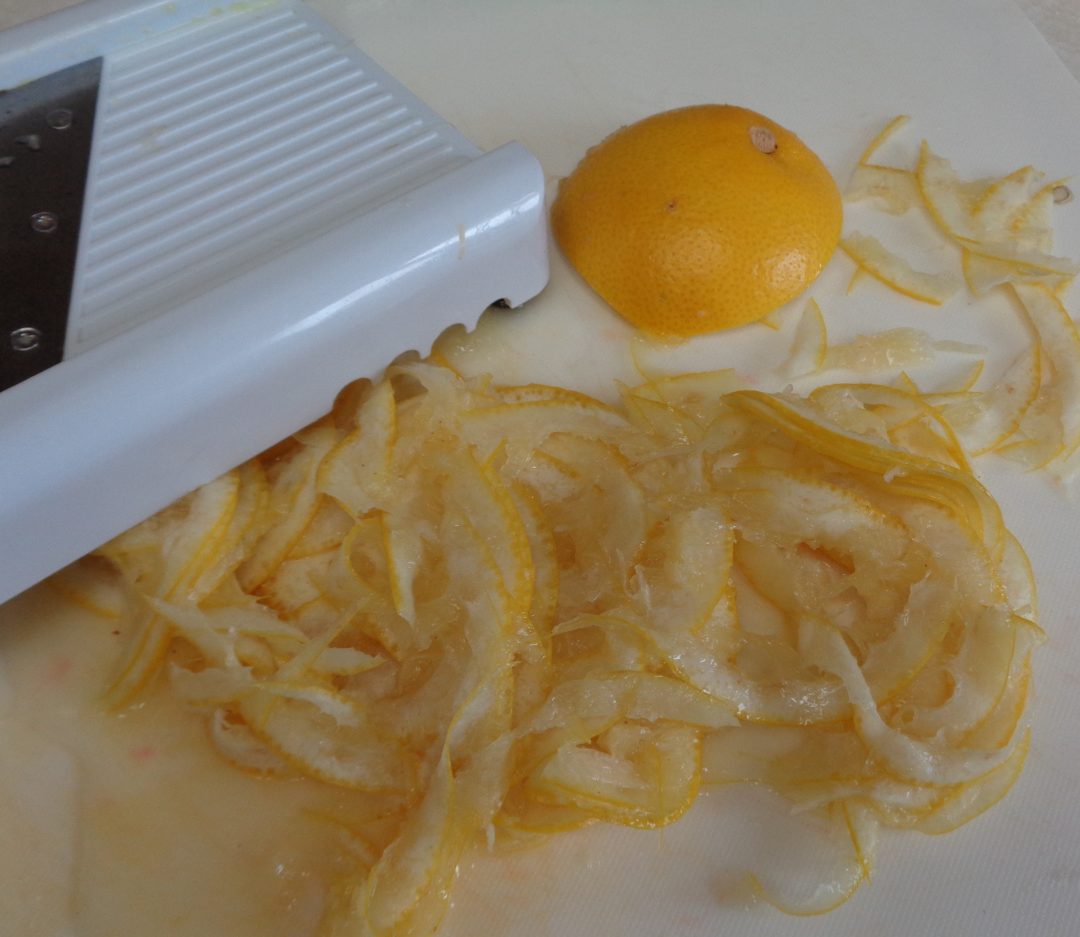
Wash the lemons and using a mandolin slicer, very thinly slice both lemons.
Do this on a board with a moisture trap rim so that all the lemon juice can be saved and added to the orange juice.
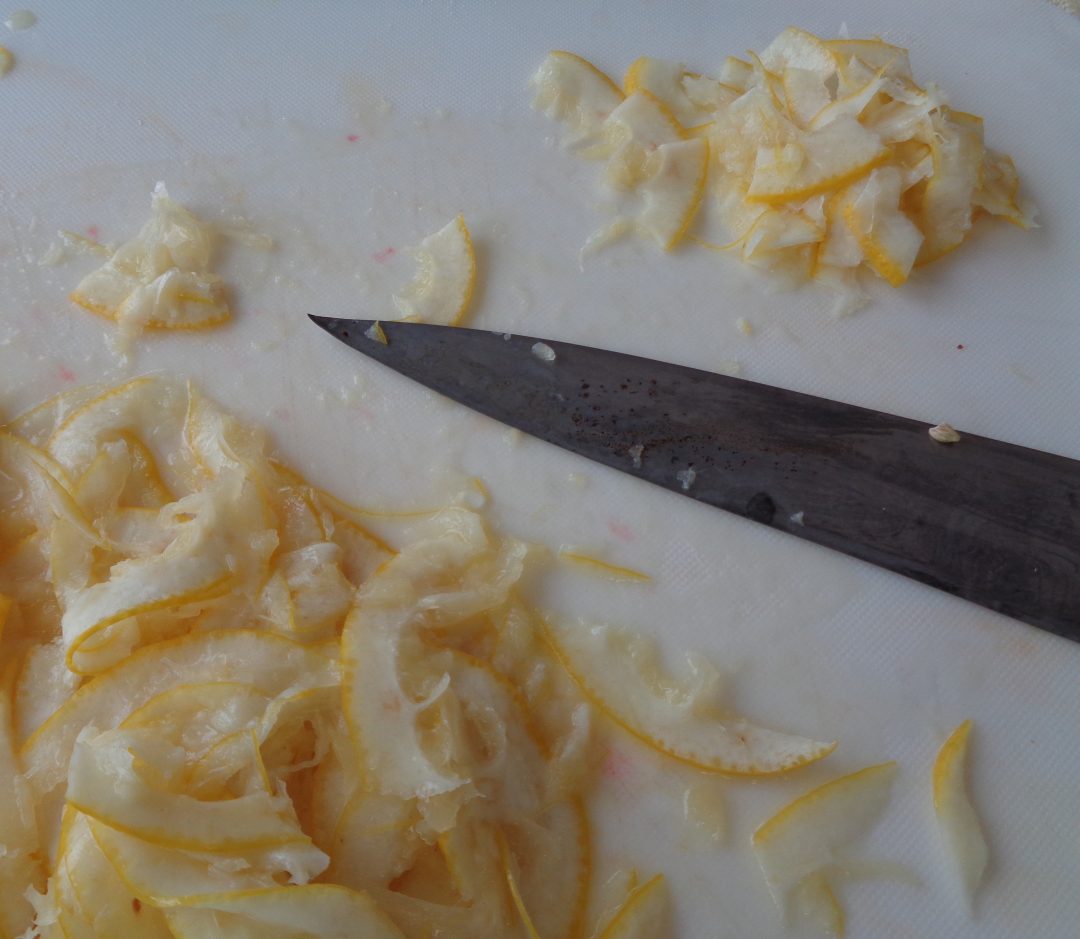
Additionally if it feels like the lemon slices are too large in comparison to the grated orange, cut the sliced lemon into smaller sections as seen below to bring the sizes more in line with each other.
 There should now be a bowl with lemon juice and sliced lemons sections as well as orange juice and grated orange rind. Cover and place in the fridge. See below if your peel is larger that a grate.
What is left, the rest of the pulp, pips and pith goes into a pot along with 15 cups of water. Let sit overnight to aid in the extraction of all the pectin.
If your choice was slicing or dicing larger pieces of peel then wrap the prepared peel in cheesecloth or put in a muslin bag and submerge in the water. Letting it sit overnight will soften the peel, reducing the cooking time the next day. Just keep the peel separate from what will ultimately be the leftovers so life stays simple.
 The following day, take the bowl of juice and grated peel out of the fridge and place on the counter.
Bring the pot of skins and pips to a boil, reduce the temperature to allow to simmer and let the mixture bubble away uncovered on a back burner for 90 minutes to 2 hours. How long the cooking takes will depend on how long the peel takes to soften. Larger equals longer.
This was my pot with lots of pith and orange sections as I had grated.
The peel is ready when a thicker piece is pressed it between thumb and finger, looks slightly transparent and feels soft when you rub it.
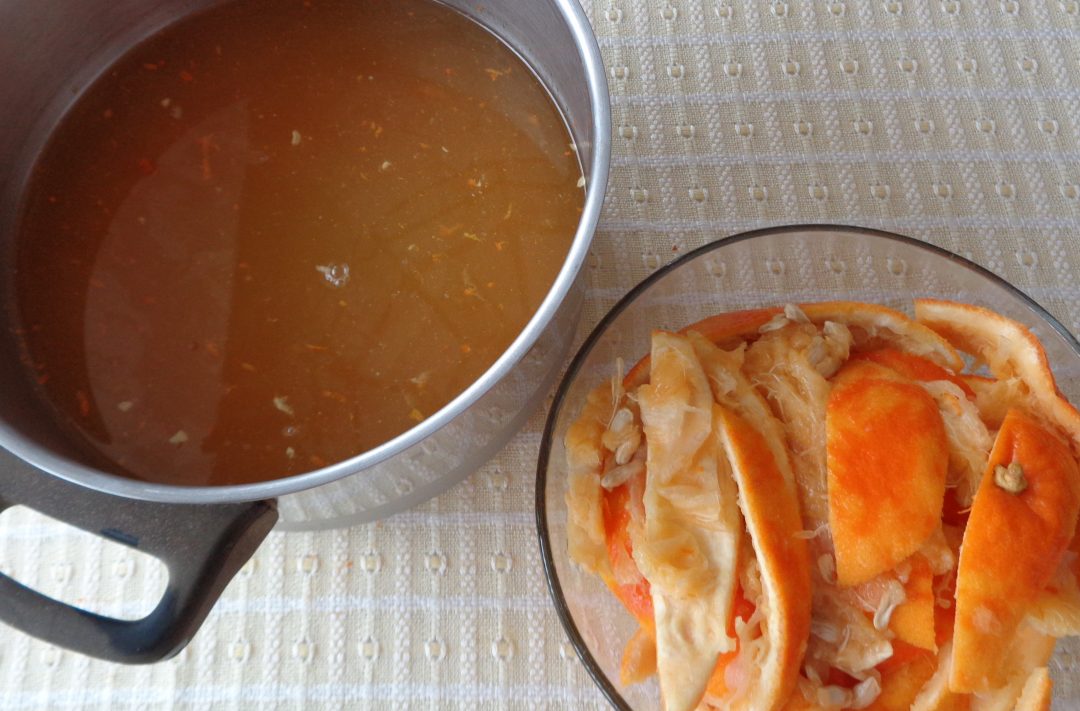
In this case I specifically mean the prepared peel in the cheesecloth. The rest of the orange pieces in the water will not be going into the marmalade.
 My grandfather would have said for thicker peel pieces, it needs to disintegrate when squeezed. The point here for thicker slices is that once sugar is added the peel will not get any softer so be happy with the texture before moving on to the next step.
Everything will be hot so allow to cool until the mixture can be handled or wear rubber gloves for this next step. Remove the prepared peel in the cheesecloth from the mixture. If you grated or zested your oranges, that is still in the bowl with the lemons.
Let the mixture drip through a sieve. Press down with a glass or something similar to get as much liquid out of the mixture as possible. There will be much less product in the sieve if the skin is grated rather than sliced or diced.
 My grandfather always preheated his sugar. He said it cut the boiling time as warmed sugar did not bring down the temperature of the other ingredients. Place the sugar on a cookie sheet and place in a preheated 220 degree F. oven.
This is also a good time to place three or four saucers in the freezer for testing.
Rinse out the pot, add the liquid and juices and peel/zest (cooked or uncooked).
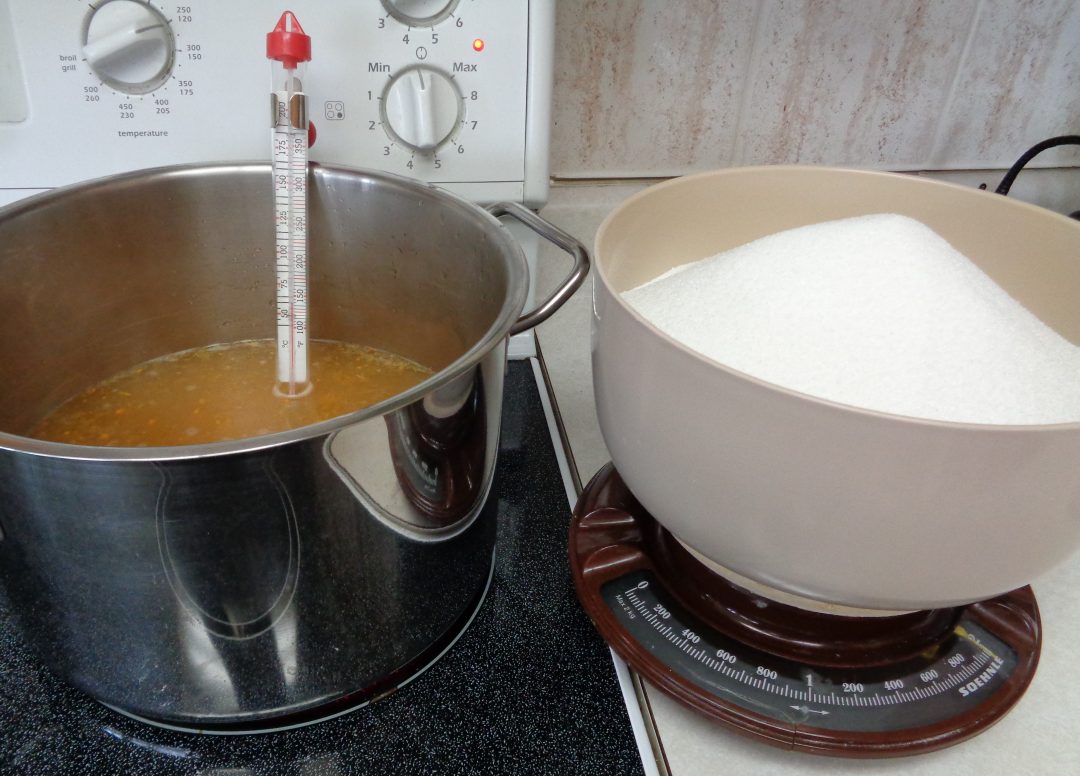 Bring the liquid to a simmer and allow to bubble for 10 minutes. Take off the heat. Check the lemon pieces for transparency. Return for a few more minutes if needed. Add the warmed sugar. Stir with a wooden spoon. Once the sugar is fully dissolved, return to the heat and raise the temperature, bringing the ingredients to a boil. Stop stirring and let the mixture bubble until it reaches 220 degrees F.
How long that takes depends on the size of the pot in relationship to the volume of what is inside. Ensure there is enough room so the marmalade can double in volume as it boils and not boil over.
If there is an issue take the pot off the heat rather than stir the marmalade down. Once the volume has reduced it can be placed back on the heat. As the mixture thickens it will be less likely to boil over.
This applies also to testing the marmalade. Take the pot off the heat while testing so that the marmalade does not overcook while waiting for the set test to complete.
To test, first allow the bubbles to subside. Take one of the saucers from the freezer and spoon a teaspoon of marmalade liquid onto it before returning the plate to the freezer for 1 minute. If set point has been reached then your finger will create a wrinkle along the surface of the marmalade when pushed forward. The marmalade will stay wrinkled when your finger is taken away. If that doesn’t happen and the marmalade flattens out again, return the pot to the heat. Bring the mixture back to a boil and wait two minutes before re-testing. This process can be repeated until set point is reached, which is why putting several saucers in the freezer before starting is a good idea. Technically 220 degrees F. should be set point on a thermometer but it is always good to have a backup verification as once bottled and sealed, it is additional work to open, clean, reboil and rebottle.
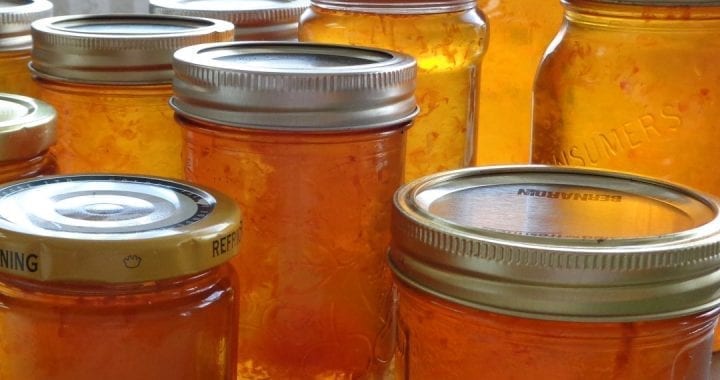
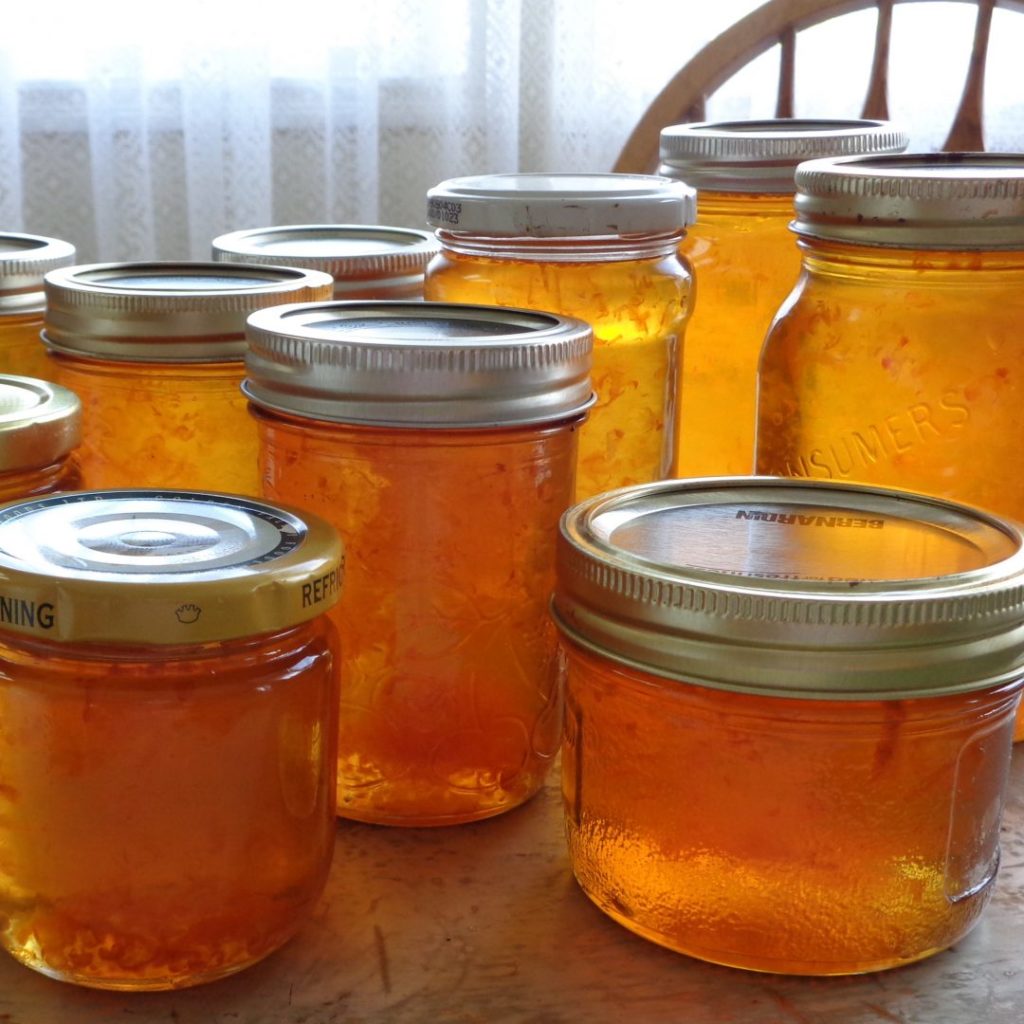
Allow the mixture to cool and thicken for 7-10 minutes and proceed with filling and properly sealing.
Enjoy on toast and scones or in a Marmalade Tea Bread.
 Seville Orange Marmalade from My Kitchen Wand
