

Beltane celebrates reproduction and that is reflected in the use of flowers for decorations and gift giving. In very simple terms the purpose of flowers is to attract pollinators so that fertilization can occur and the plant will be able to create seeds for the next cycle. Birds, bees and other insects are drawn by the strong scents, bright colours and sweet nectar and move pollen from one flower to another. Once pollinated the plant moves on to producing its seeds, sometimes within fruits and the flowers have completed their task. In pagan thinking this is the time where the transition from maiden to mother energy occurs so Mother’s Day being celebrated the following week makes perfect sense.
Children often make baskets to fill with flowers or other treats for May Day morning and here is a simple cone basket to make for your early morning gifting.
You will need:
Cardboard or some form of stiffer paper (I used an old file folder)
Pretty paper napkin or ribbon ( optional )
Ribbon
Tape
Stapler
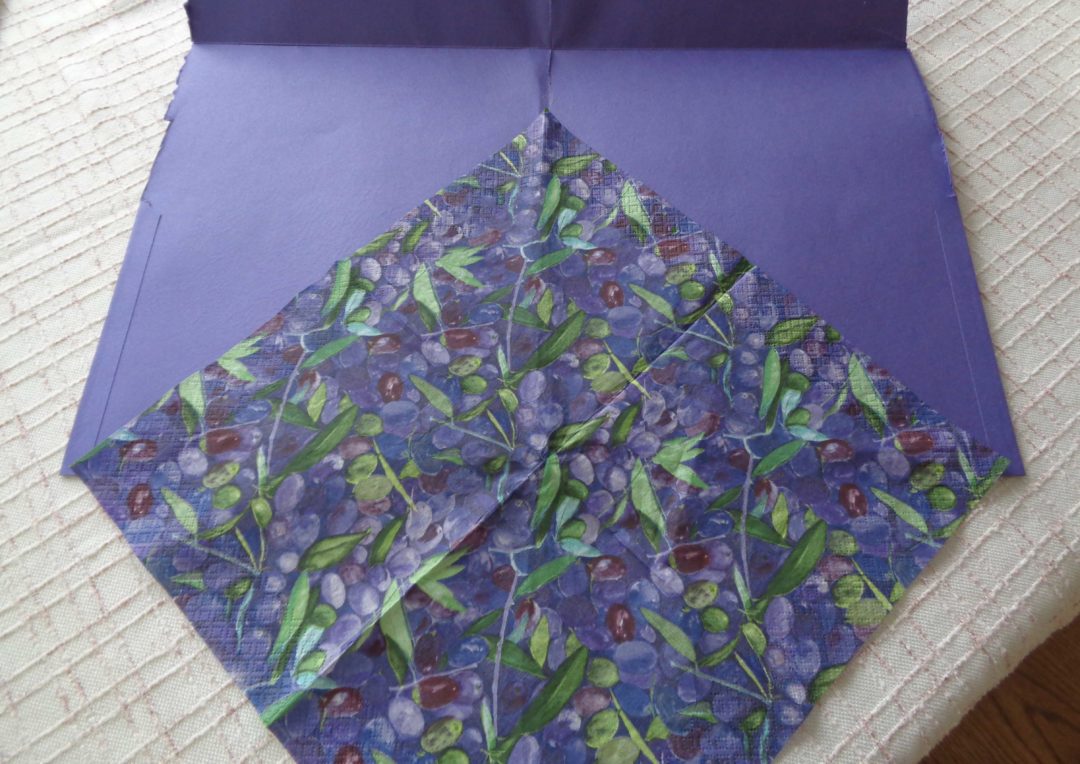
Begin by deciding on the decoration. My choice was to use a two ply napkin which I took apart, saving the white second ply for later. You (or the kids) may want to paste decorations onto the stiffer paper or draw pictures. Those things will determine whether decorations go on first or later and what colour to choose for the cardboard. I happened to have a old purple file folder that matched the napkin colour so it was easy.
Place the napkin on the carboard as shown and draw a cutting line from the point of the folder to the tip of the napkin on both sides. Cut the folder into the triangle you have marked. For me there was about 1/4 inch plain purple cardboard showing which make for a nice edge to the cone basket.

Place a loop of tape between the napkin and the cardboard at the tip of the triangle then turn the triangle over and repeat. This will fold the napkin around the carboard and keep it secure while the cardboard is shaped into cone.
The next step is to roll the outer edges into the middle just as if you were making a piping bag, point to point. Use a staple to secure the one side then repeat with the second side and add an additional staple.
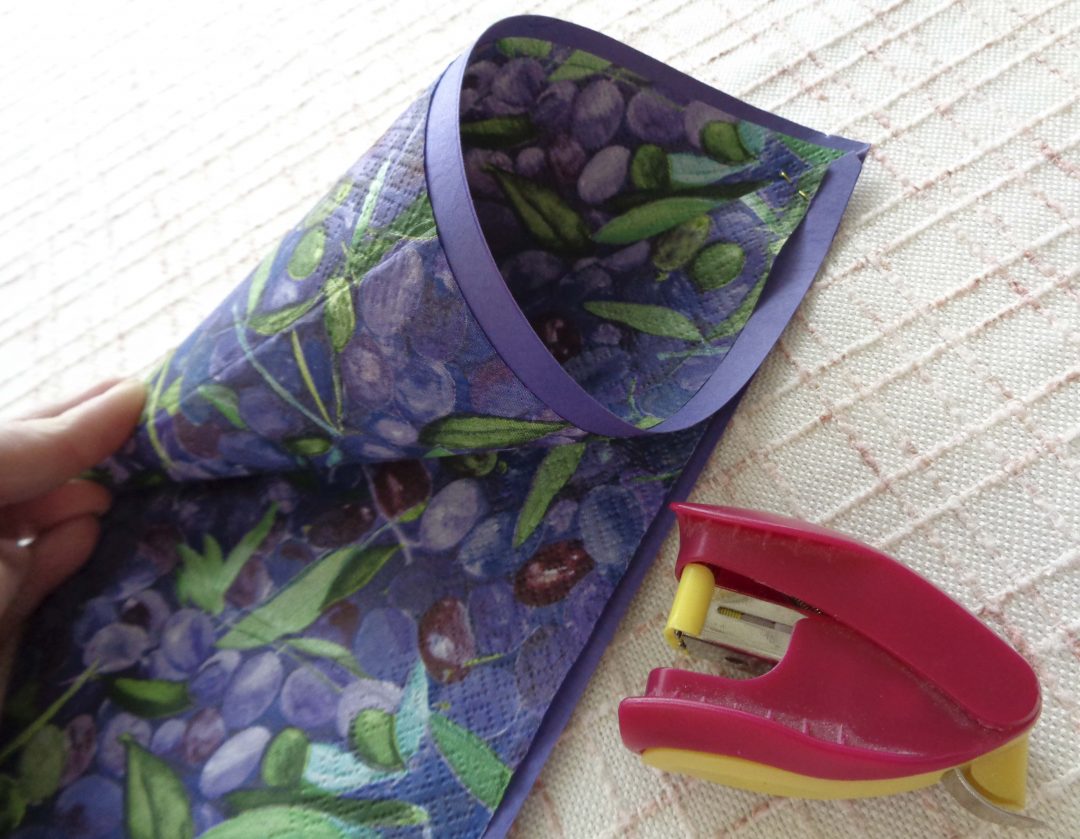
Keep your focus on the bottom tip, making sure the rolling is tight and the hole at the bottom is tight ( just like a piping bag ). You may find the top tips do not come together quite as well as a piping bag. That is because the carboard is stiff and the angles are slightly smaller than precut pieces of parchment paper. I didn’t worry about it and got a double trim line I like. You can see it in the pictures below.
If you have decided to not go with the napkin option, now is the time to decorate with ribbon, lace, art work, a message or anything else you have handy.
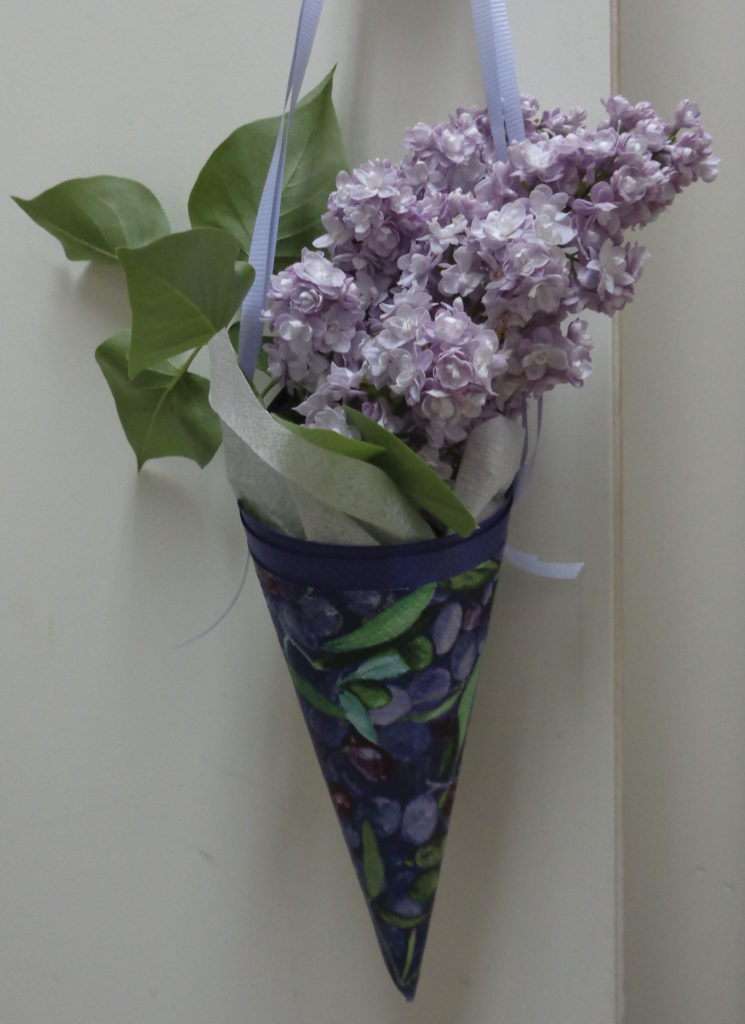
Add some matching ribbon to the sides of the cone, attacjed with a stapler and use the backing tissue ( 2nd ply ) to “fluff” the cone. You will need enough ribbon to hang over the door knob and still have space for the flowers or whatever you are adding.
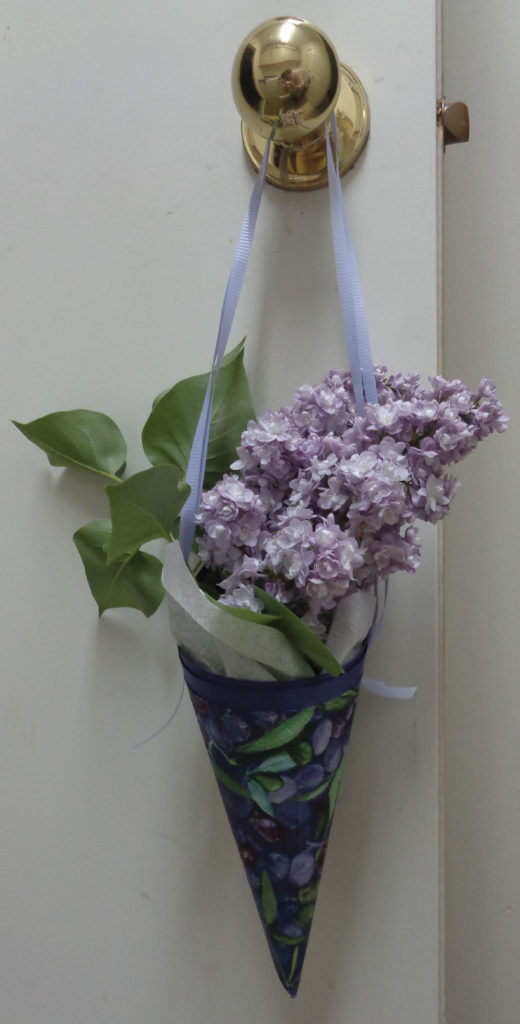
Pick complementing flowers and wrap the stems in wet tissue and a plastic bag before adding to your May baskets. Deliver before the flowers wilt.
Hang your gift on the door knob, ring the doorbell and run like……let’s go with the wind. May baskets are intended to be anonymous.
It is also a lovely way for children to give to adults and learn that giving can go both ways and that they can participate, even at a young age.
It is creative and inexpensive. The idea is to use what is around you, not to head out to the flower shop.
It will hopefuly bring a smile to the face of the receiver, always a deed well done.
Simple May Baskets from My Kitchen Wand
