
This is a post about temperature in candlemaking. In the past I have shared candlemaking options as it related to rolled beeswax and melt and pour type waxes. The next few minutes were put together to show you why sometimes, the finished candle does not come out of the mould as anticipated.
You can skip the technical bits and just go to the picture at the bottom to get the point but there are several other tips along the way.
During the year, I teach candlemaking classes and generally each summer gather together all the left over bits and pieces, sort them out, combine, remelt and get ready for the following season or make a bunch of candles to enjoy in the house over the “dark times”.
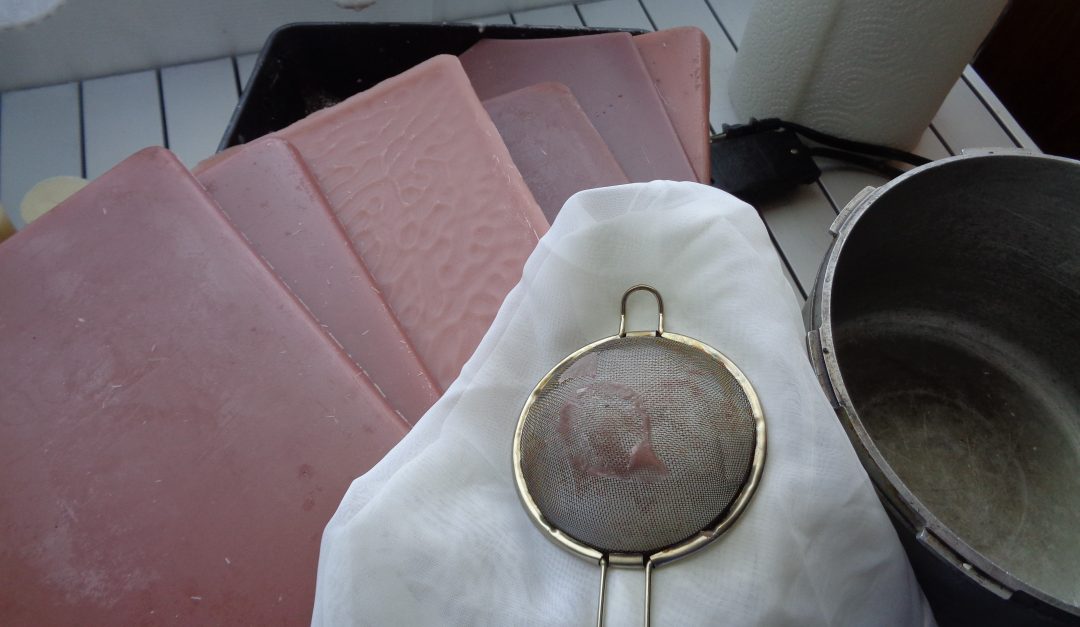
Paraffins together, soy together, vegetable waxes together. Waxes are reusable but repeatedly melting the same wax is not a good idea. The oils are affected by the melting so adding a little new wax is a way to keep the older mixes viable. In the picture above, I have gathered up all the old paraffin, melted it together and then using a sieve with cloth lining to clean the used wax and keep all the little bits and pieces out, poured 1/3 inch sheets into 9 x 12 baking pans and left them to cool over the course of a day. The best option I have found for lining the sieve is fiberglass curtain material, easily found in a secondhand thrift store and usable for years.
I poured off some of the melted wax to make sheets and then added more bits and pieces. They darkened the colour. You won’t really know what colour you will have until the first sheet is cold but if you have a batch that could use a little tweaking of colour, now is the time to add any dye chips of your choosing.
 Once the wax is cold, take a hammer to it, cracking it into smaller pieces. You can see the difference in colours a little better in this picture.
Wick your mould by pulling the wick through the hole in the bottom of the mould and then tieing a knot around the balancing security stick that sits on top. This is a 3 inch wide mould, 4 inches tall. I am using a # 1 wick.
Holding the stick to the top of the mould, turn everything over and pull the wick taunt so that it sits straight.
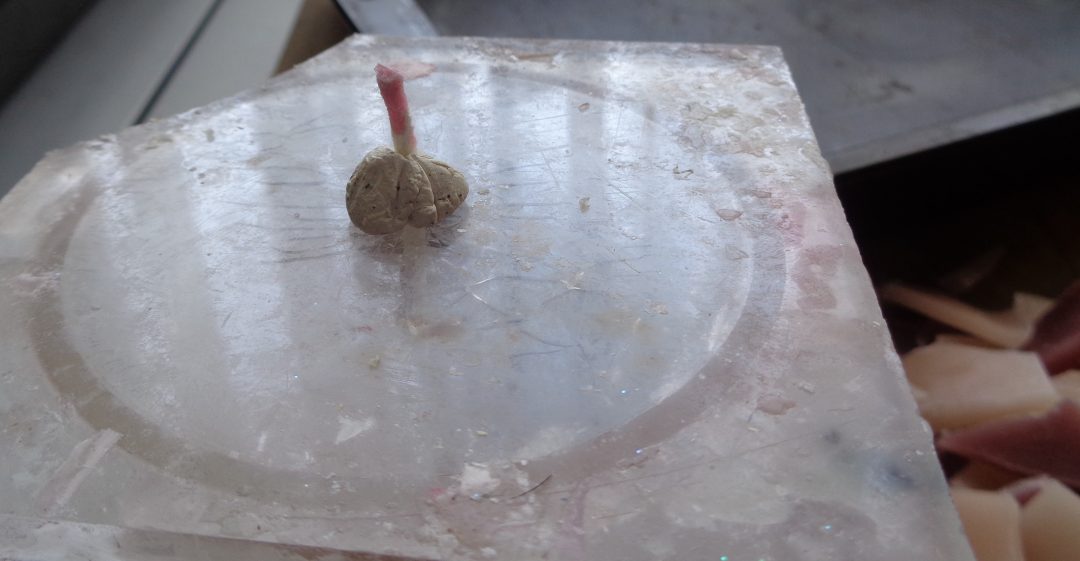 Secure the wick with any one of a number of methods. Here I am using mould sealer rolled into the shape of a cigar and wrapped around the wick.
Turn the mould upright and press down onto a lipped cookie sheet or cake pan. During the days I had production space, I was not as concerned about dripping wax but at home it is safer to keep any run away wax from improperly sealed moulds coralled.
 Now fill the mould with the broken
 chips, making sure that there are no large empty spaces and that the wick stays in the center of the mould. The nice thing about using clear moulds is that you can see what is going on inside and can adjust the pieces as needed. If you are using a metal mould, then check the pieces as they go in. Don’t just let them fall in where they will. Ideally you are looking for about 1/2 solid chips and 1/2 liquid wax to “bind them all”.
Over filling the mould with chips is an option for several reasons. Firstly, some people like the effect of a spiky top and prefer to burn the candle from that end. Secondly as you will see below, the chips will sink into the candle as hot wax is added.
This process is called stained glass or cathedral technique and is a good way to use up leftover wax, my favourite kind of wax. Paraffin is the best wax to use for this technique as it is the only wax with a translucent option for filling.
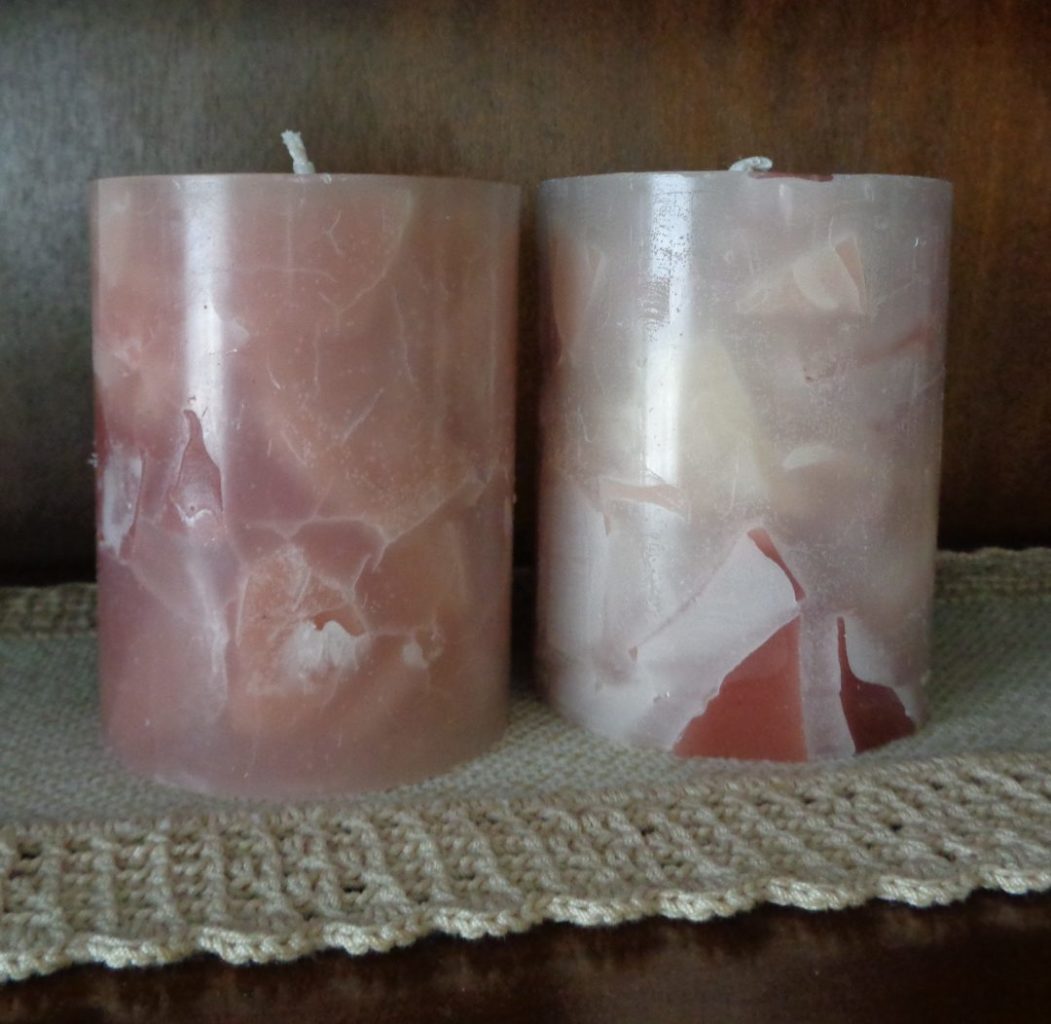
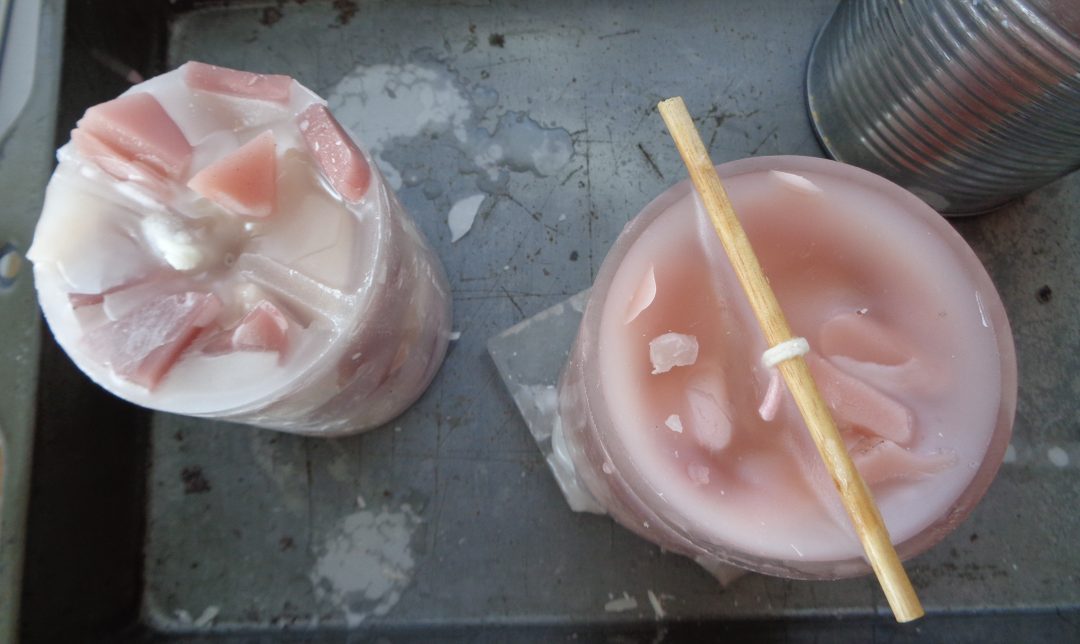 Here are two candles, made exactly the same way. After being filled with chips, the space inbetween was filled with liquid wax.
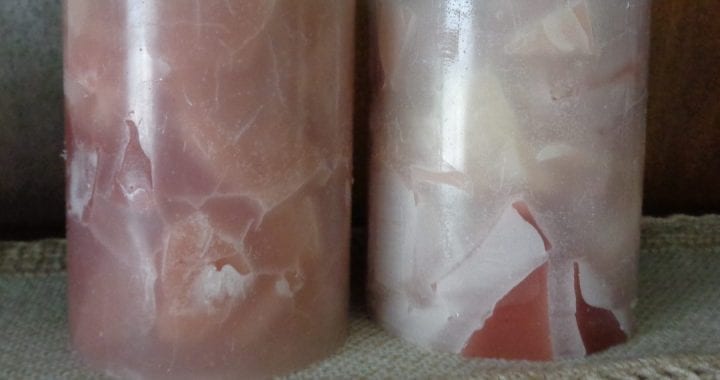
The one on the left was poured at a cooler temperature (180 F.) and you can see that it looks white with coloured chips visible, sticking out. There is a little indentation in the middle, created by the contracting liquid fill.
The candle on the right was poured at a higher temperature (220 F). It will have a bigger contraction hole in the middle when cool but the other difference is that the chips will share their colour with the liquid fill and the entire candle will finish up as a variation of the colour of the chips.
Each type of wax has an optimum pour temperature which is different than its melt temperature. A liquified wax usually needs a few extra degrees of heat to achieve a thinner viscosity and to pour nicely into a mould. If the mould is empty one temperature can be used. If, like we are doing here, the mould is filled with solid chips. The chips will ensure that the wax cools more quickly so a higher temperature can be used to compensate. Read any information about the wax you are using to know the suggested temperatures and ask where you purchase your supplies for any additional information needed.
 This is the hotter poured candle, cool. The hole down the middle is normal and can be filled now. There will always be a slight difference in the colour of the second fill.
You can also see that the chips have been pulled down into the candle as it cooled.
Another way that temperature plays a roll is that a metal mold will release heat more quickly than an acrylic mould, cooling the candle down in a shorter period of time. The more quickly the wax cools, the less time it will have for colours to combine and to release air bubbles.
 Air bubbles you say?
Yes! Pouring liquid wax into a mould produces air bubbles and when the wax is cooler it is not possible for the air to get out through the thickening wax. The air bubbles get stuck along the inside wall of the mould and when the candle is taken out of the mould all the trapped air bubbles break, leaving a rough surface on the candle and a dirty mould. Something I refer to as a grunge look. You can see what happens along the side of the candle on the right here, the one poured with the cooler wax.
 You can also see what the bottom of the candles look like above. The one on the left had the big hole and was topped up. Both candles had there bottoms trimmed with a sharp knife until they sat flat. Melting on a hot flat surface is another way to bottom your homemade candles. Please also take note that the knot has been cut out of the candle on the right. The security knot will be the biggest barrier to getting a flat candle so digging in and cutting it out is a good move before melting or trimming. I am showing you the bottoms because in my years as a chandler, one of the very first things that any potential customer oe recipient would do is turn the candle over and smell it, so having the bottoms look good was almost more important than the candle itself. In production, I used a miter saw but at home there is really just cutting and melting….or covering the bottom with a label.
This is the candle with the hotter pour undergoing one last temperature related process. The fill I used for both candles was paraffin called 1245. A more typical candle wax is 1242 but I have always liked the more translucent look of the wax and in some of my specialty candles that little extra bit of heat needed to liquify the wax was useful. This candle is sitting in a bath of ice water and since there has been no strengthening additives, like stearic acid or polybar melted into the wax, two things happen, the wax has a see through effect and under cold conditions, it cracks adding another dimension of interest to the finish of the candle.
Before we finish up, I would like to go back to temperature one last time as it relates to moulds. Candle moulds can be made from all sorts of materials, rubber, silicone, acrylic, metal and plastic to name the more common options. Each material holds heat differently. Plastic for example that is vacuum formed does not do well at high temperatures as it will get soft and loose integrity. Using the technique shared here and pouring at 220 F., would not be advisable. Acrylic moulds come with different thicknesses of walls. The thicker the walls, the longer the wax inside will take to cool down. Sometimes a good thing and sometimes not. Silicone is a better choice for sticky beeswax that does not like getting higher than 175 degrees. Get to know the optimum conditions for your moulds in combination with your wax of choice and you will be improve the chances of being happier with what comes out of the moulds.
Here are the two finshed candles, one with a cracked shiny surface where the colours have melded together and the other with a rough rustic finish and less colour bleed. Identical material and process. The only difference was temperature.
Temperature and Candlemaking from My Kitchen Wand
