
May Baskets are a tradition that has gone through many changes. For the last 200 hundred years, much of the focus has been on children or sweethearts. In some places the custom was to knock on the door, yell “May basket!,” and then run. If the giver was caught by the recipient, he or she was entitled to a kiss. During the depression of the 1930’s, children in some cities, would use handmade flowers created from wall paper samples instead of real flowers.
Going further back in history, these baskets were made at the end of April. The filled baskets are given on the first of May, in a tradition connected to Beltane. Beltane, like each celebration of the wheel of the year, starts at sundown and continues through the following day. Flowers and Beltane go hand in hand. Spring is turning to summer in the Celtic calendar and many plants are in bloom, offering their pollen to bees so that the seeds and fruits of the next steps in the cycle will bare fruit. Flowers had a strong sexual connotation in pagan world views, hence the connection to sweethearts. They were also something made, often by young people and given to friends and neighbours as a caring wish/reminder for the coming bounty.
If a simple May Basket using a piece of cardboard and a paper serviette is more to your liking, try this option for fresh cut flowers.
You will need:
egg carton or egg flat
hot water
food colouring (optional)
oil
strainer
bowl with holes for mold
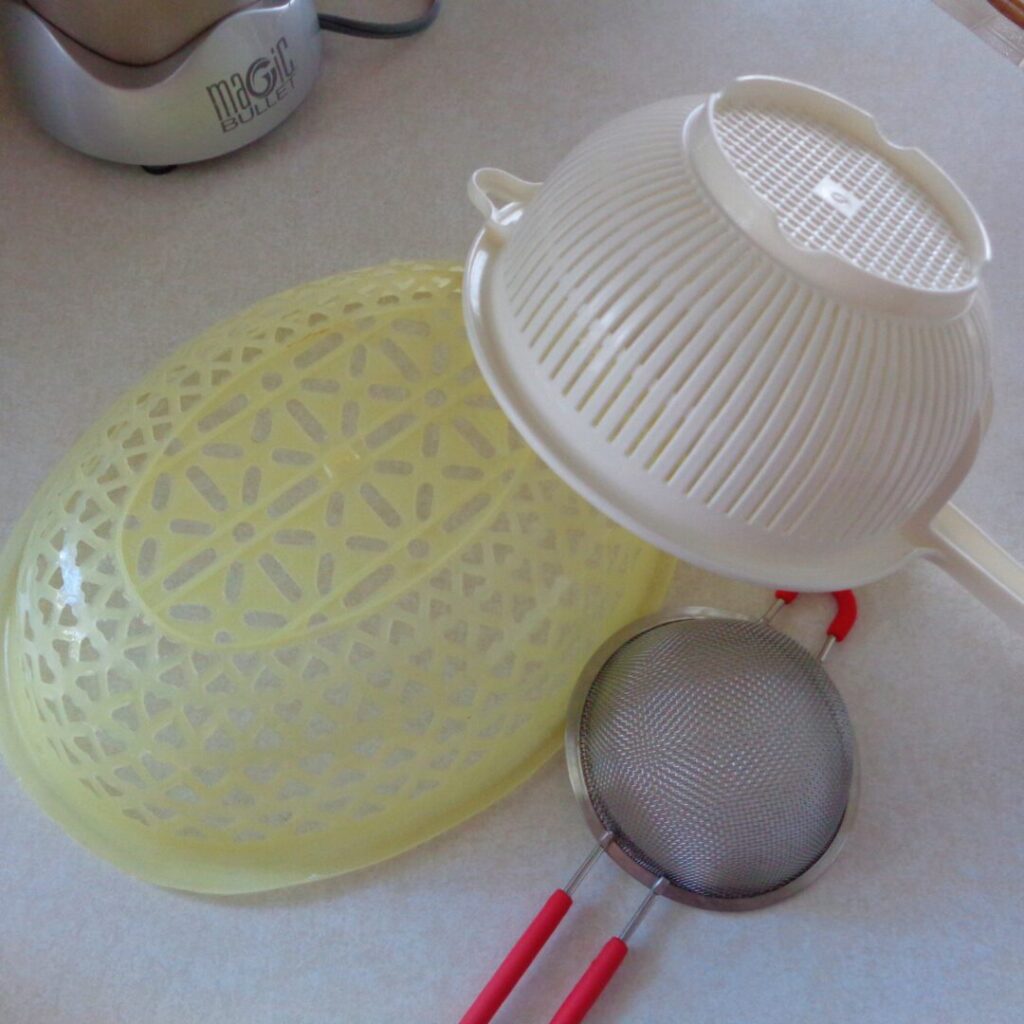 Let’s begin with a little chat about what to use as a mold. I have used all three containers in the picture. The fastest unaided drying times come when the air can get at both sides of the project, hence the holes.
By unaided, I mean that they do not end up in the oven. If they do then on the very lowest heat possible ( under 200 degrees F) and with the heat turned off after the baskets go in. All these have survived being in the oven at one time or another but it is important to be aware that melting is a possibility.
The oval basket is currently drying over a heating vent that is in a tile floor and that seems to be working too. I am not ready to risk letting a basket dry over a vent in a carpet.
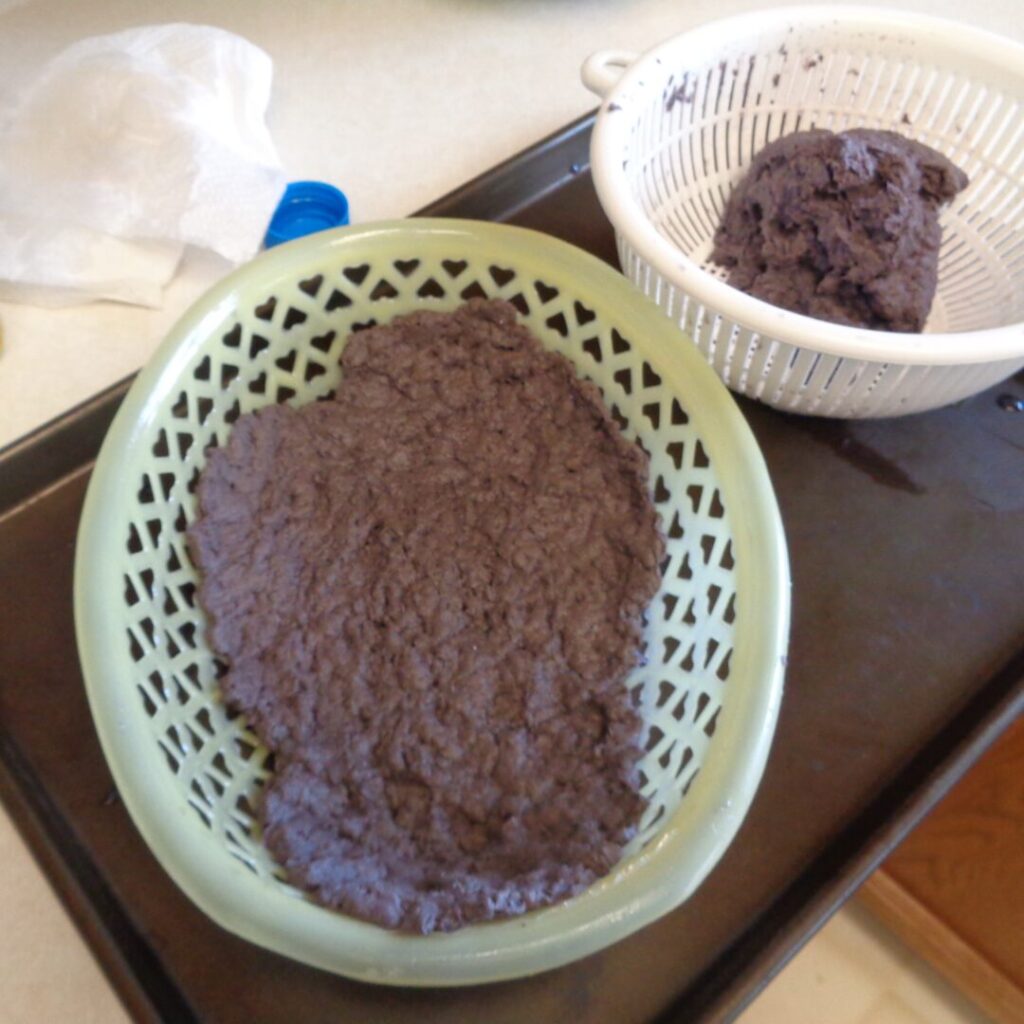
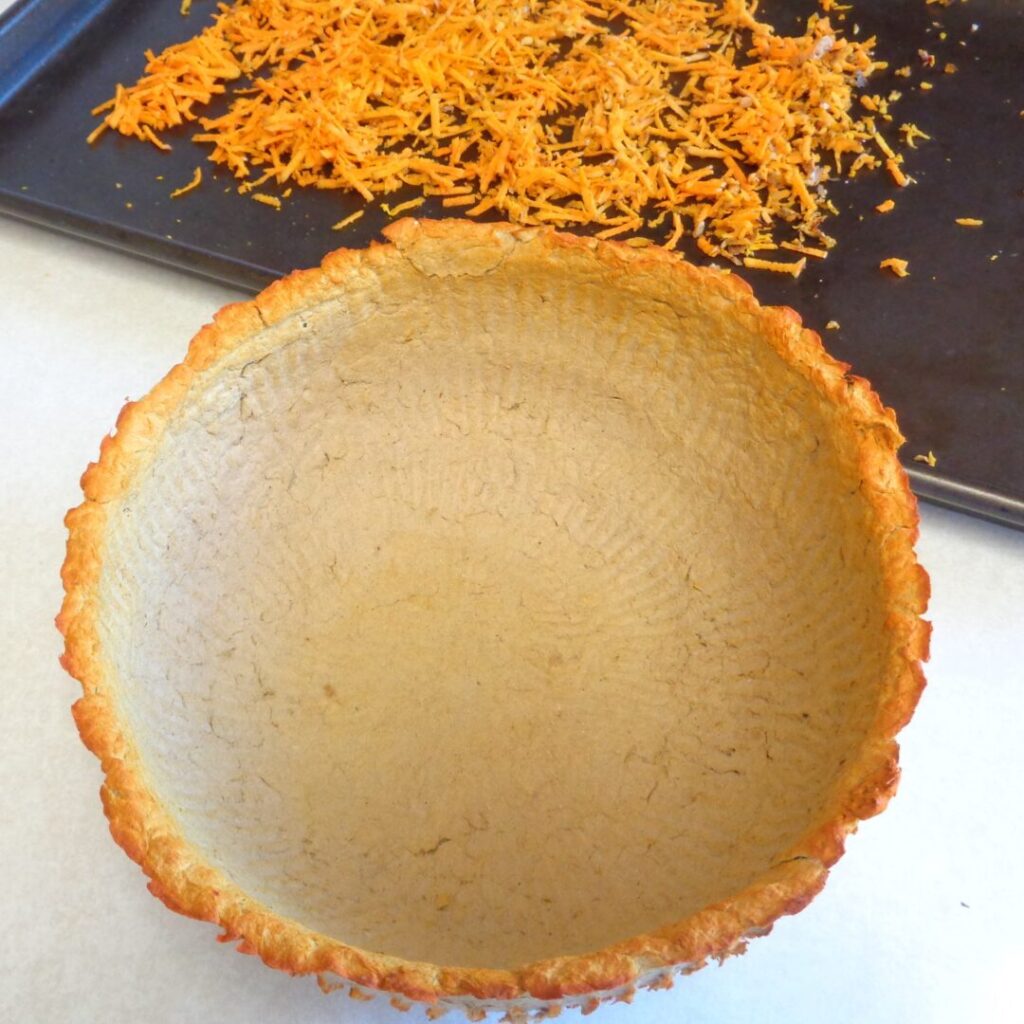
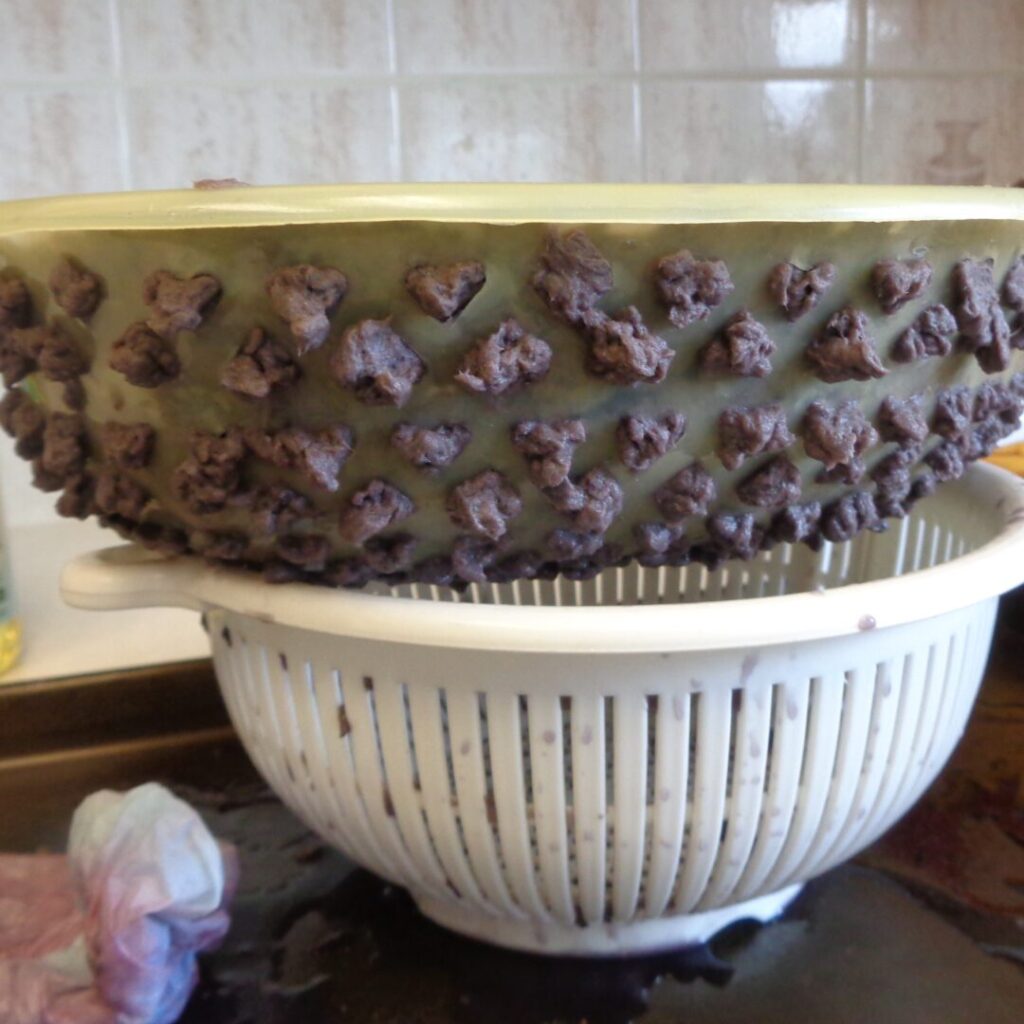 What can happen is that the wet pulp will come through the mold if the holes are large enough to allow it. In this case I just ran my fingers around the outside and collected up all the pulp that had gone through. It was returned to the inside of the bowl and patted in place. If the bowl had been left as is with the hopes of creating an artistic effect, the dried paper bowl would not have separated from the mold.
Whatever is chosen as the mold, it is vital to wipe it down with oil before adding the prepared pulp or there will be removal issues once the baskets dry.
They will, in theory, just pop out and that certainly happened with the sieve but when there are larger holes a little patience may be needed.
Okay let’s do this!
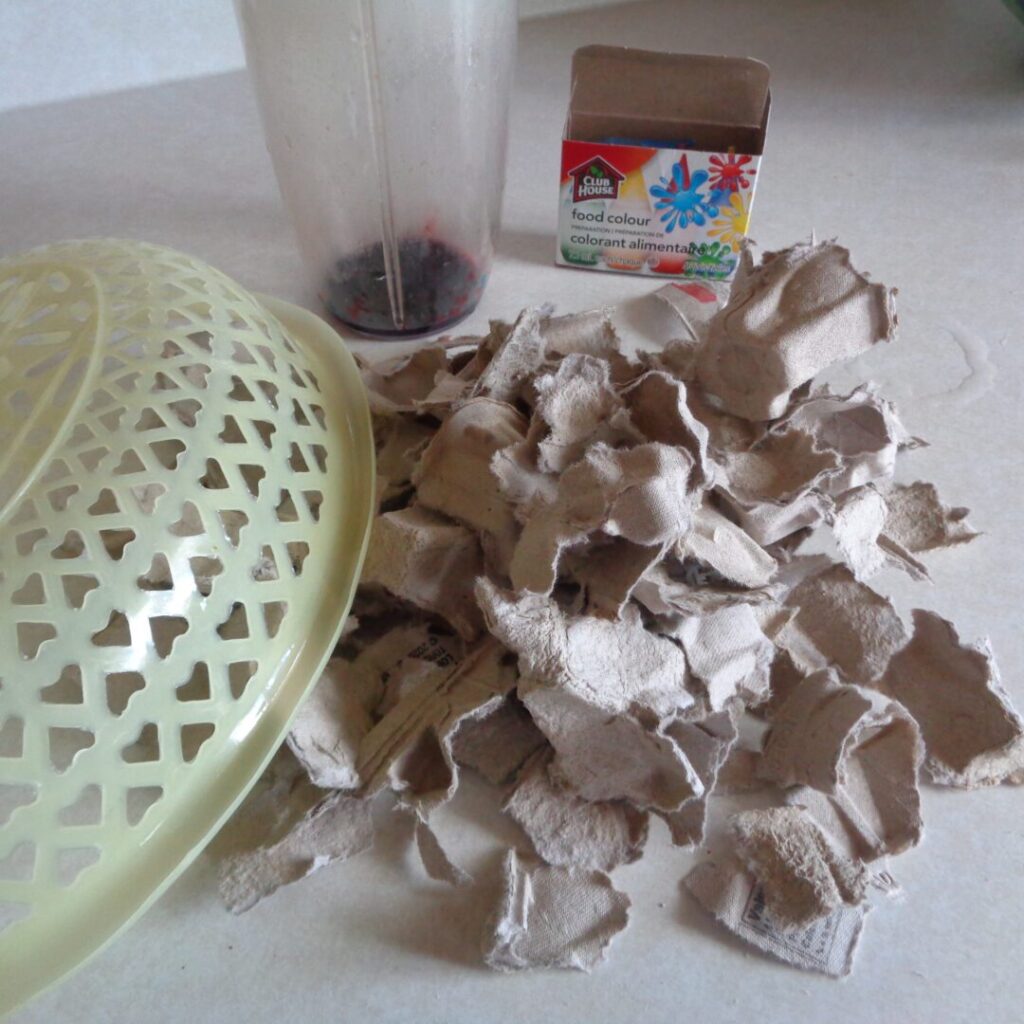
Tear up one egg carton. One carton was just enough for the oval basket and good for the white colander. If your project is a little bigger then in addition to using one and half cartons, the pulp flat for 24 or 30 eggs is also a possibility.
The thing to consider is that if there is food colouring to be added, it is best to do it once and not get caught trying to match a second batch. This is not an issue if the intention is to paint once the bowl is dry as the colour of the bowl will not ultimately matter. Here are two painted paper basket options for spring, one smaller and quicker and the other a next step up in complexity.
The first time I made paper baskets, I put the water and the food colouring and the egg flat in a big bowl and let it all sit overnight to absorb the water and colour.
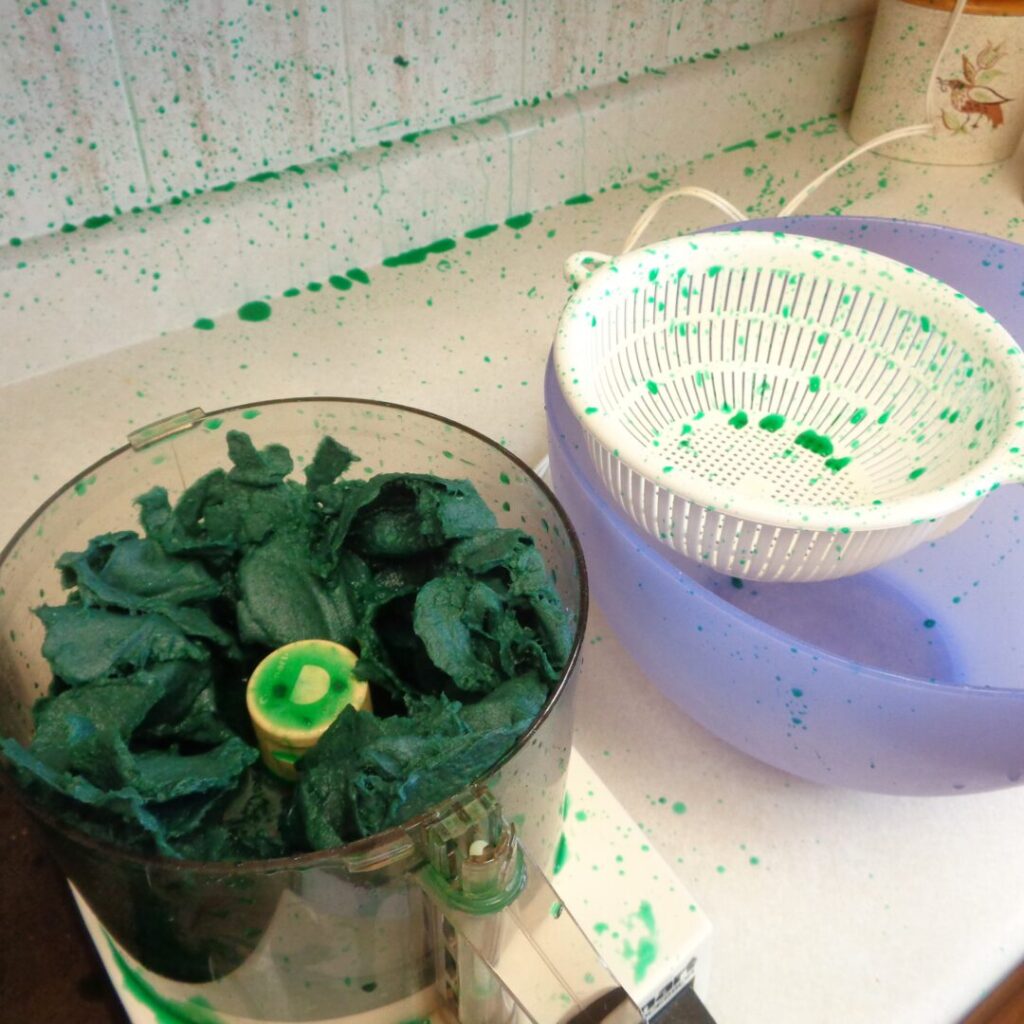
I then took all the paper out, popped it in the Cuisinart with a little of the extra water and started things up. NOT MY BEST IDEA! As you can see the coloured water went everywhere. This kind of processor is not actually liquid tight and I did actually know that, I just wasn’t thinking.
So after cleaning up all the extra decorating, I tried again in a Magic Bullet and that worked much better. A blender that you trust is important.
For all the baskets since, I have just put the egg carton, hot water and food colouring together in the jar and turned it on, no waiting overnight. Everything has mixed together with no issues and then the mush can be tipped out into a sieve to drip before building the bowls.
 This is the one I am working on now and I hope that it will be dry in time to add it to the pictures.
It does not really matter how much of the dyed water is added. Don’t go over the recommended level of your blender but in terms of the paper, all that is needed is enough for the paper to move easily when the machine is on.
After everything has been mixed, turn the mixture out into a sieve to allow it to drain. An hour at least, longer if possible. The plan is to get as much water out before it is transferred to the mold, thus quickening the overall drying time. It is best not to make things go faster by squeezing the pulp out as it tends to get lumpy when that is done.
Take handfuls of the pulp and begin to place them around the mold, using fingers to spread the mixture out to a uniform depth. The pulp will still be dripping water so this is best done in a sink or over a cookie tray. The tray works great for keeping everything together if there are small ones involved and the whole tray can be moved to a lower table if need be.
Watch while the sections are being created for holes and uneven depths in the areas being worked. Taking a little extra time on the rim is also helpful.
There will be water collecting at the bottom as you work. By pressing the sides, the water will naturally move to the bottom of the bowl.
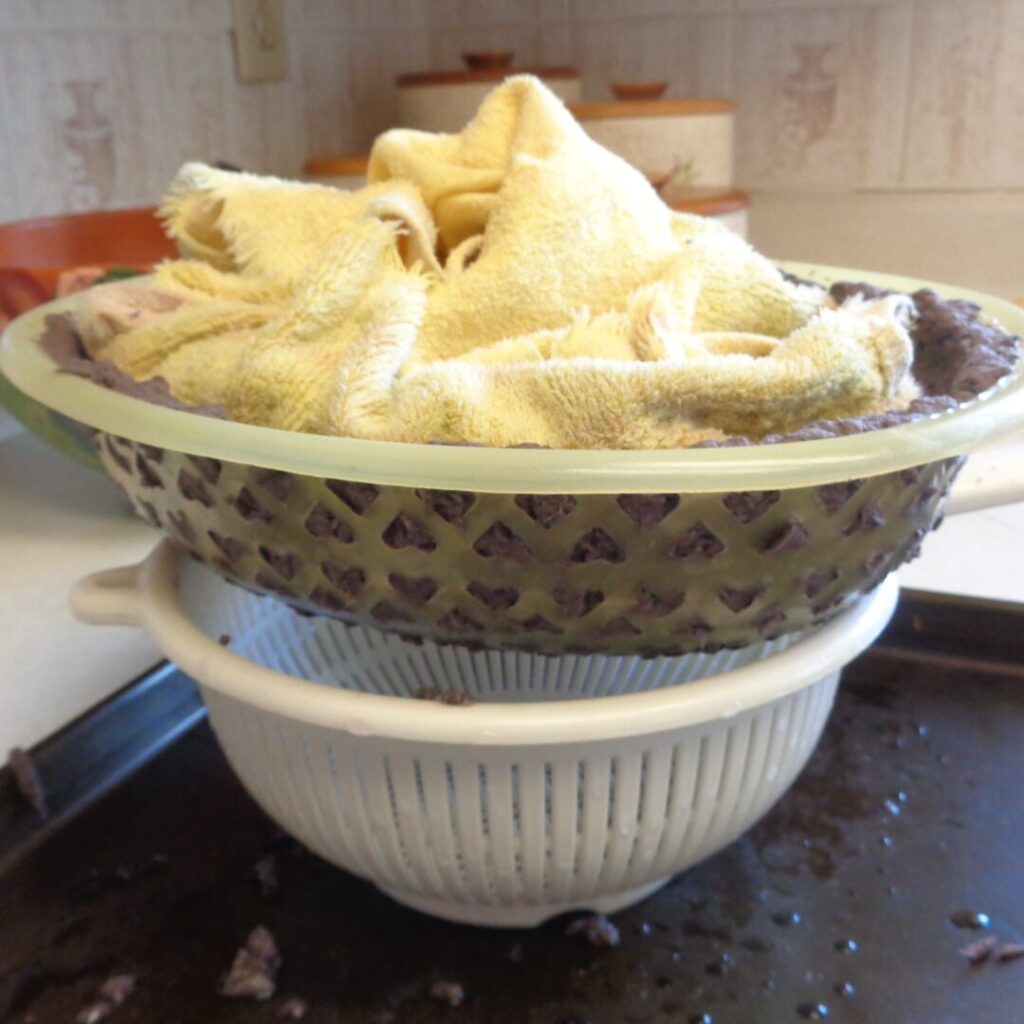 There are two ways to speed up the evaporation of the water at the bottom. The first is to layer some paper towel, to wick up the water. This time round though, I tried an old towel and that worked just as well without creating more waste or material for the next bowl. Let the towel sit in the bowl for at least 30 minutes, longer if it looks like it is necessary. The food colouring will wash out and it was a rag anyway.
Now comes the waiting and waiting, did I mention waiting?
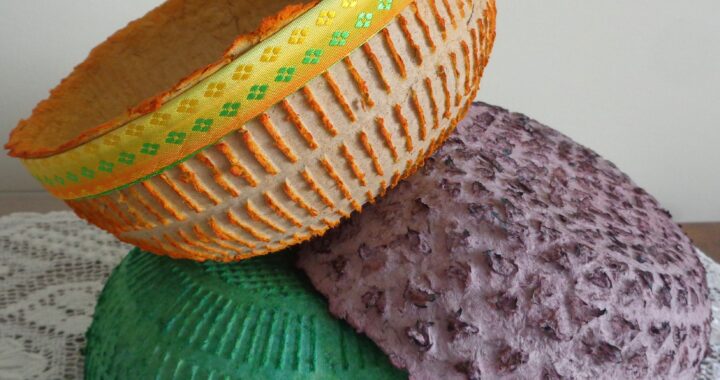
The orange bowl in the pictures below took five days to dry and release. I did not put it in the oven, just let it “mature” organically on the kitchen counter. The larger of the green bowls in the pictures below took 3 days before I tried the oven and was done the next day.
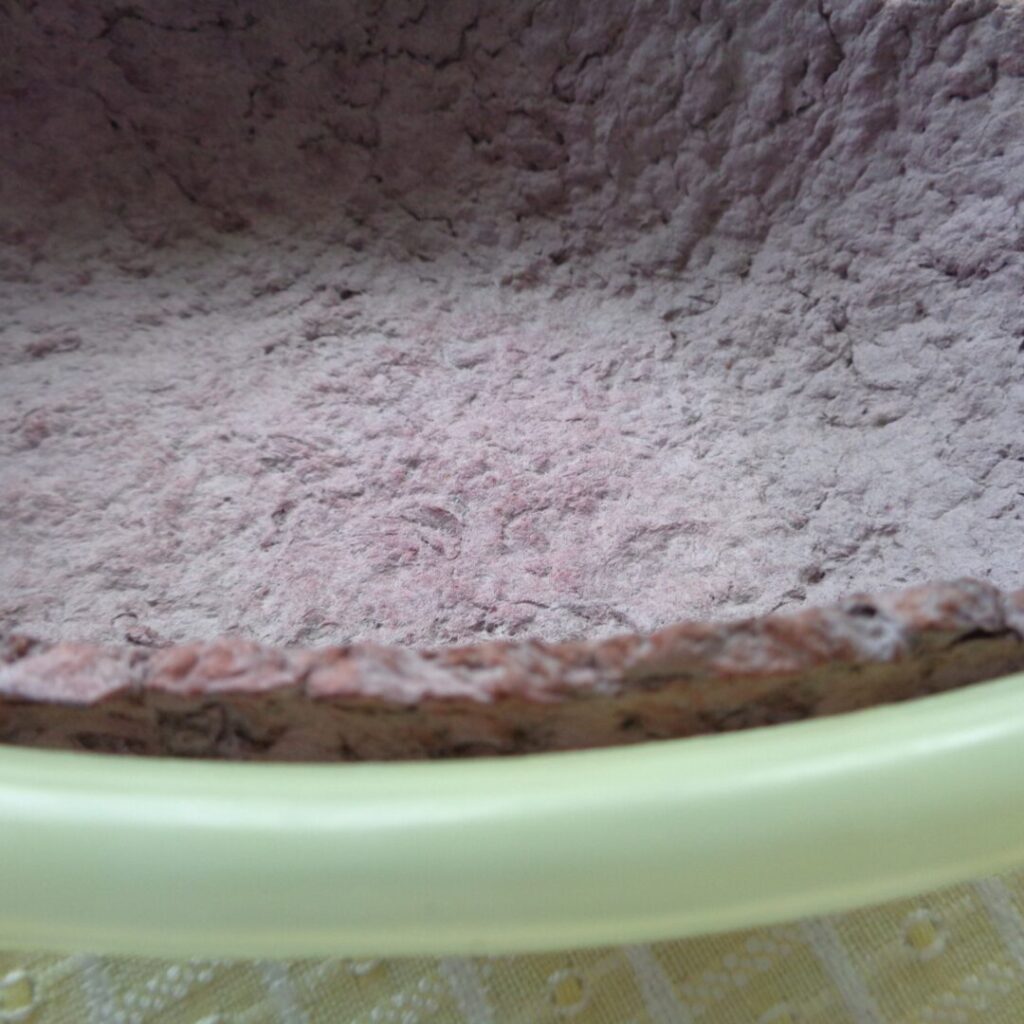 The purple one, I put over an air vent and the next morning, the bottom was dry. That is usually the last thing to dry out as all the water runs to the bottom. Over the air vent the bottom gets the most heat and dries out first. The light section at the bottom is dry and the darker coloured section up the sides is still moist. The edges are separating places as well, after only one night over the vent. I sat the bowl on its side, rotated it during the next day and it out that afternoon, still a little moist but able to release. It went back over the air vent for a few more hours. Bare in mind for planning purposes, this was a larger project, made with one egg carton and therefore it had thinner walls. For more stability, one and a half cartons would be better and that would take a little longer to dry.
The truth is what you end up with always a surprise. What comes out rarely looks like what goes into the mold. The colour lightens, the tone can change and designs can appear but that is all part of the fun. And if it is not to your liking there is always paint to change the finished project entirely.
 Something I did learn is that the food colouring adds to the design. You can see here that the colour is around the edges but not as dark in the middle. The pictures below also show that the bits that were pressed through the ribs of the colanders highlighted the pattern by drying darker. The same happened with the green bowl to a smaller extent and the little green basket made from the small metal sieve has a darker top rim.
I happened to be drying grated tumeric and was wondering about using beets, spinach and other plants as the colouring source, rather than food colour. That is however, for another day. If you decide to give it a go I would love to hear how it turns out.
Of all the bowls made, the easiest to release was the small green one in the picture below. This was because the opens spaces of the sieve were large enough to let water and air through but not to create any design. The larger bowls that could allow the pulp through needed just a little extra patience to release any stuck paper. If you are doing this with young ones, this may be the “mom helps out” stage.
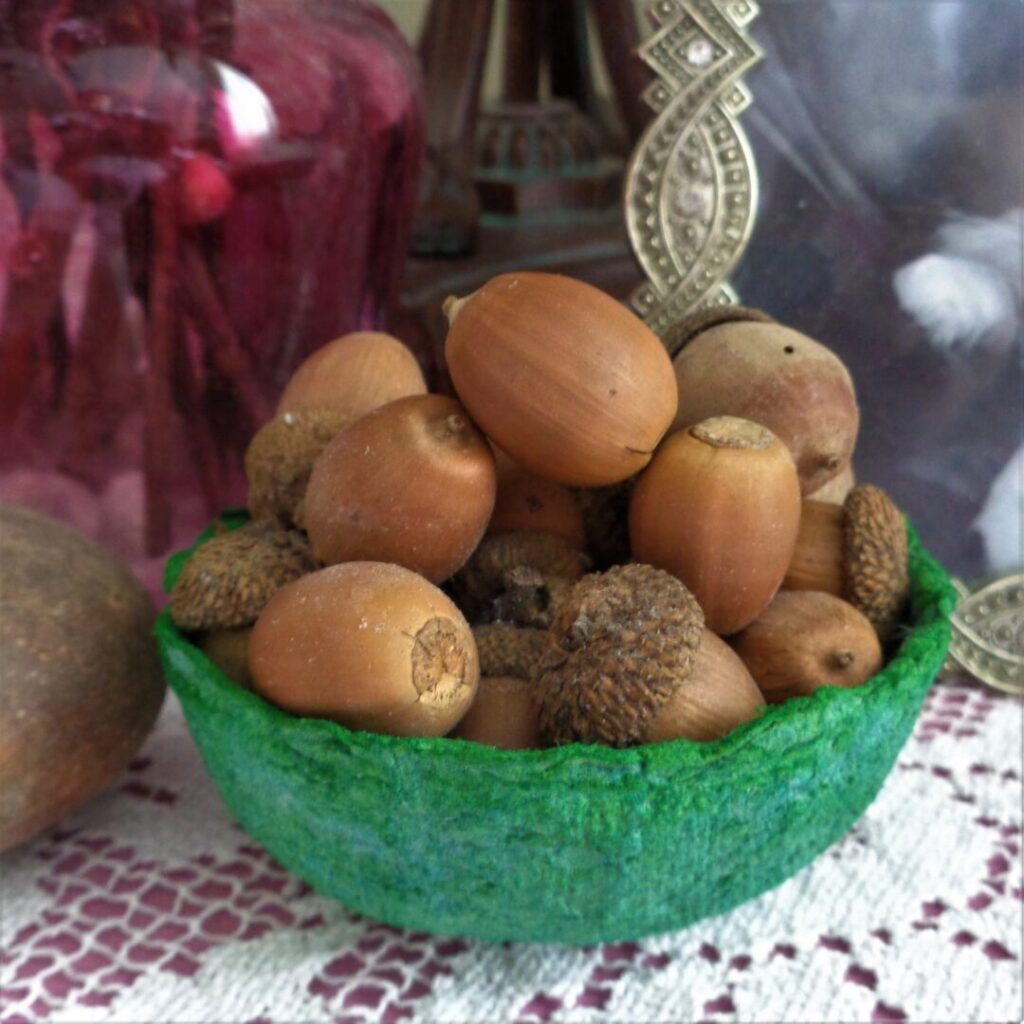
This is the little green bowl made from the metal sieve. I use it for acorns on my bedside table. They are a reminder that when I feel stuck, there are a never ending supply of options just looking for some fertile soil to grow in. This spring basket holds Hot Cross buns, Primulas and chocolate eggs, hopefully a little something for everyone. You can see how the orange has settled into the slots of the colander and the rim of the bowl. A little bit of ribbon was added to lighten the general presentation.
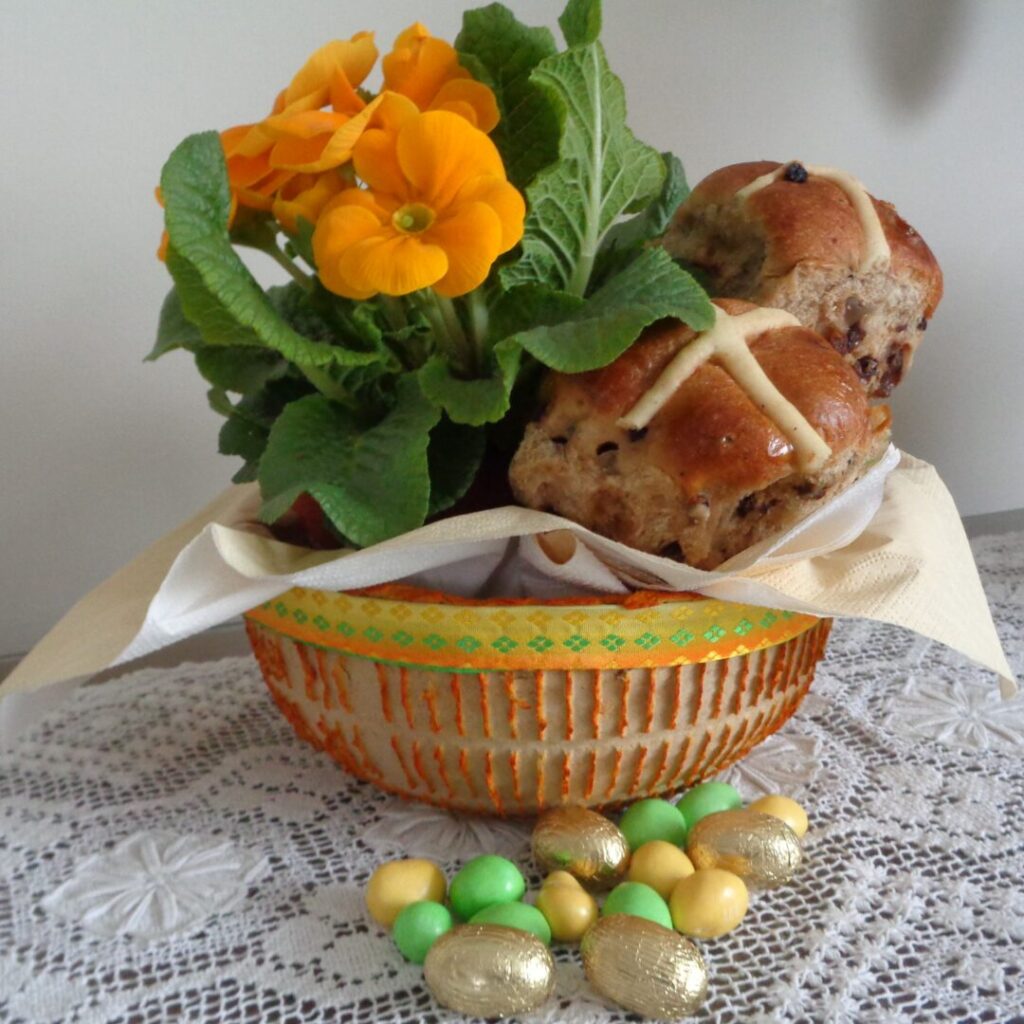 This spring basket holds Hot Cross buns, Primulas and chocolate eggs, hopefully a little something for everyone. You can see how the orange has settled into the slots of the colander and the rim of the bowl. A little bit of ribbon was added to lighten the general presentation.
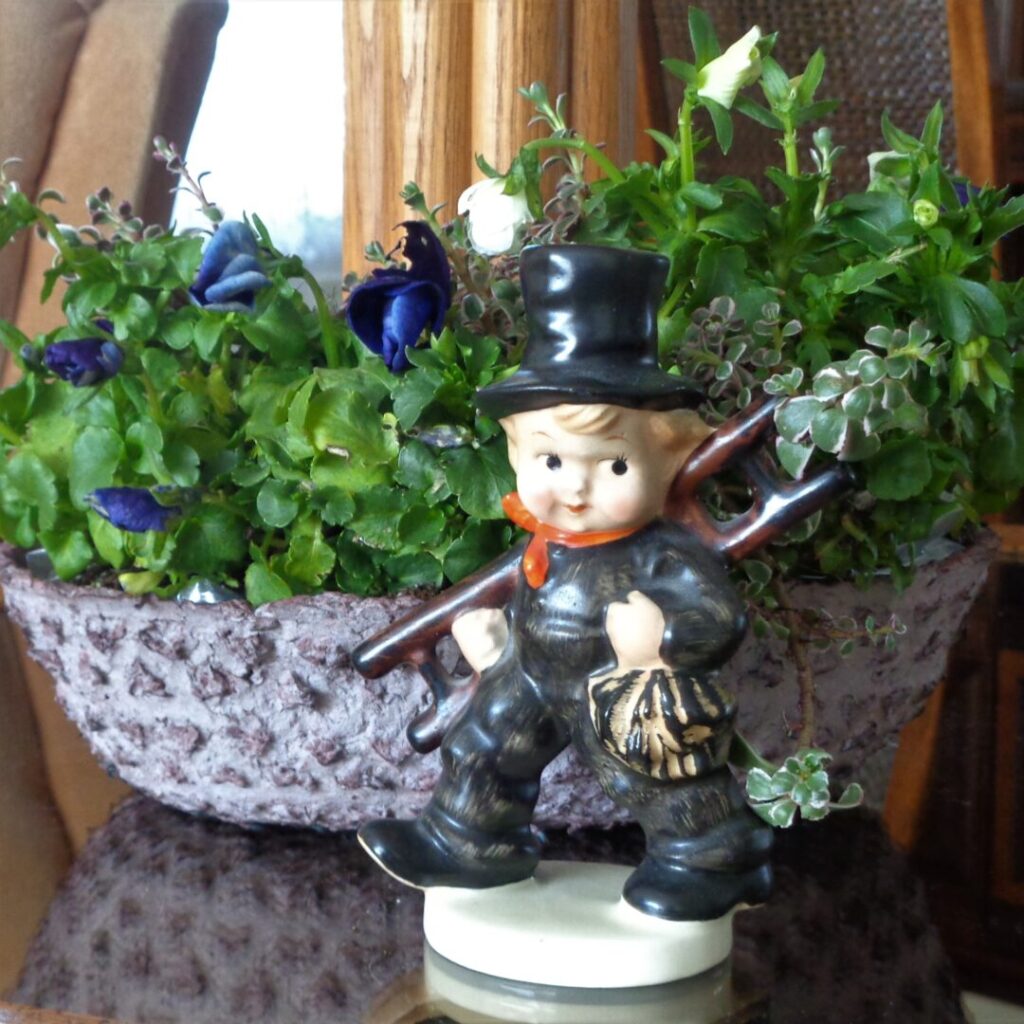
It came out in time! My Italian friend remembers this as a tradition between grandparents and grandchildren, made for the generation in between. The grandchildren got to learn about plants from the grandparents and Mom got a Mother’s Day present on the second Sunday in May, usually plants that could actually go into the ground. May baskets, just a week further on.
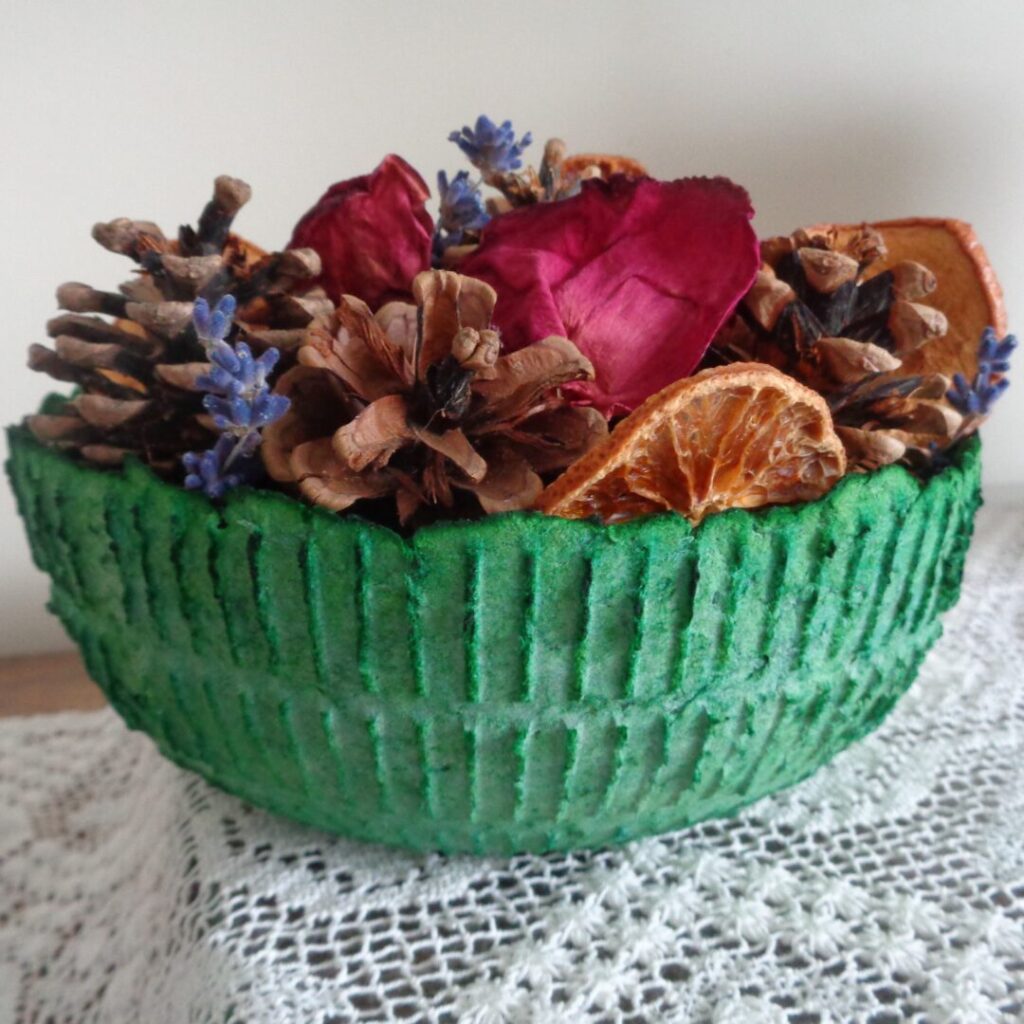
There is a tradition, in some places, of returning a Beltane Basket at Samhain/Hallowe’en so this paper bowl contains potpourri, collected and dried over the summer months. Once again you can see the darker lines that add to the design of the bowl.

Paper Bowls from My Kitchen Wand
